The example here walks through an Oxide IdP setup using Microsoft’s Entra ID SAML 2.0 service, formerly known as Azure AD. The Entra ID version documented in this guide is as of the October 2024 release.
The steps below assume that you have directory services already set up on Microsoft Azure Entra ID and at least one security group that can be used for assigning users to access the Oxide rack. The access permissions modeled in this example is based on application roles but can be adapted to work with directory groups or roles. Please consult Microsoft Entra’s documentation for instructions on how to expose additional claims in SAML tokens where necessary.
Create Entra application SAML provider
The Oxide SSO integration can be configured in the Microsoft Entra Admin Center or Azure Portal. The steps shown below make use of Azure Portal but the equivalent menu options should be available in Entra Admin Center as well.
To begin the setup, navigate to the Entra ID module and locate the Enterprise applications and App registrations options under Manage on the left navigation bar.
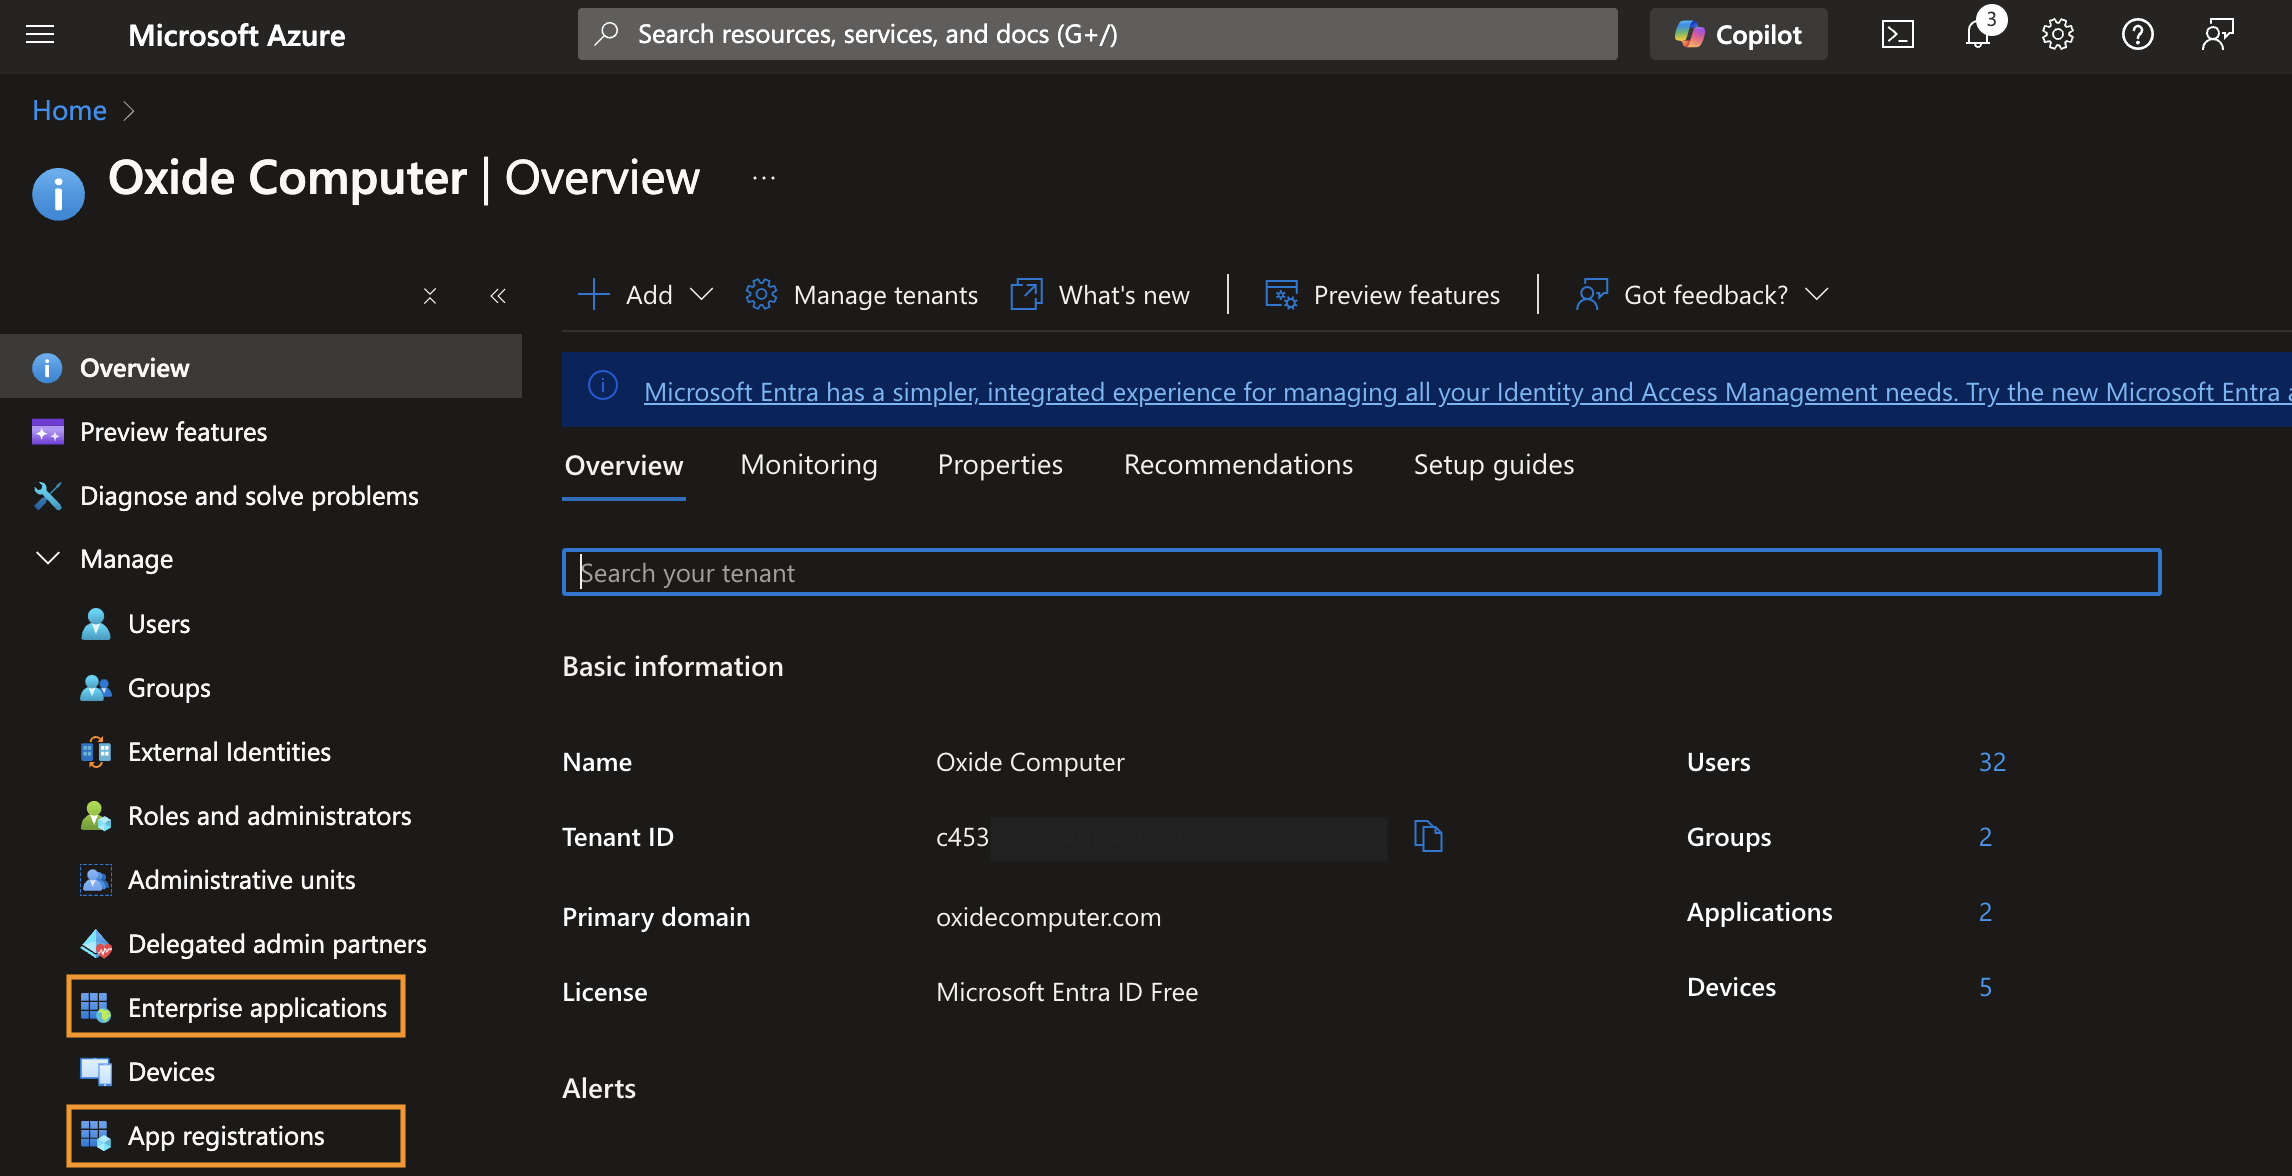
Create enterprise application
First, you’ll create an application for Oxide. Click New application on the main page, then Create your own application on the page below:
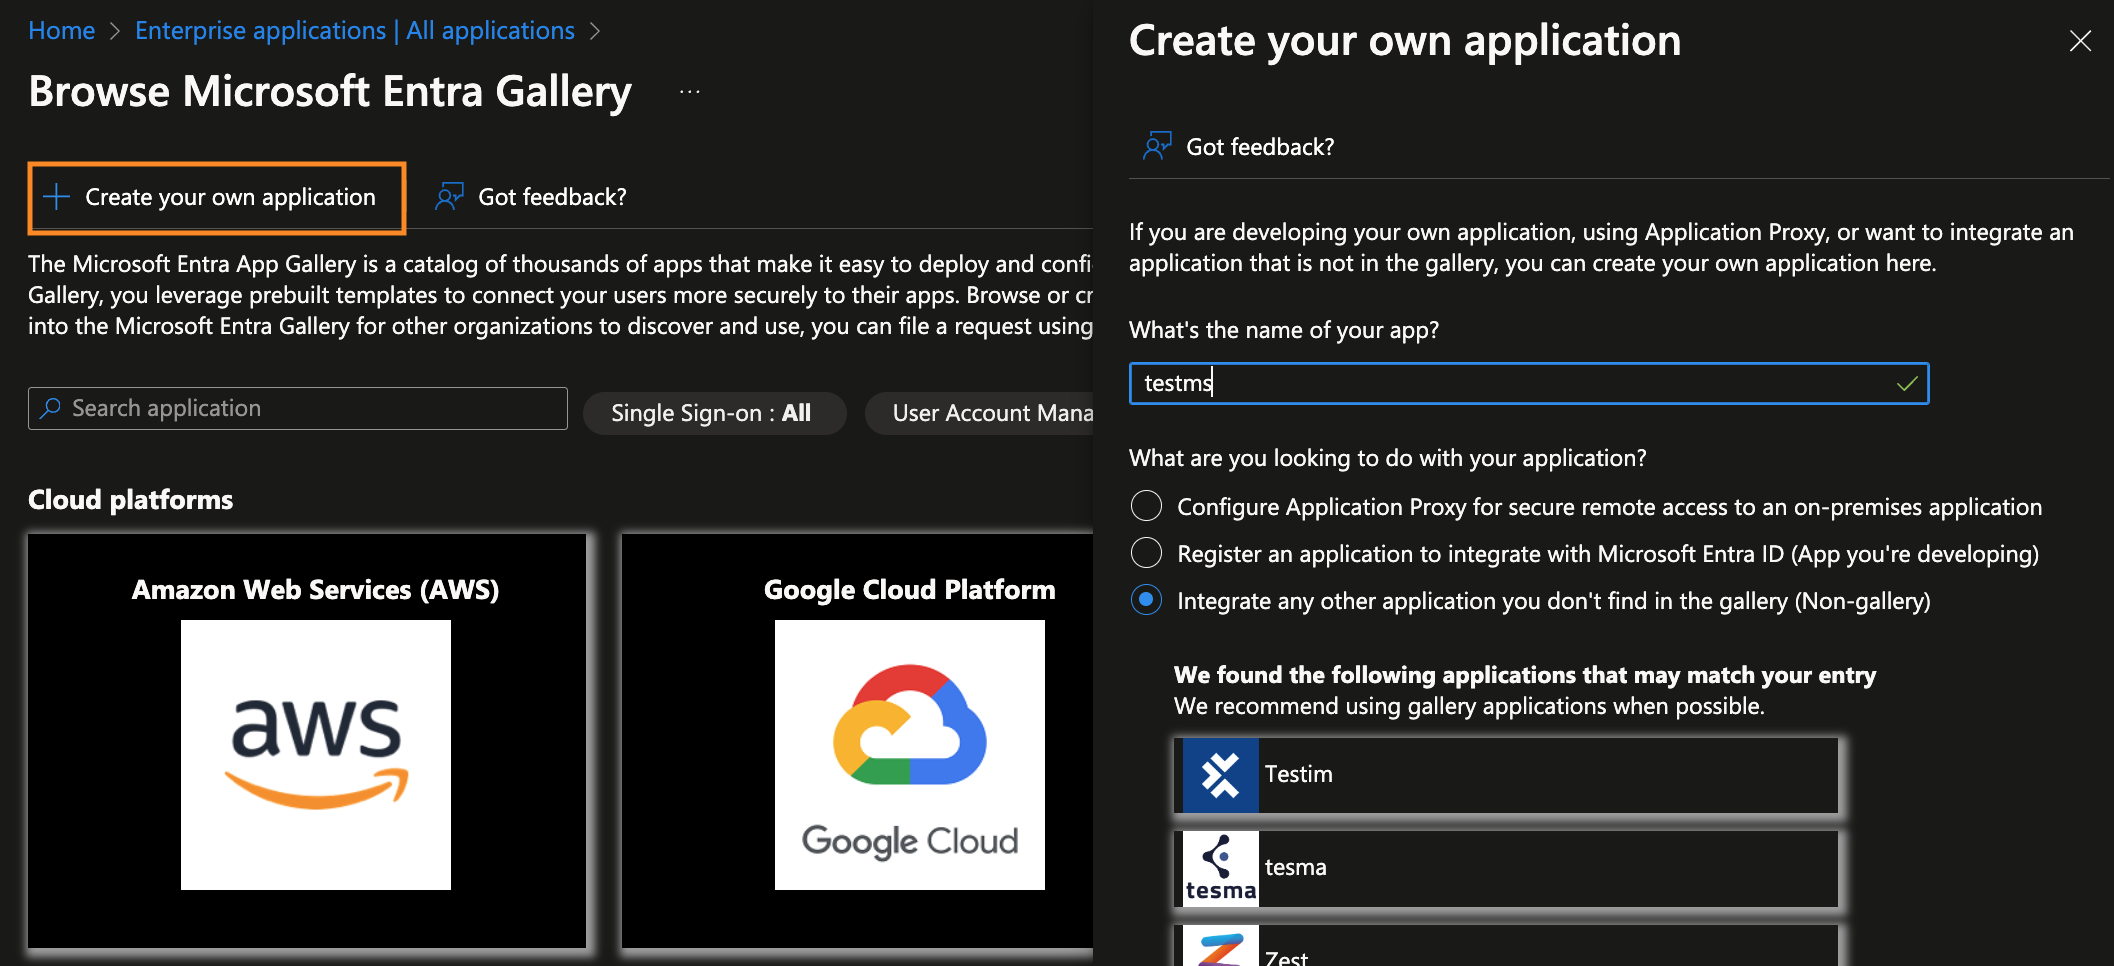
Enter the application name and ensure to select the Non-gallery option.
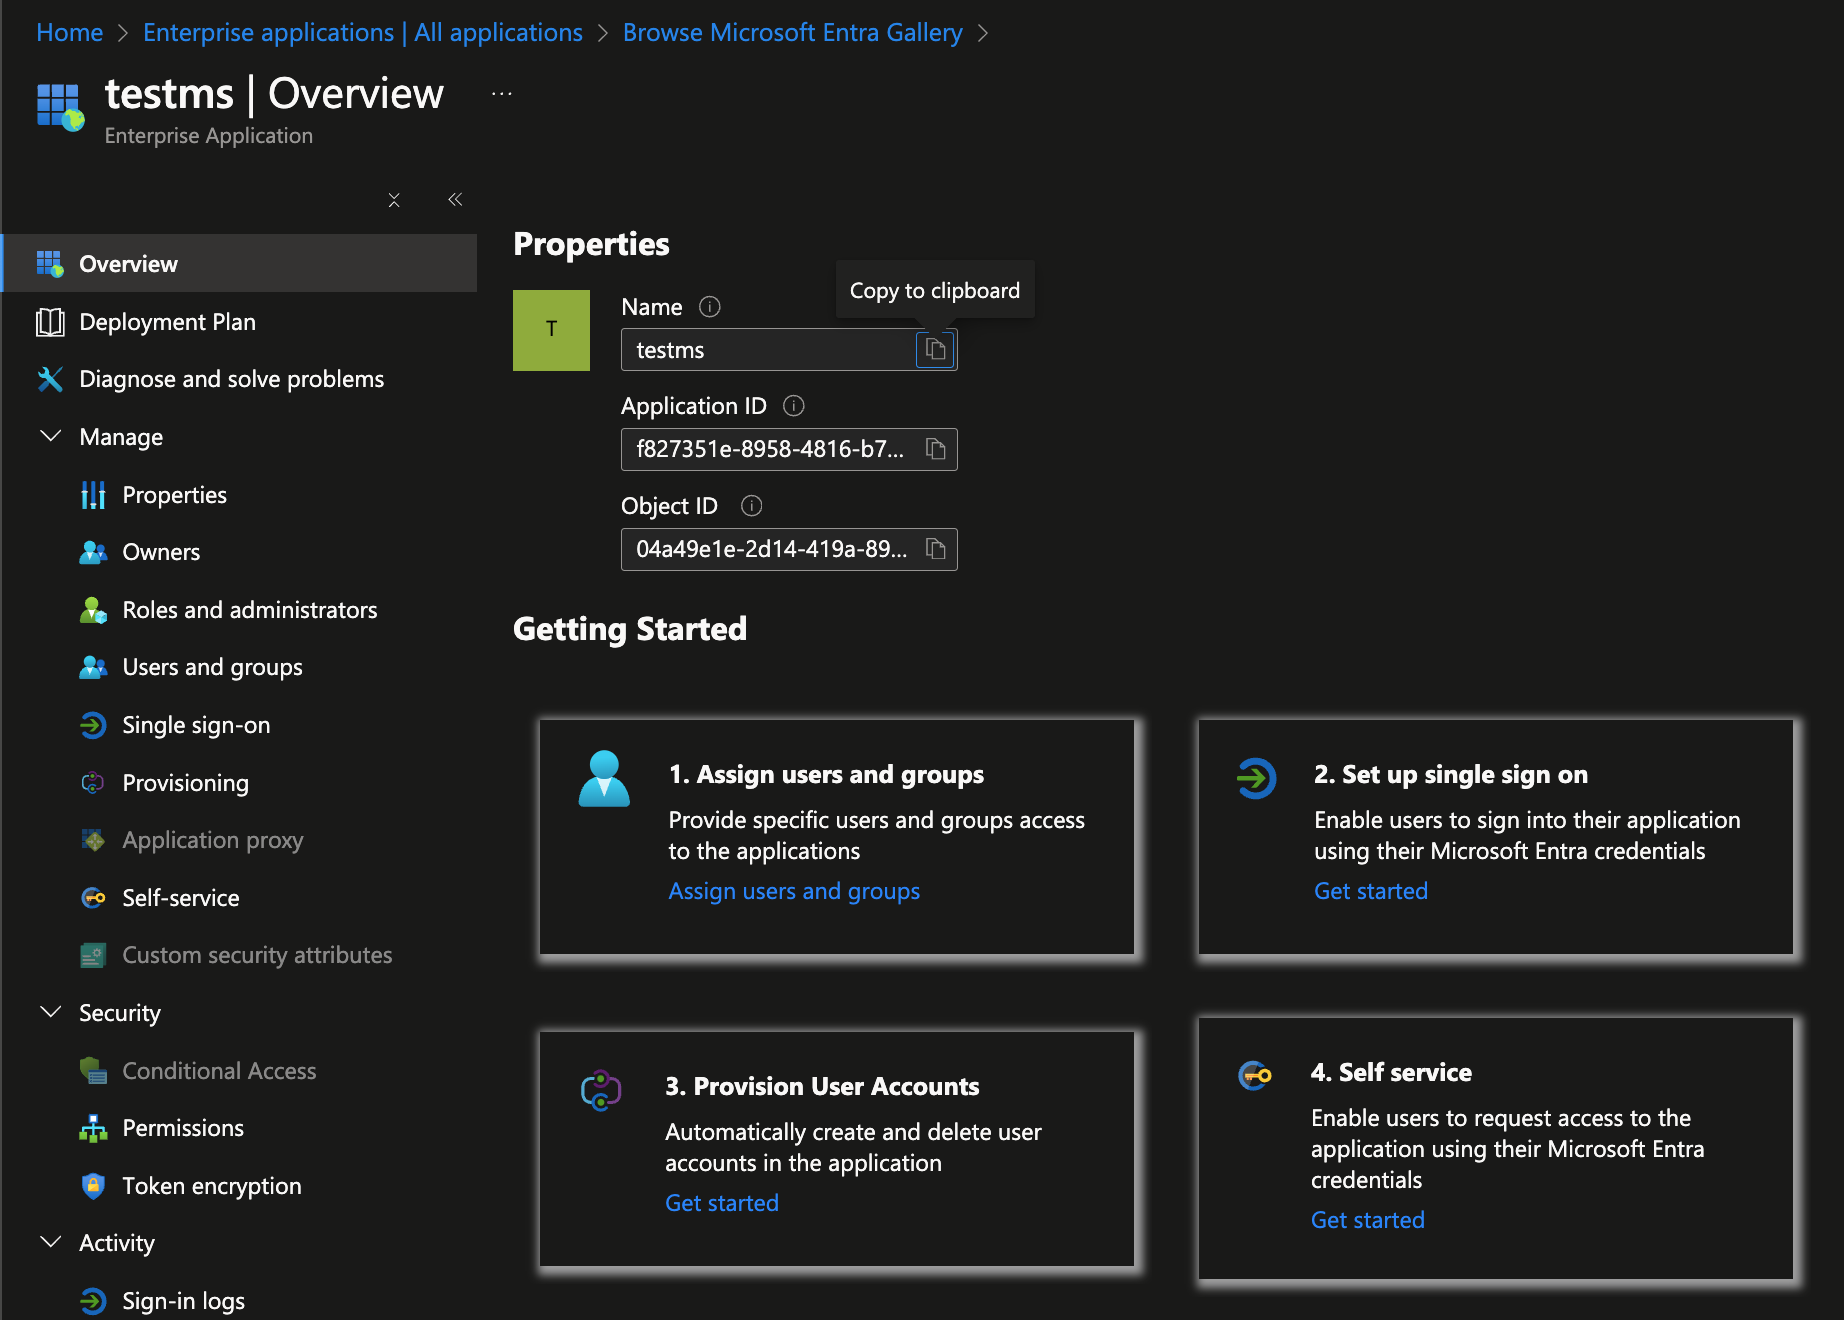
Once the application is created, you’ll see the suggested next steps. Before configuring any of these, you’ll need to define the roles to be used for configuring Oxide access.
Configure app registration
Navigate back to the top-level overview page and select App registrations, or open another browser tab to navigate there.
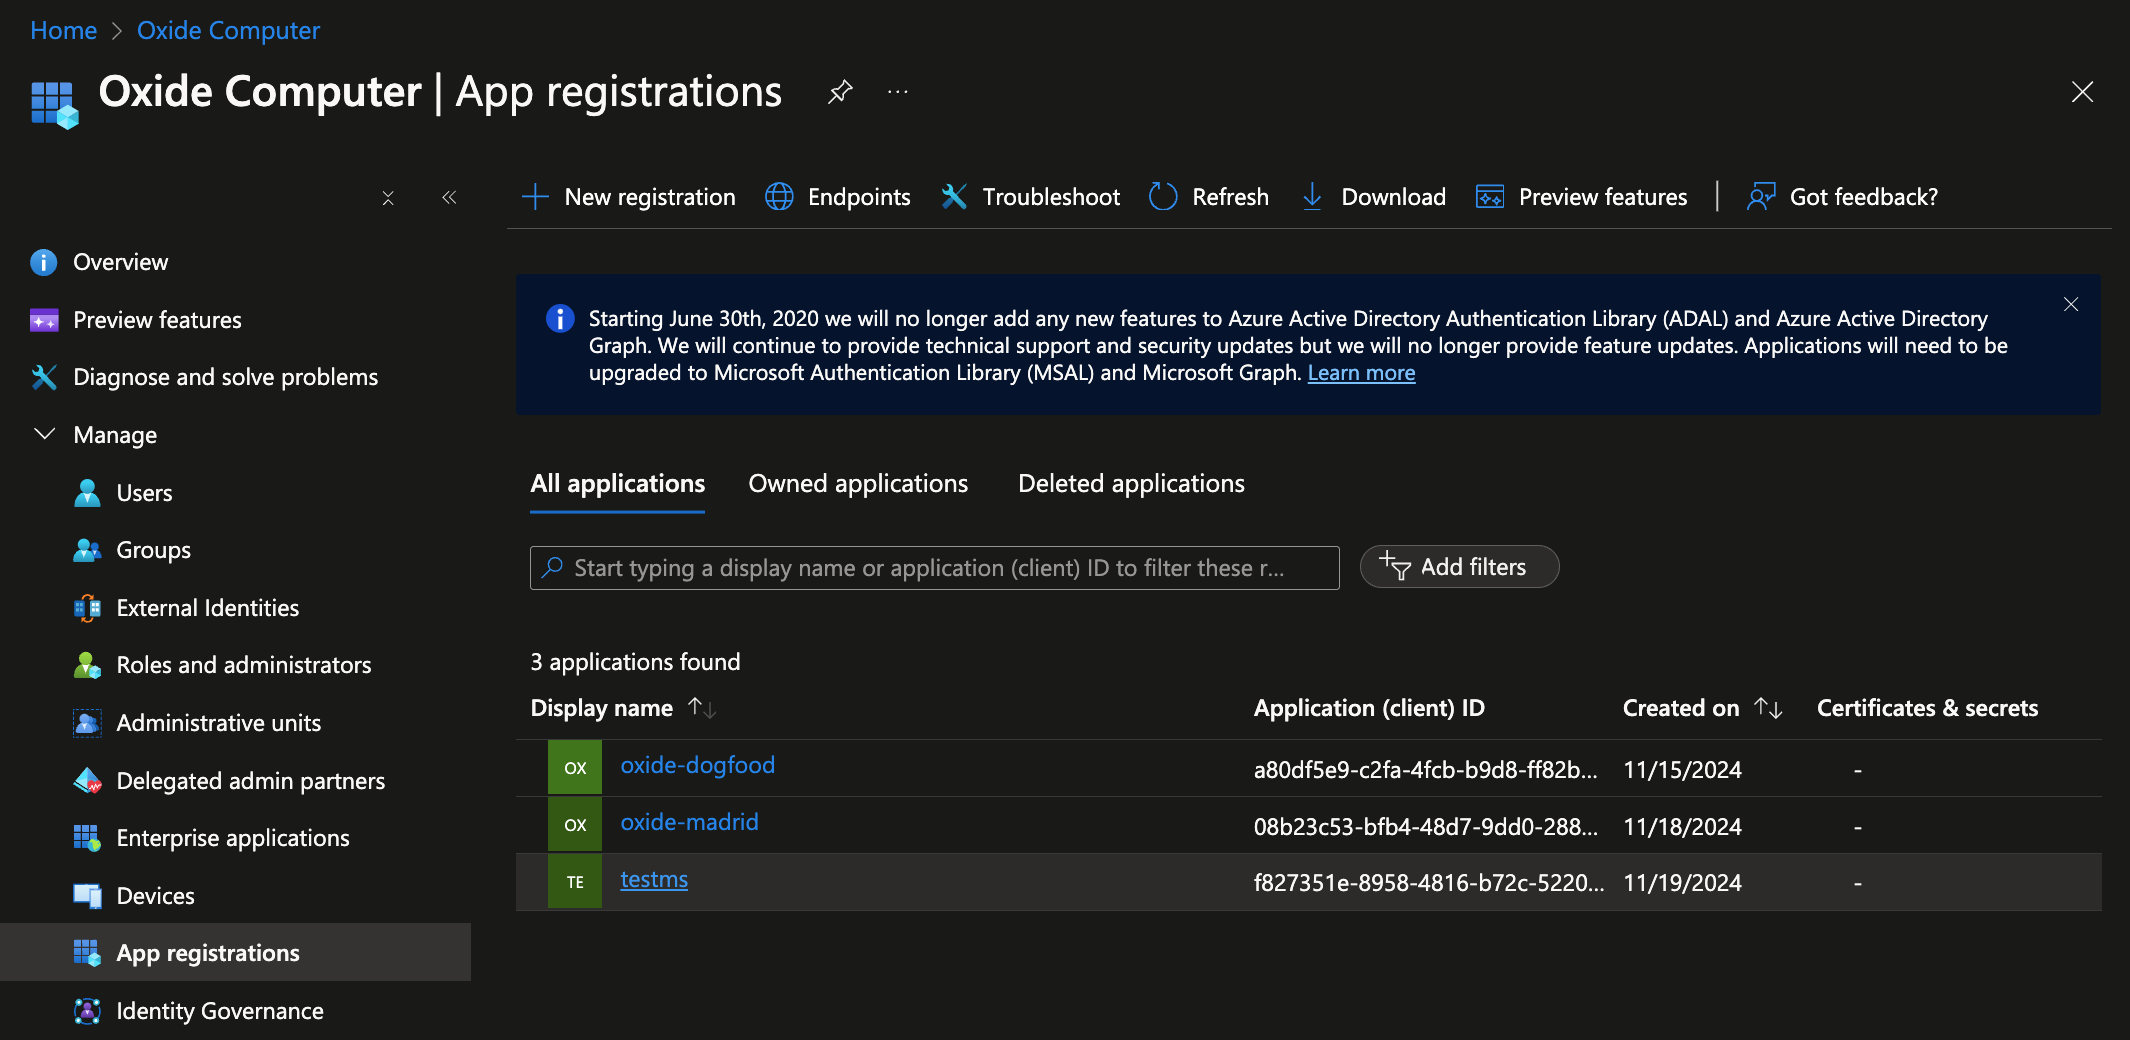
Add application redirect URI
Select the application created above and click Add a Redirect URI.
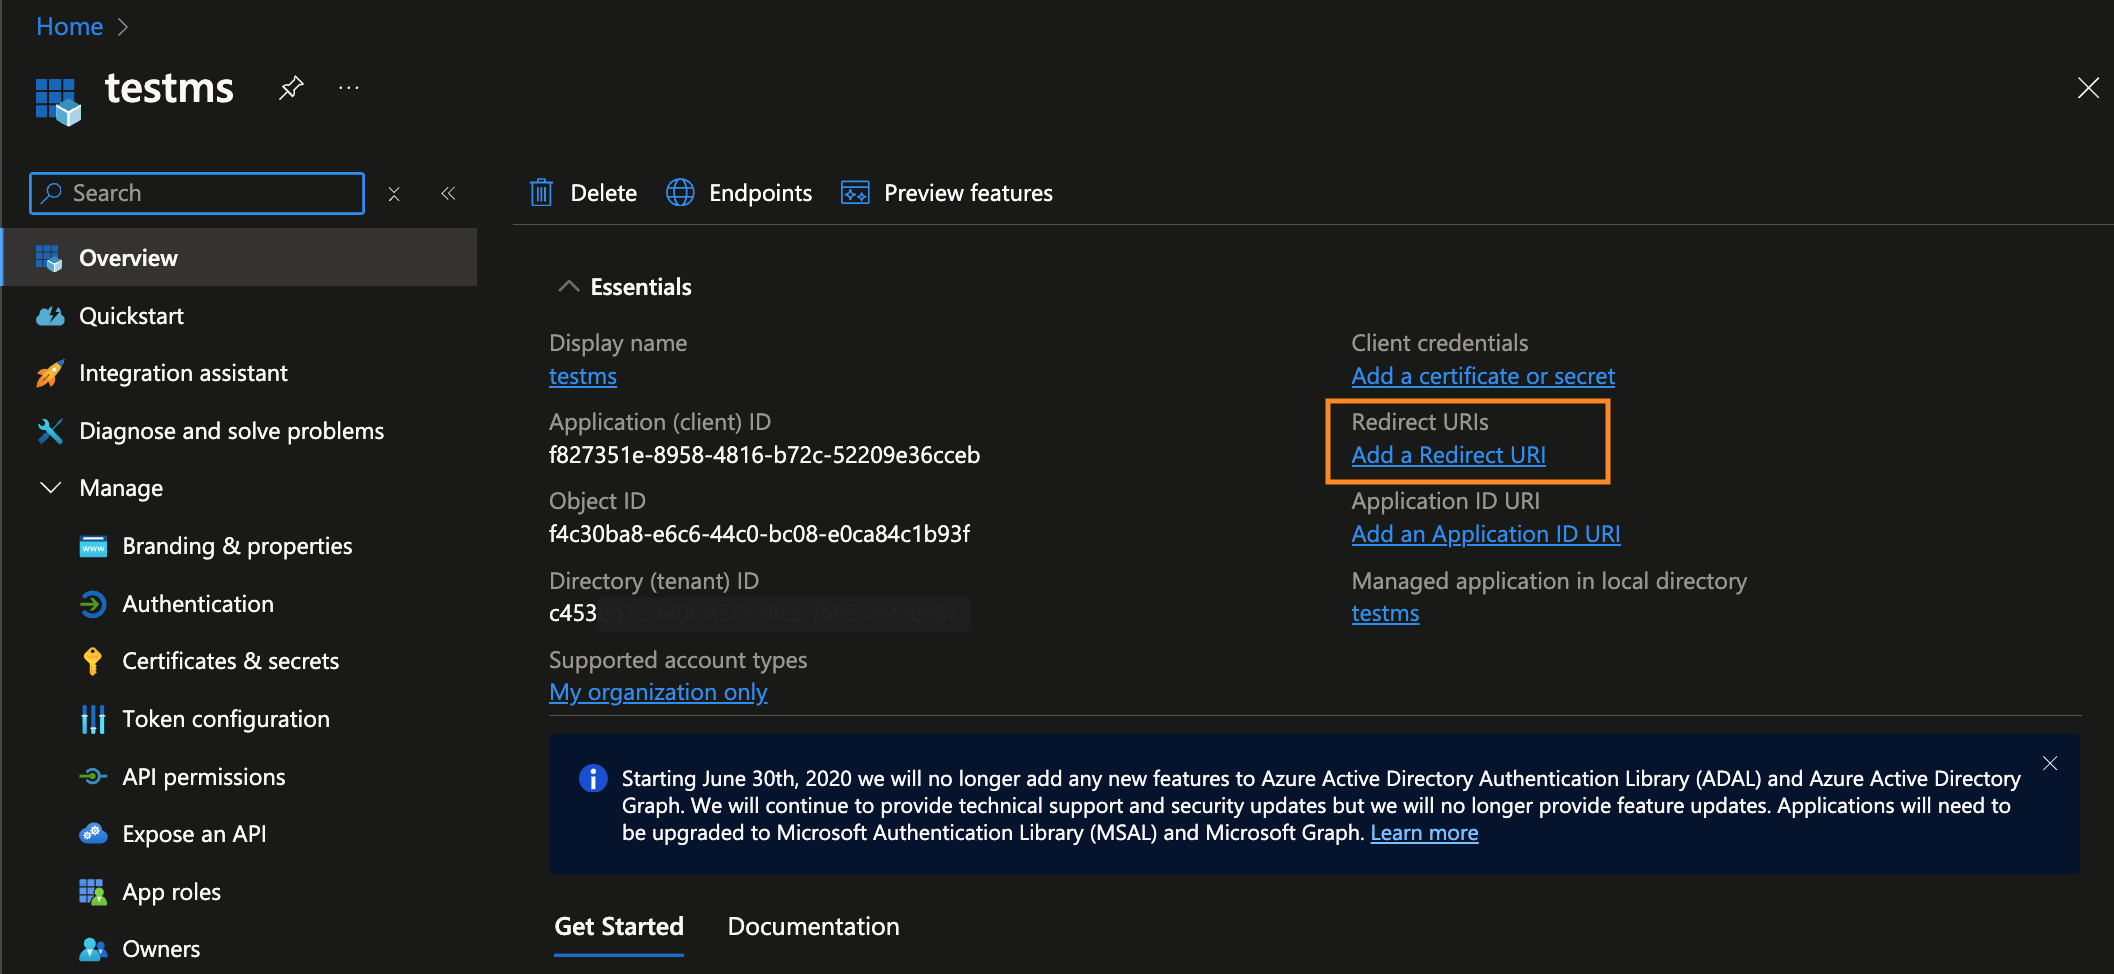
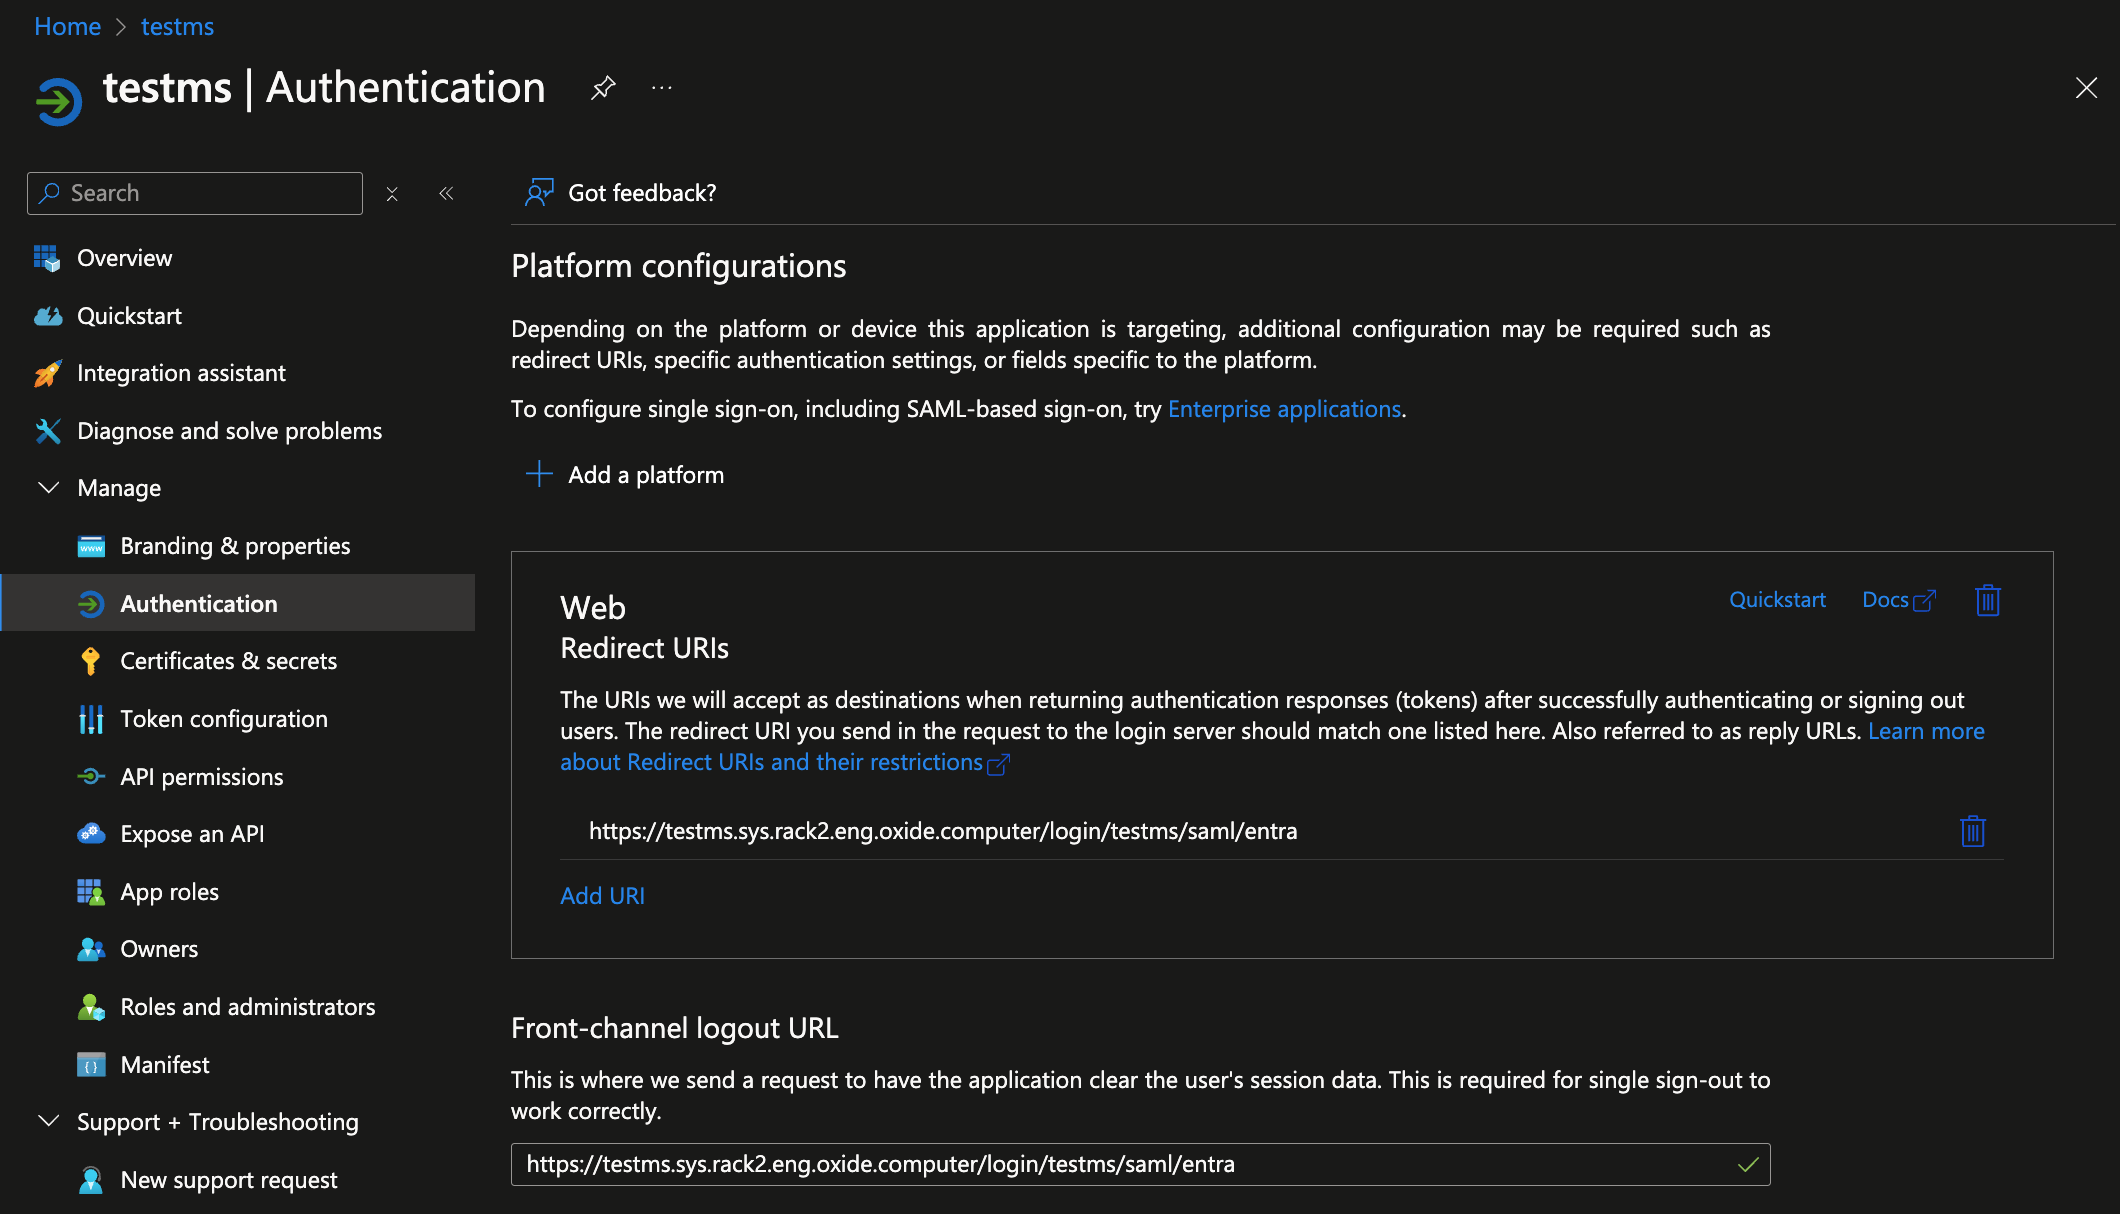
You’ll be navigated to the app Authentication settings page. There, click Add a platform, select the account type you plan to use, and enter the Oxide login endpoint with type Web in the Redirect URI section. The URI for the silo you are about to create follows this naming convention:
https://$siloName.sys.$oxideDomainName/login/$siloName/saml/$providerName
In this example, we’ll name the silo testms and the provider entra in an Oxide rack running on the subdomain rack2.eng.oxide.computer. The URL in this case is
https://testms.sys.rack2.eng.oxide.computer/login/testms/saml/entra
Create app roles
Next, navigate to App roles. There, you’ll find two default roles Entra already created for your app. You can modify them and add new ones in the way you want to differentiate the Oxide access permissions.
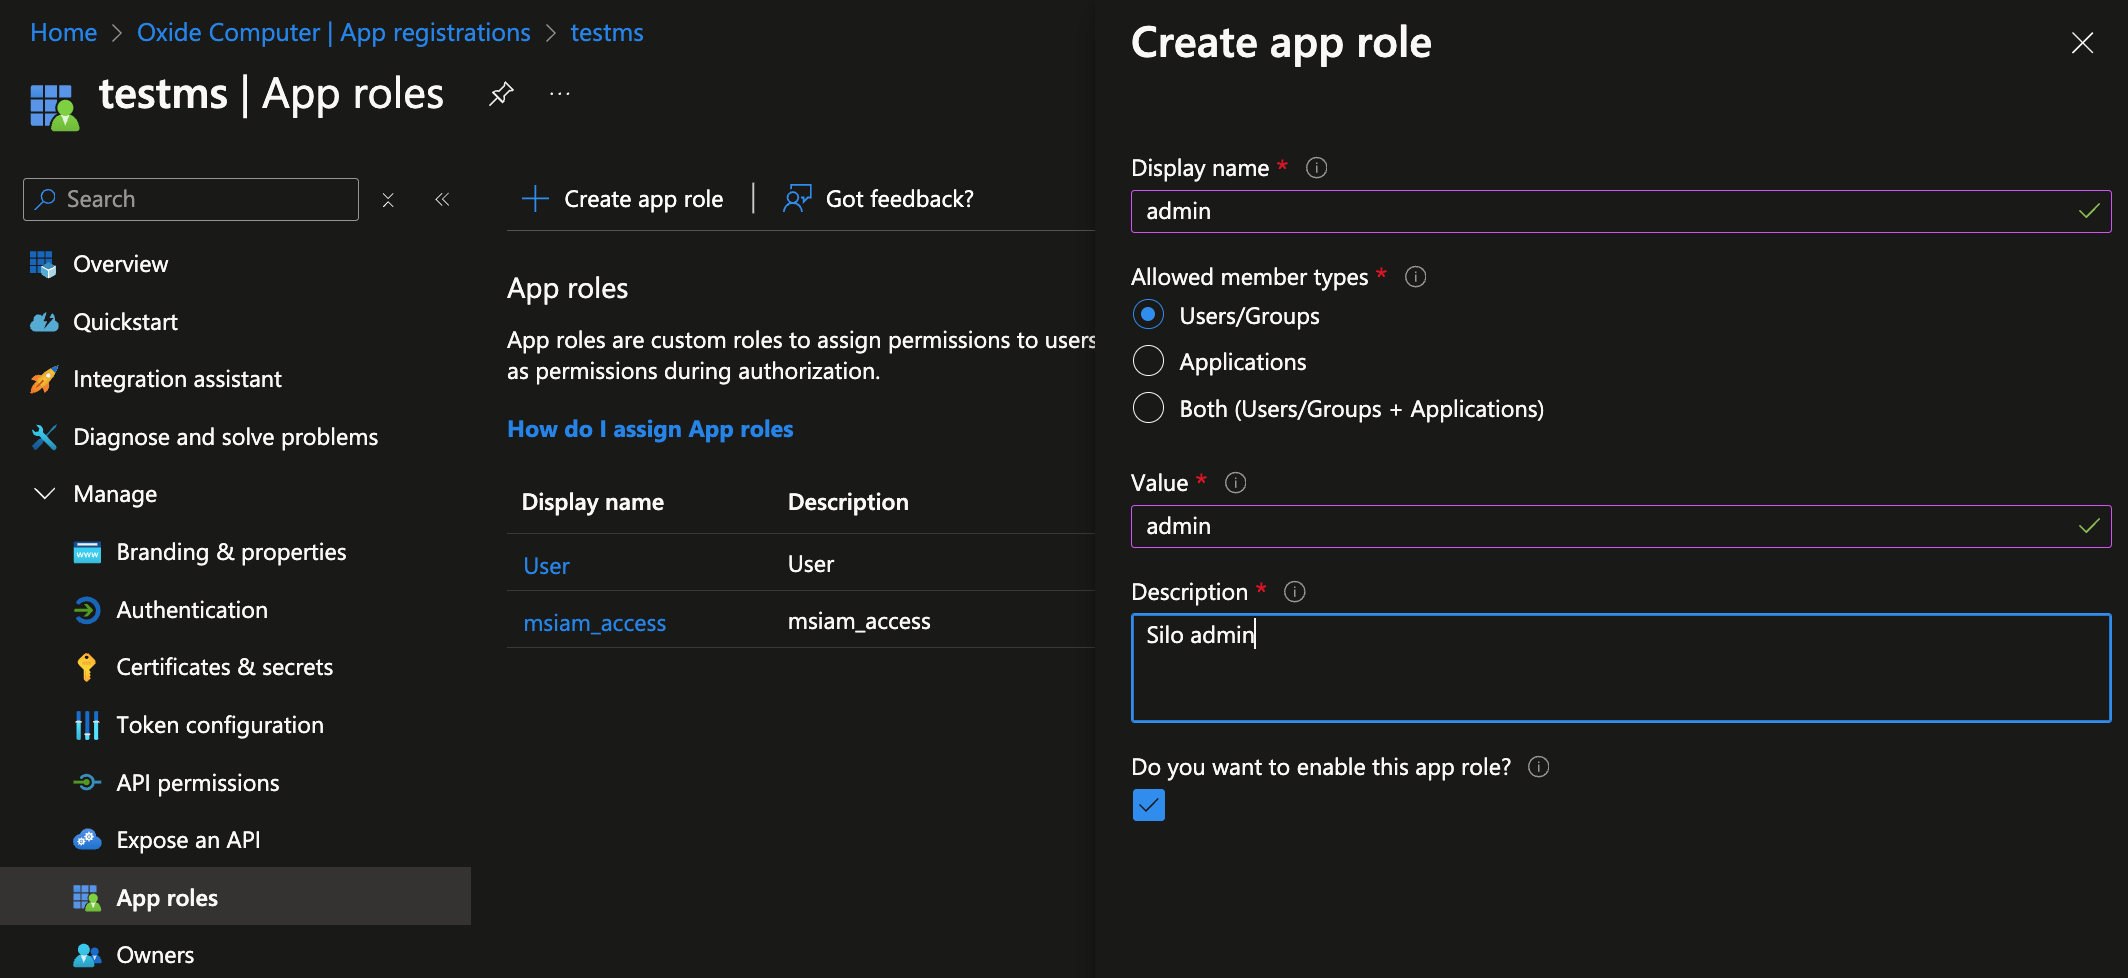
The app roles are used for passing authorization information to Oxide. They will become Oxide groups that get mapped to built-in roles. In this example setup, we’ll simply define two tiers of access - admin and user. They can be named in any way that is meaningful to you. One of these roles should represent the silo admin role used when creating Oxide silo in a later step.
Configure SAML provider
Now that the app registration is completed, you can return to where you left off in the Enterprise Applications setup.
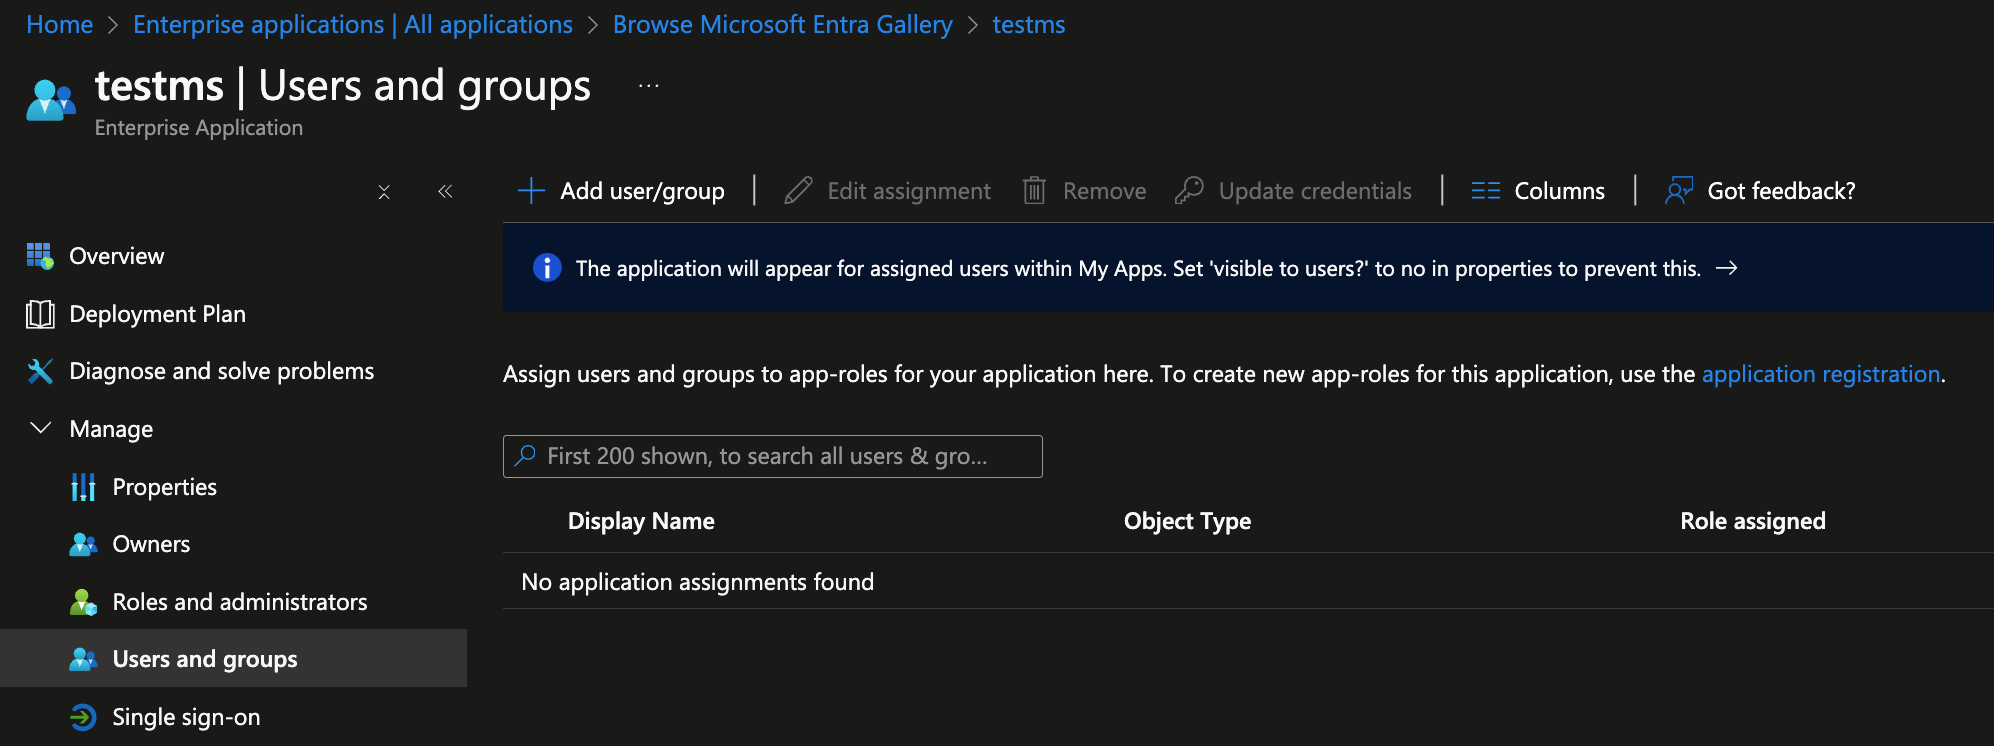
Assign users and groups
Add users and/or groups who will access the Oxide rack and set the appropriate roles.
Set up single sign on
Select SAML for the single sign-on method.
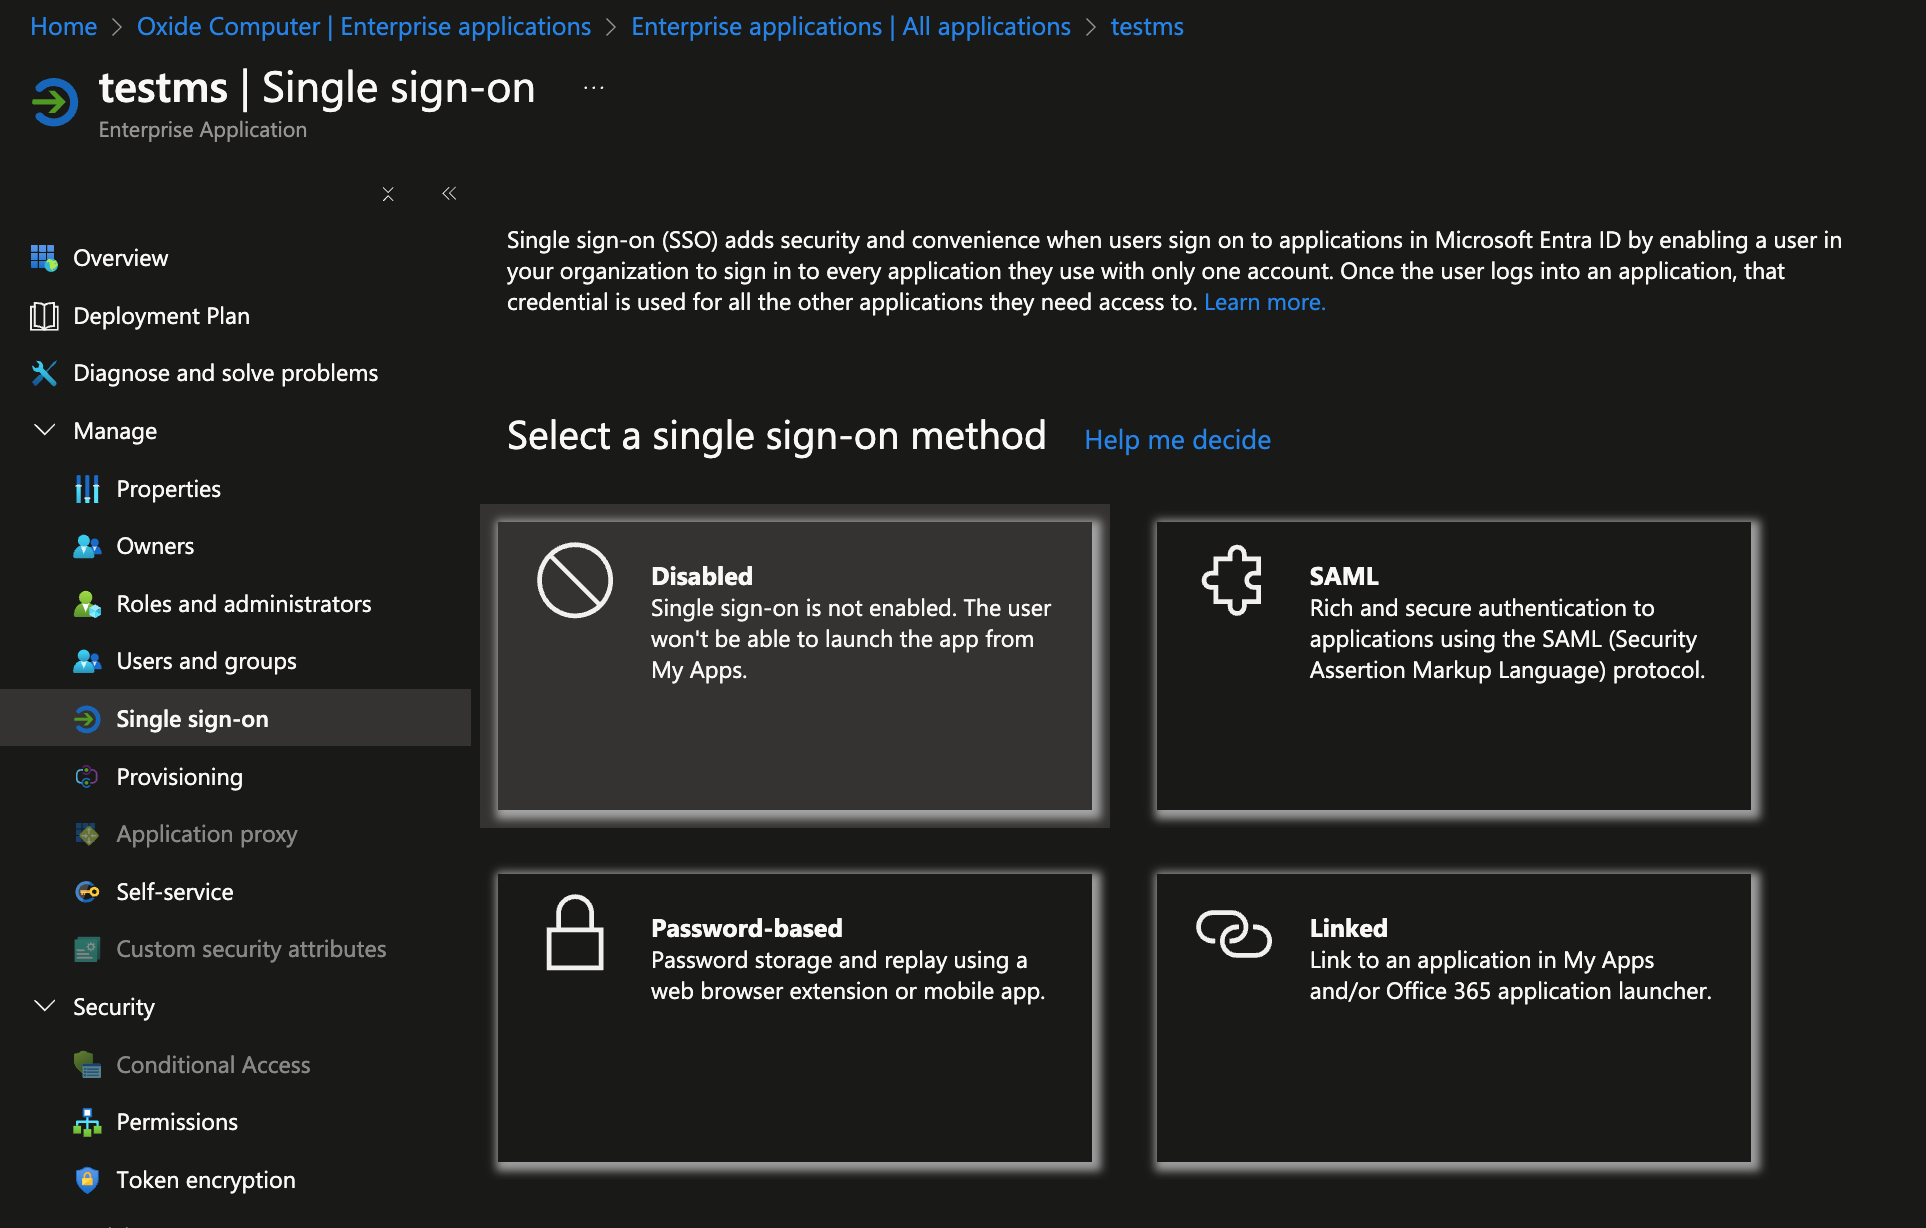
Next, you’ll walk through configuration tasks 1 to 3:
Edit Basic SAML Configuration
Click Edit and enter the app identifier (for ease of reference, it has the same name as the app - which is also the Oxide silo name). Enter the same Oxide login endpoint you have for Redirect URI above for Reply URL, Sign on URL, and Logout URL.

Edit Attributes and Claims
You can leave everything as is and use the default values, i.e.

Configure SAML signing options
Click Edit and select “Sign SAML response and assertion” for the Signing Option and update the notification email address as necessary.
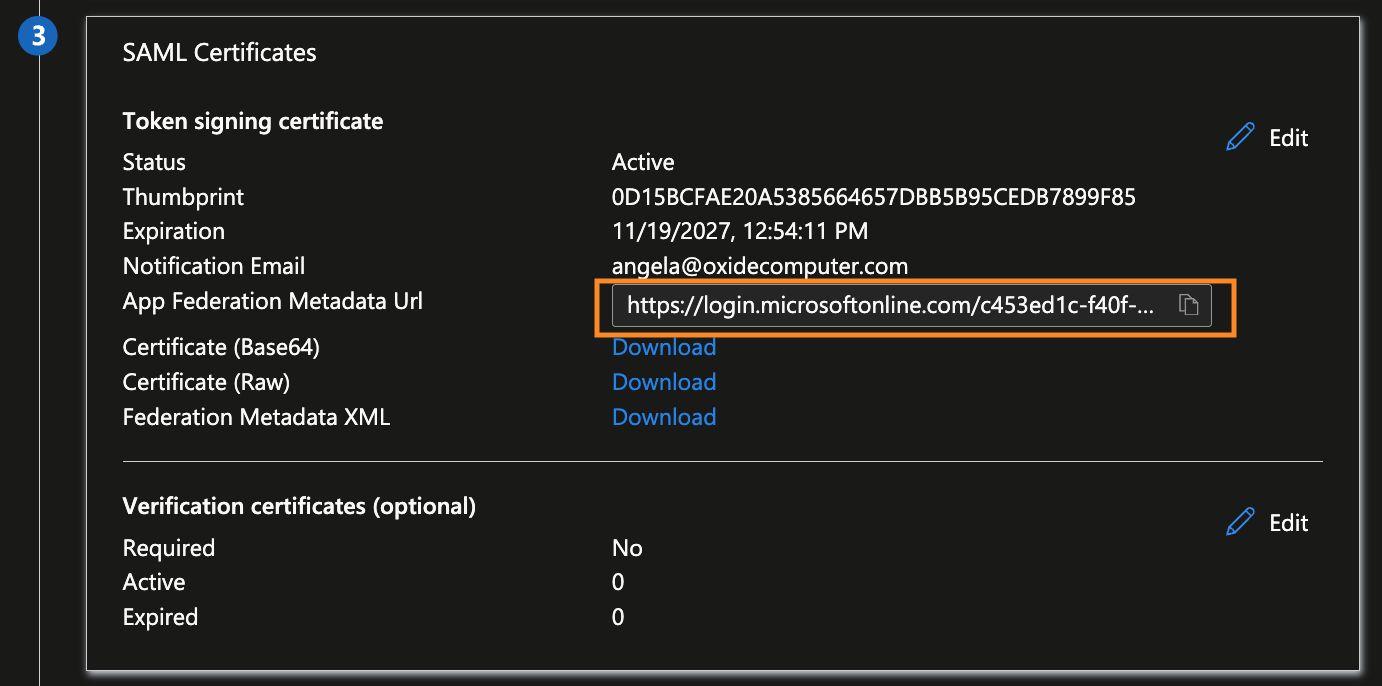
Another piece of information you’ll need from here is the metadata URL or XML file. When you set up the identity provider on Oxide, you’ll enter either the URL (if Oxide upstream network allows internet access), or import the XML file directly.
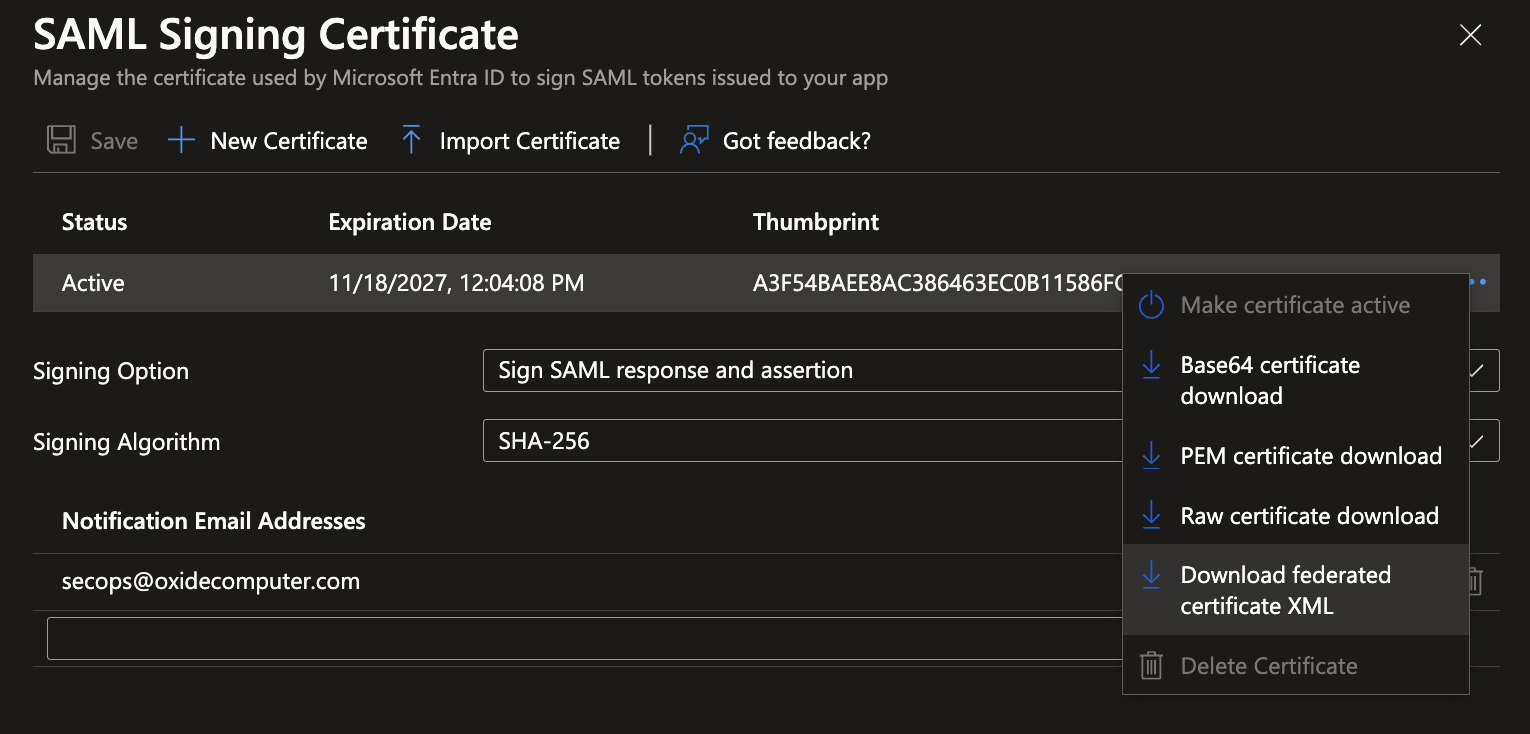
You can also optionally enable request verification and upload a certificate for it now, or configure that later on as needed.
Enable self-service (optional)
You may also modify the Self-service settings based on your organization’s access policy. They do not affect how Oxide interacts with Entra.
Create Oxide silo and identity provider
Now you are ready to create the new silo using Entra for authentication and authorization. Navigate to the System menu using the dropdown at the top right-hand corner of the web console (next to user name).
Create silo
First, select Silos and create a new silo.
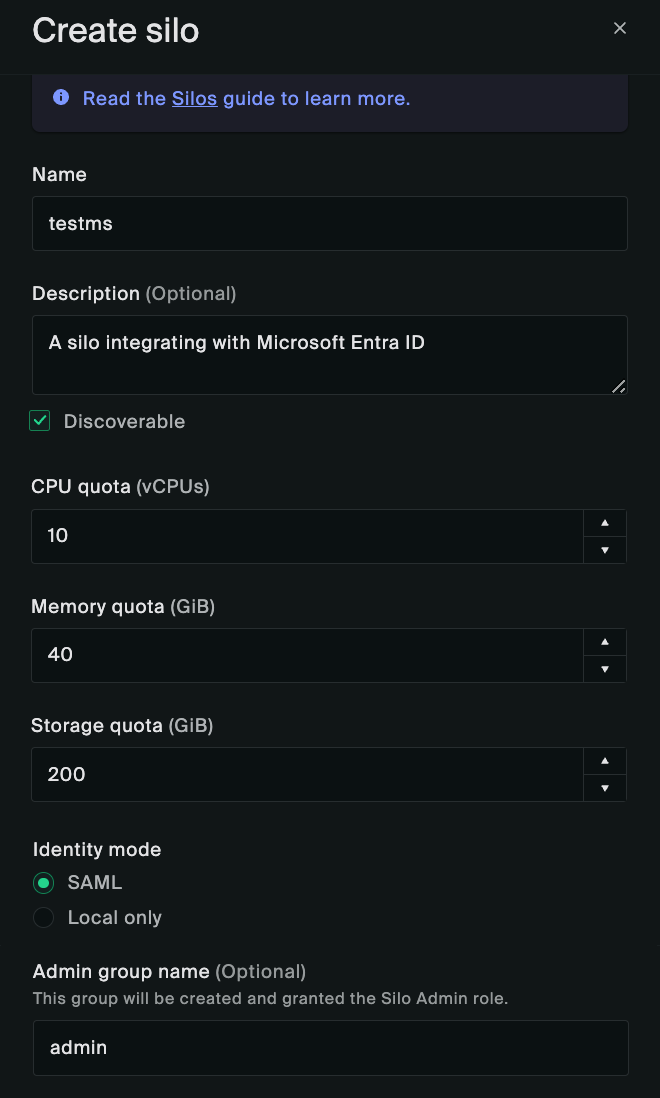
The silo name must match with what you used in the Entra Reply URL. The Admin group name should match what you configured earlier in the Entra app registration roles, with at least one user or group assigned to act as the silo admin. The silo admin user(s), once logged in and imported into Oxide, will have the necessary permissions to manage the roles of other users onboarded later on.
The Role mapping options provide silo admins and/or viewers the access to fleet-level system information. You’ll likely grant the additional access only to silos used by operators and power users. This will eliminate the need for anyone requiring fleet-level access to log in as the built-in recovery user.
Before clicking Create Silo, ensure you have added a TLS certificate with a matching common name.
Create identity provider
The provider setup requires a number of data input which should all be available from Entra. The screen shots below illustrate the input that corresponds to the "testms" Entra application settings:
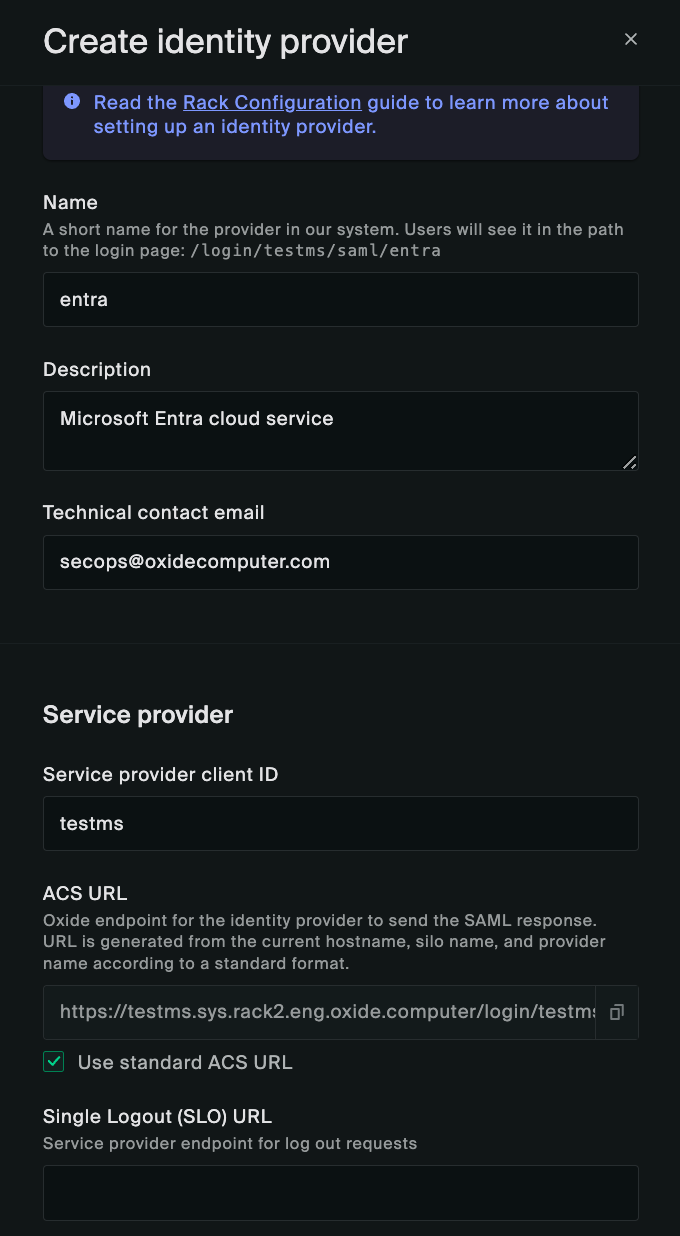
Here we use "entra" as the provider name to let users know which system they are authenticating with. It can be named differently according to your organization’s policy or naming convention.
The Service provider client ID should correspond to the Identifier short name specified in the Entra SAML configuration.
The ACS URL is generated for you based on the silo and provider names. It should match what was entered as the Reply URL in Entra.
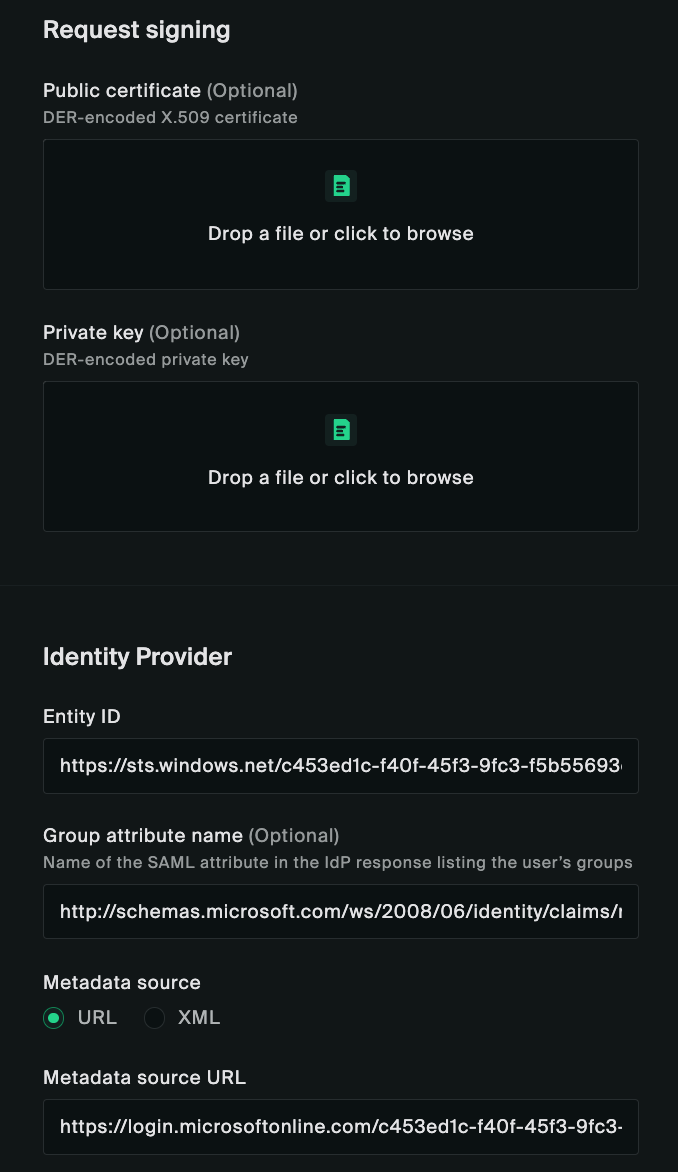
Here, you may also import the key pair to be used for request signing. Note that the request signing RSA private key should be in PKCS#1 format.
The Entity ID should be the Microsoft Entra Identifier on Entra’s SAML configuration page, under step 4:

The Group attribute name should be set to the SAML token claim URI for application roles, i.e.
http://schemas.microsoft.com/ws/2008/06/identity/claims/role
You may set the Metadata source to XML and import the Federated Metadata XML file downloaded earlier, or choose the URL option and enter the URL if the rack upstream network has internet access.
Log in as an Entra user
If everything is configured correctly, you should be able to log in as the users set up in Entra.
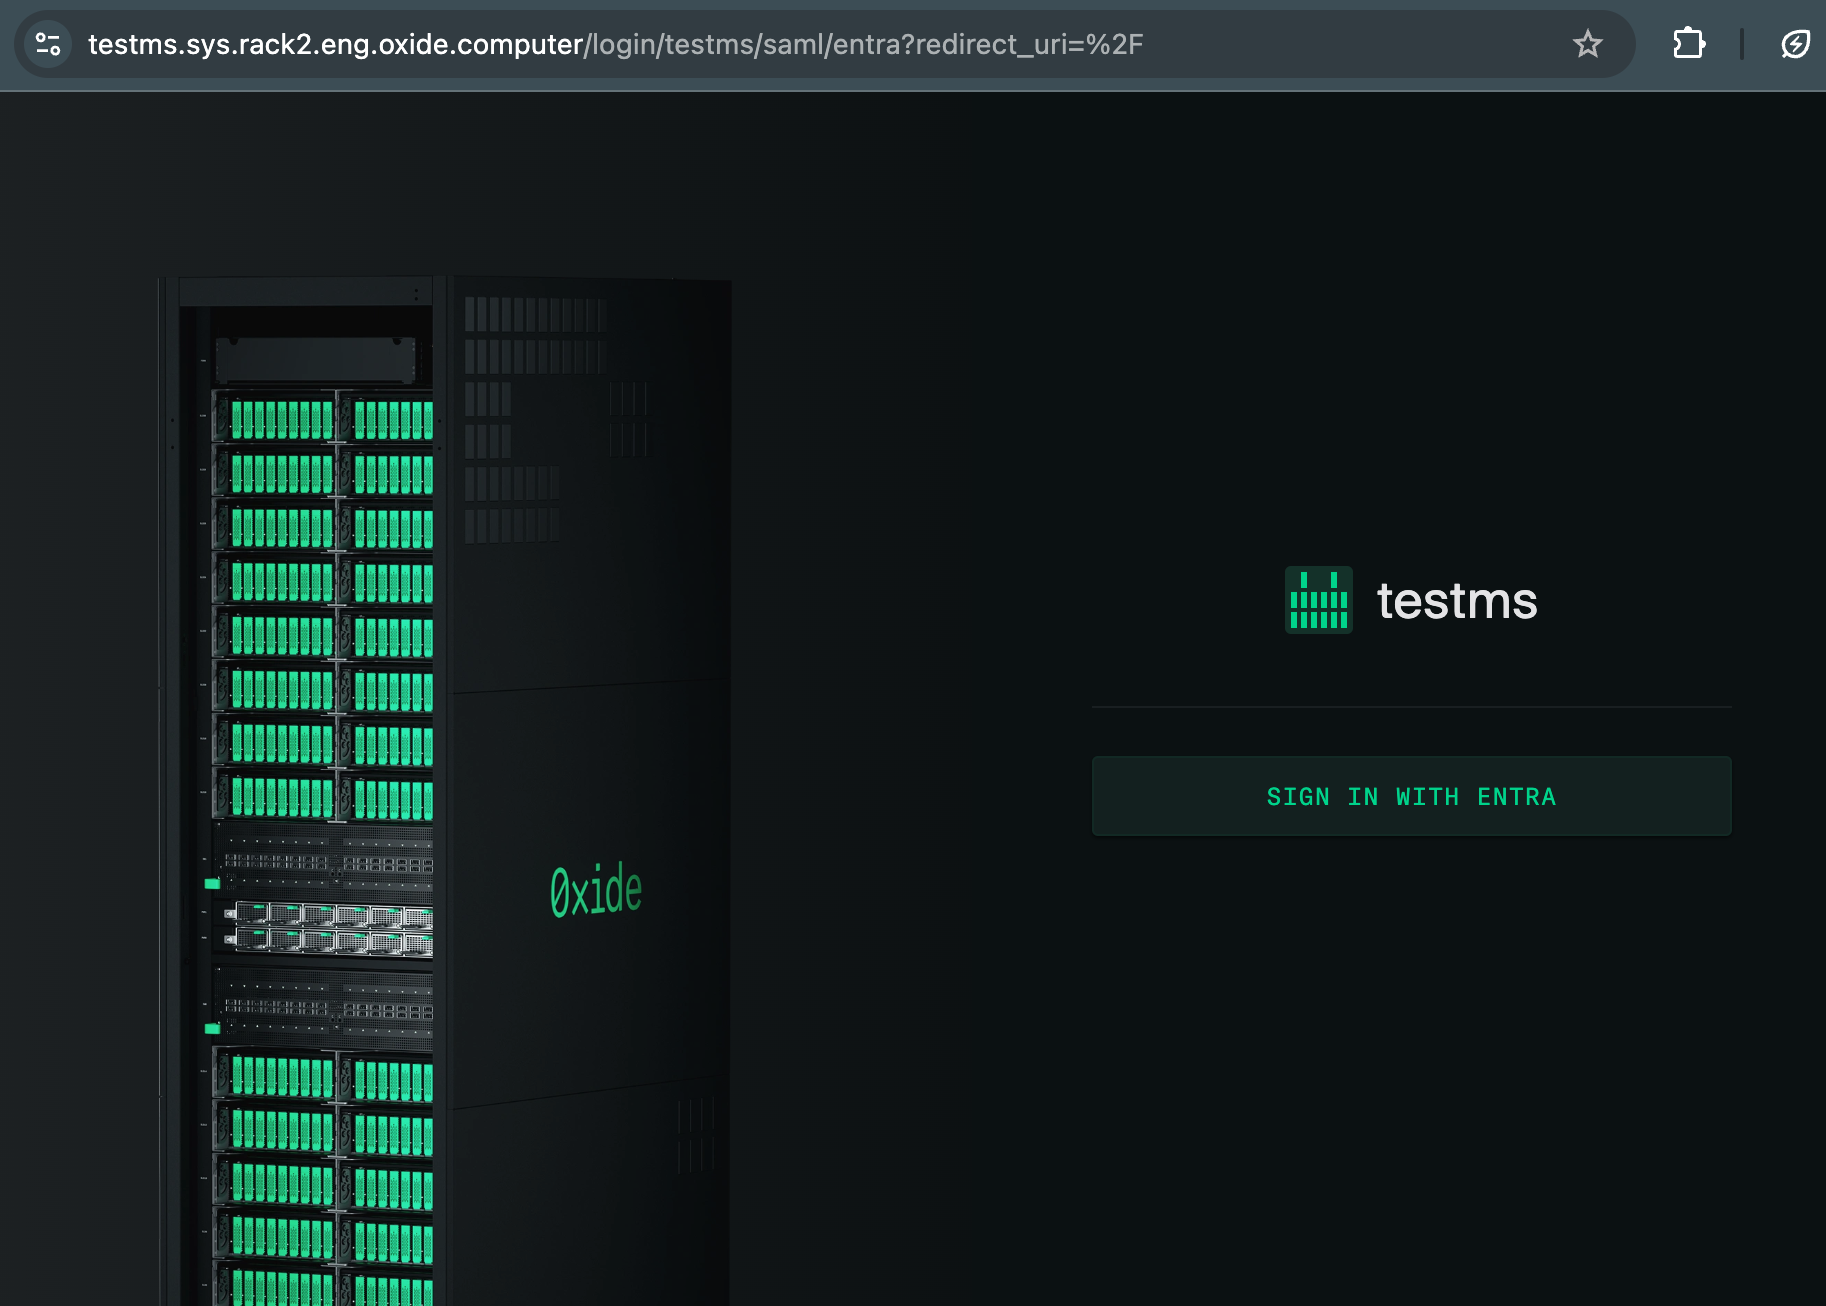
Clicking SIGN IN should redirect you to the Entra login page:
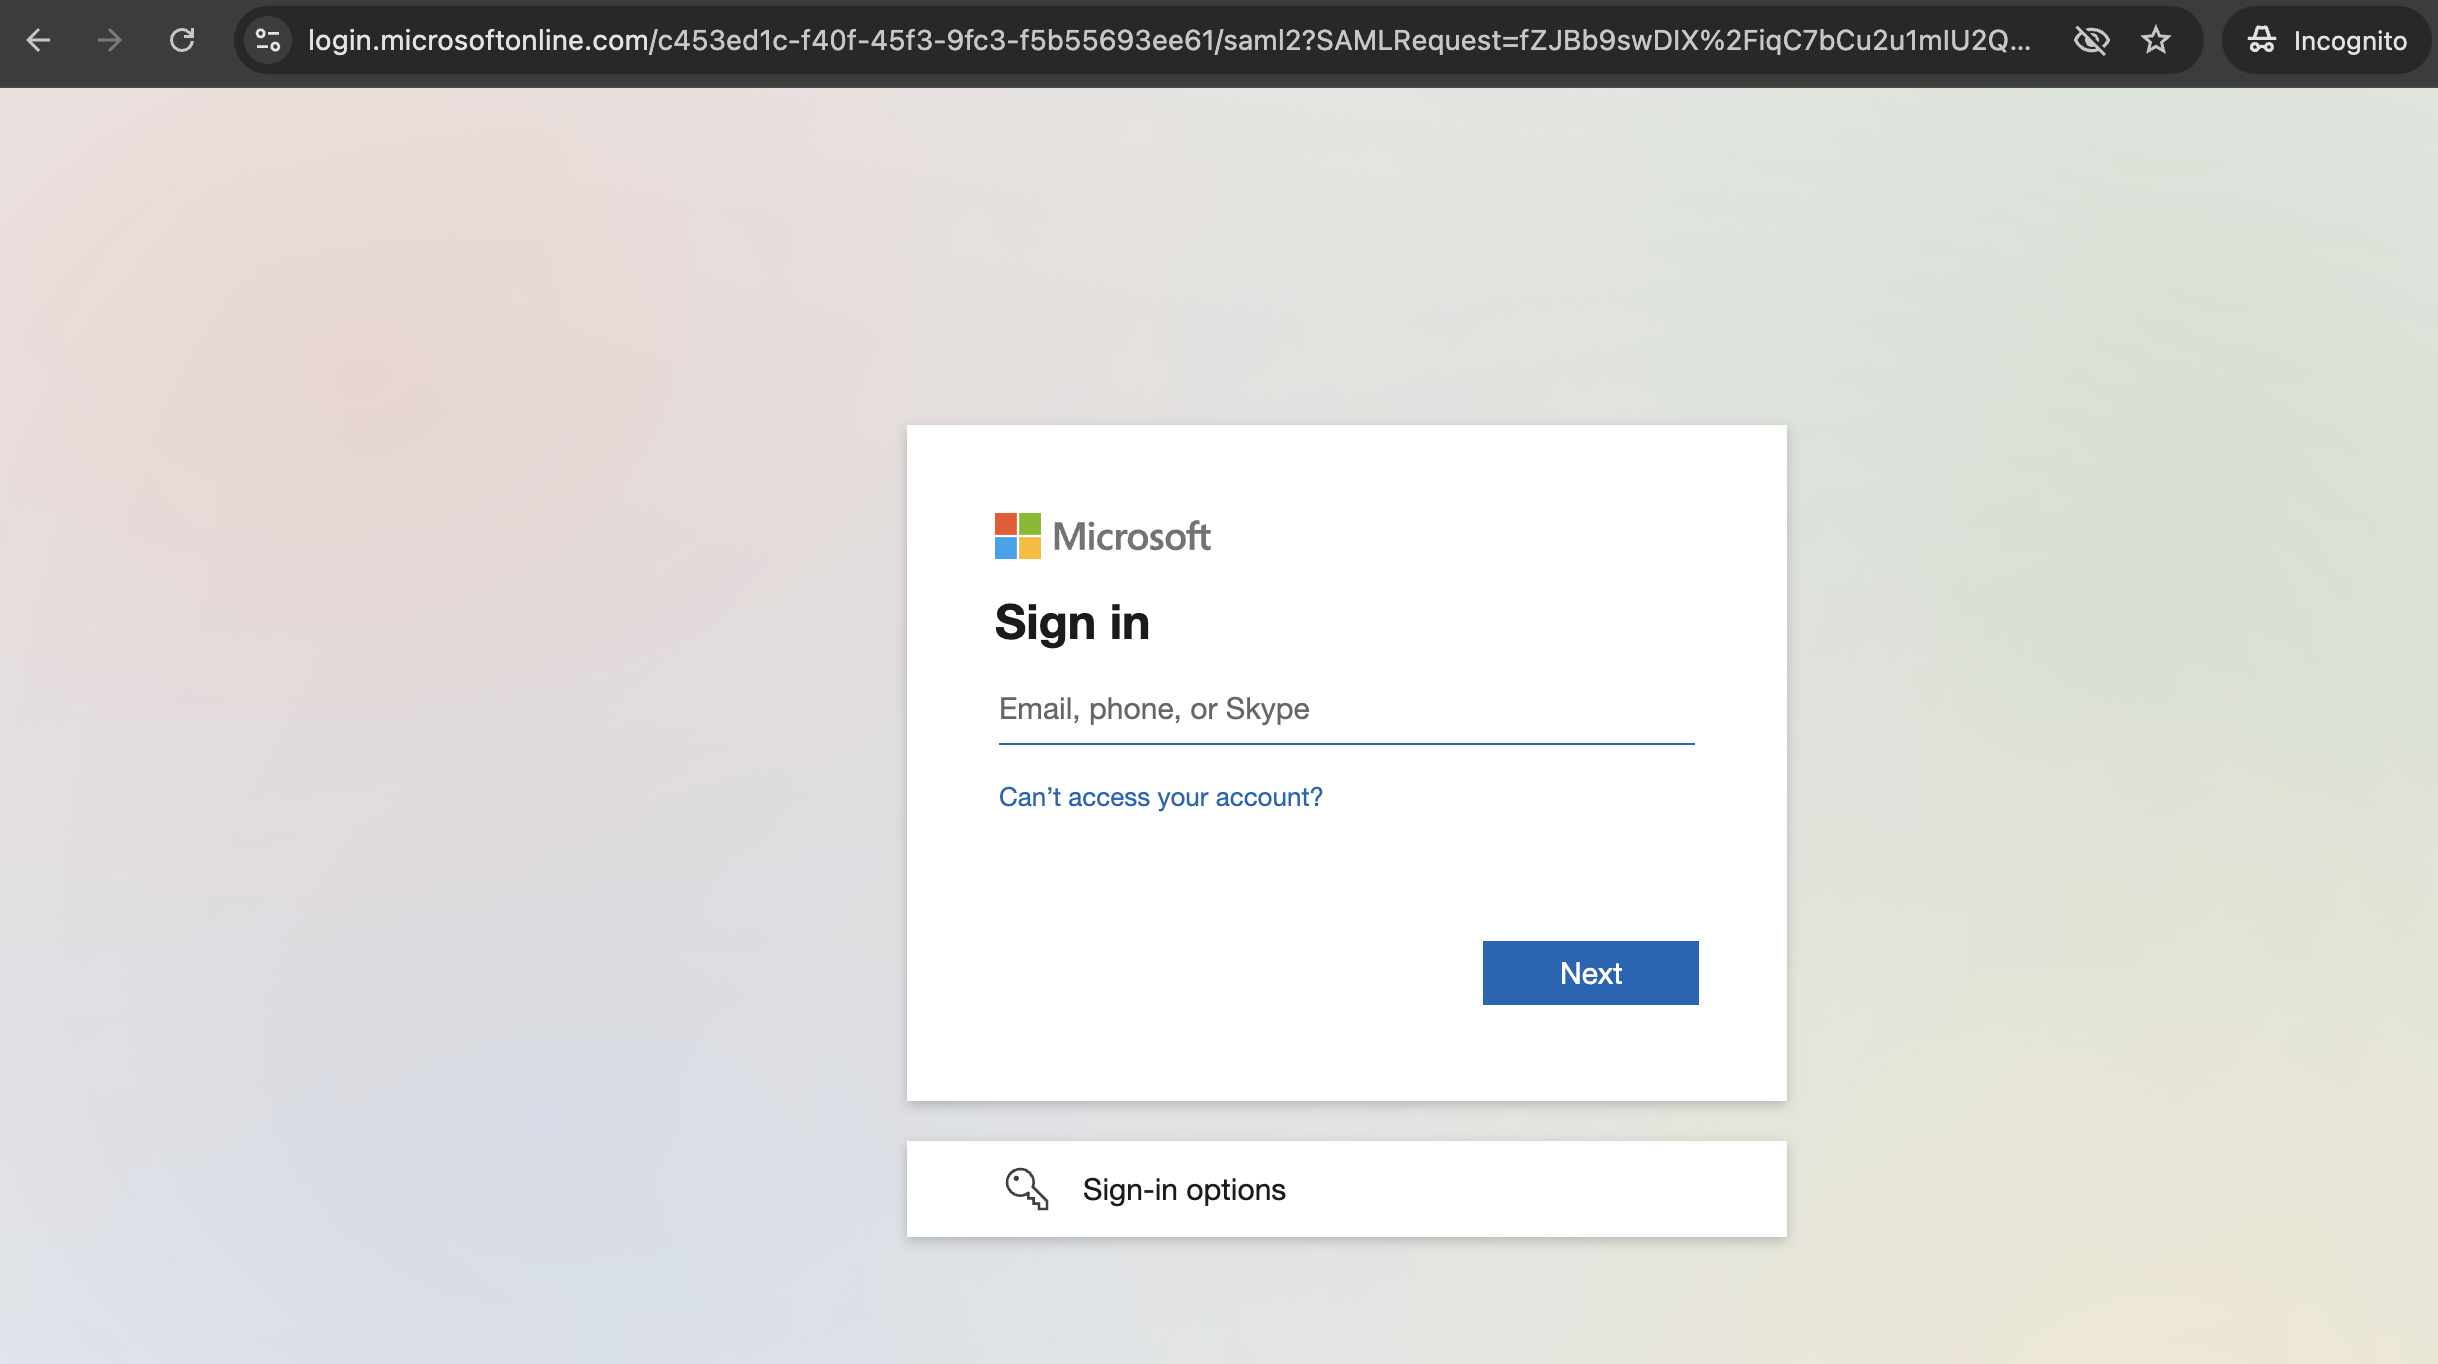
admin and user) matches with the Admin group name in the silo. You can view which groups the user has been imported with by navigating to the profile page https://$ROOT_URL/settings/profile.User roles and groups
The Entra application roles are used to create silo groups and assign memberships. Users should see those roles rendered as groups in their Oxide profile.
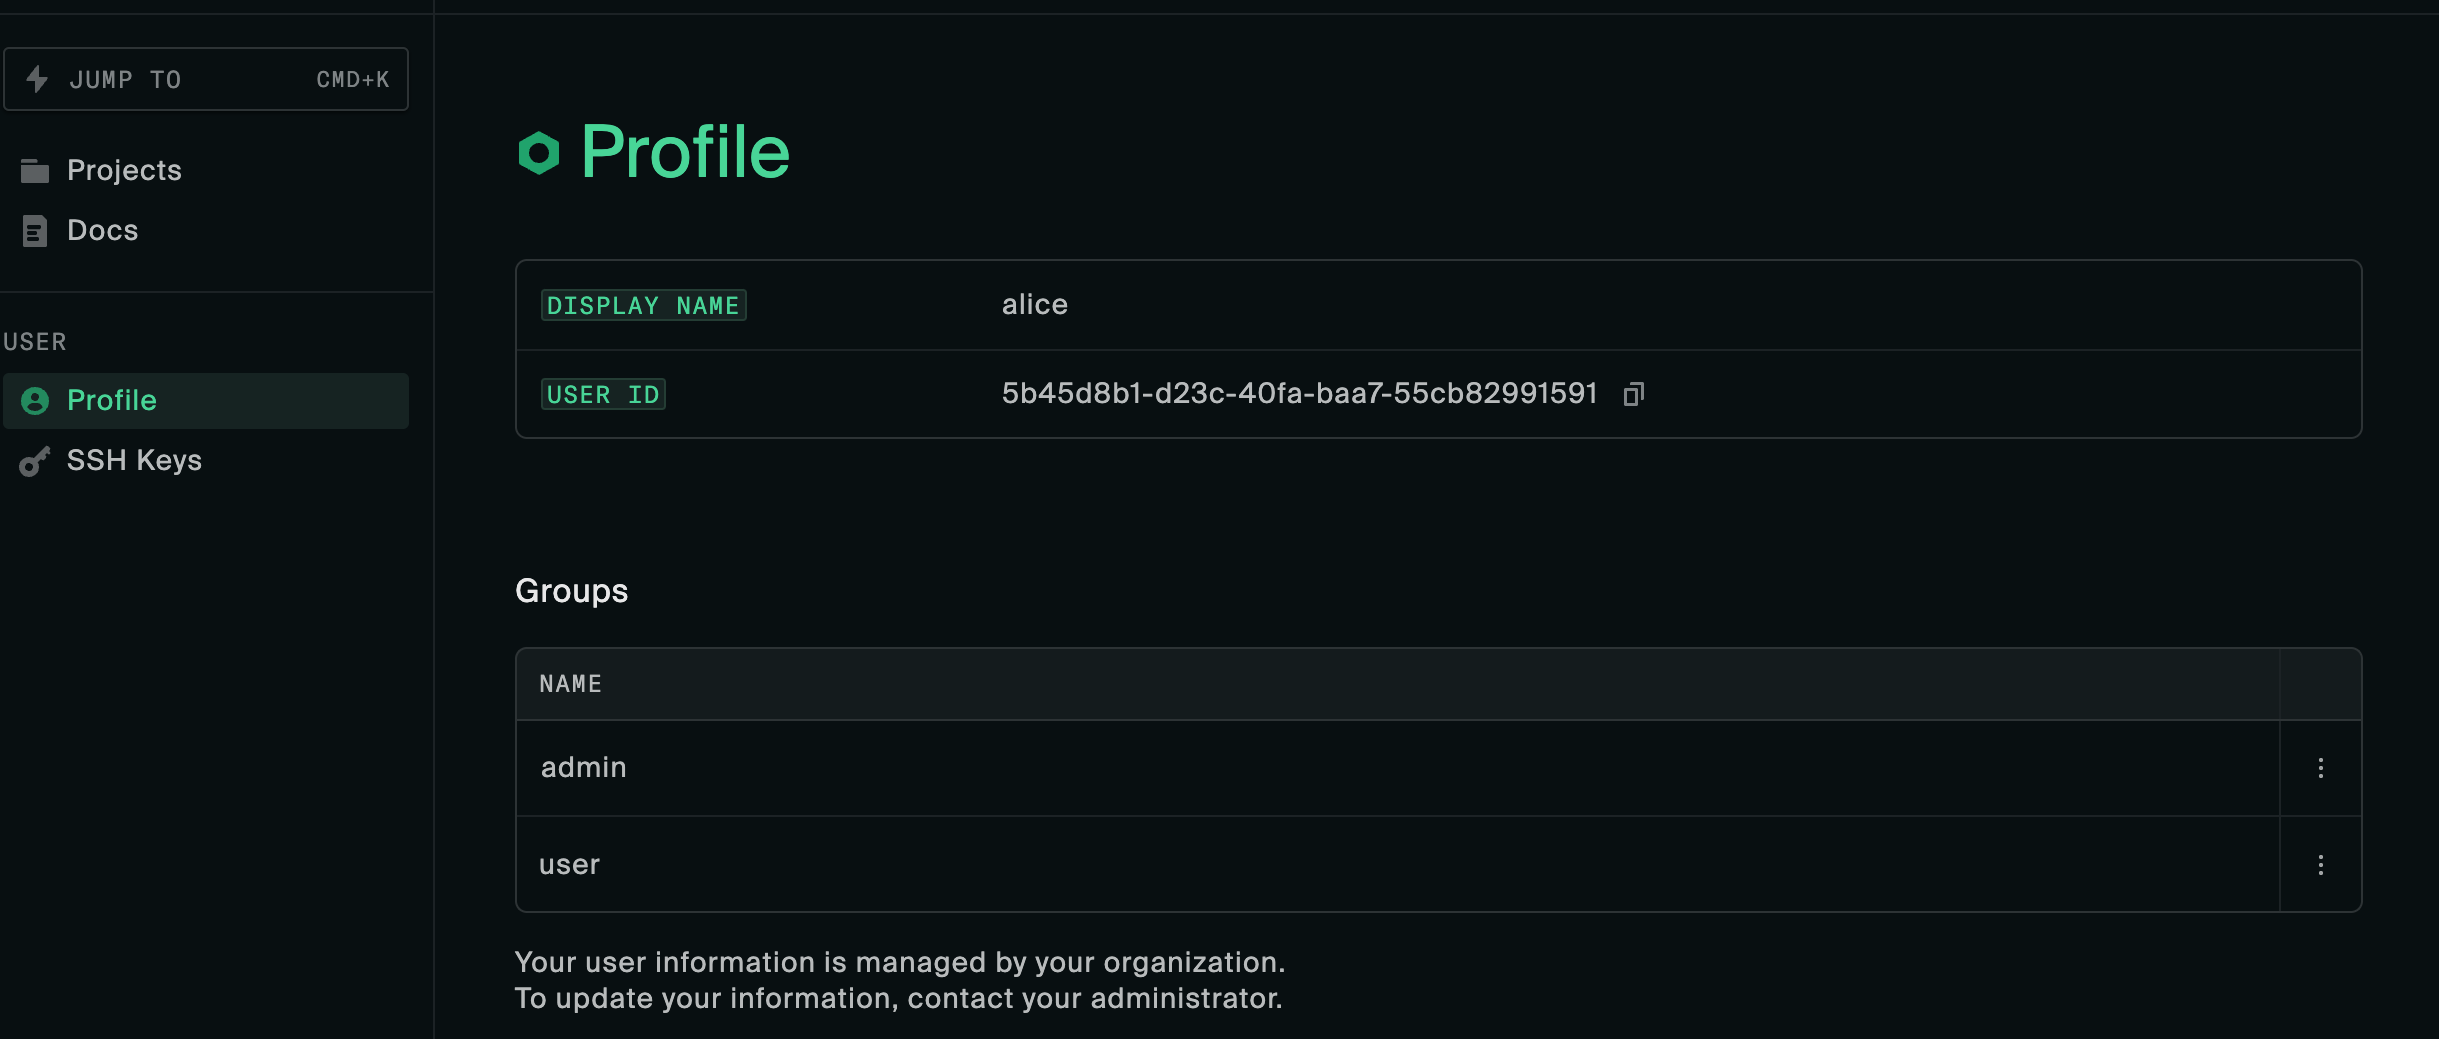
The group specified as the silo’s Admin group name should be reflected on the Access tab.
