Overview
Images let you create a new disk based on an existing one. They may be uploaded directly or created from a snapshot.
Users with project-level admin or collaborator roles have the capability to create project images. The same may be done at the silo-level by silo admins and collaborators.
While the Oxide Rack does not come with any preloaded machine images, many Linux distros provide native cloud images that can be deployed in the Oxide rack. Below are examples of creating an image using the web console and CLI:
Web console
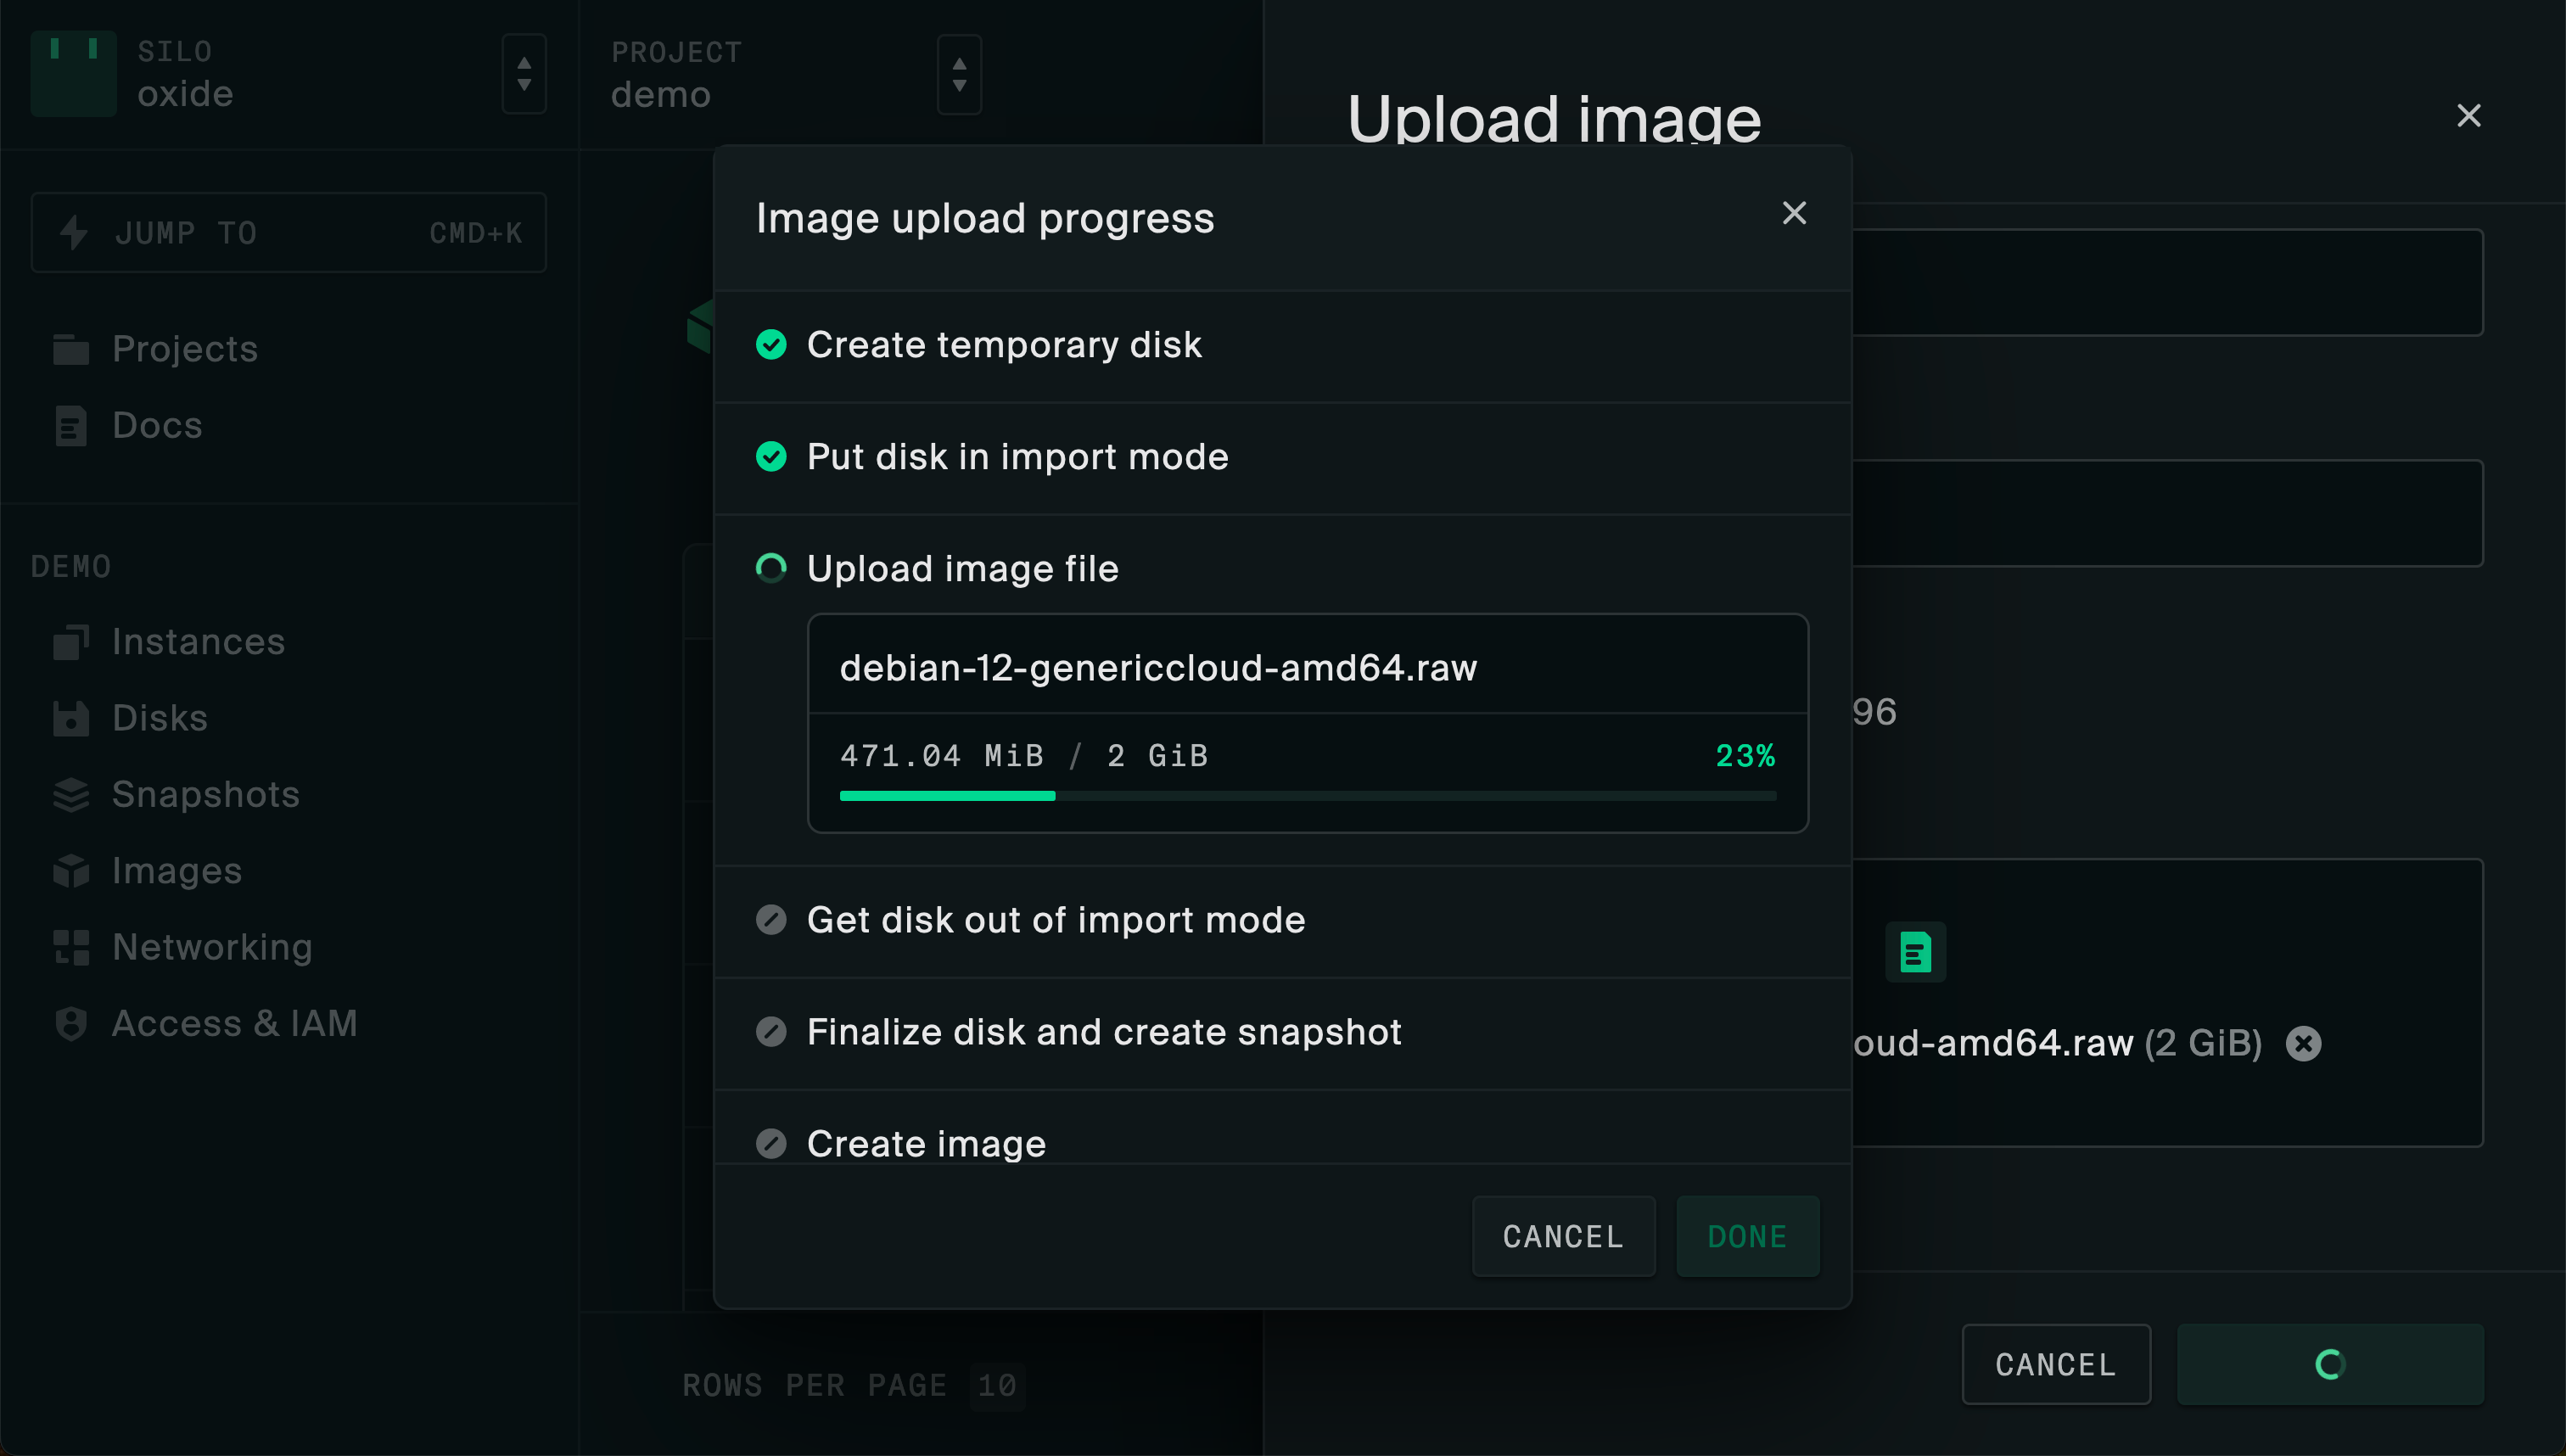
Download this generic cloud image from Debian: https://cloud.debian.org/images/cloud/bookworm/latest/debian-12-genericcloud-amd64.raw.
Navigate to the
Imagessection of your project on the web consoleClick
Upload Image, enter the required details, and select the Debian.rawimage file
This will create a boot disk, take a snapshot of it, and make an image out of that. The disk and snapshot are treated as intermediate artifacts and will be removed automatically once the image has been successfully created.
CLI
The CLI can also be used to create an image using the same disk-snapshot-image workflow. Unlike the web console, the disk and snapshot are not removed automatically.
To import a disk and create an image from it include the --snapshot and --image-* arguments:
oxide disk import \
    --project myproject \
    --path /tmp/debian-12-genericcloud-amd64.raw \
    --disk debian12-boot \
    --description "debian 12 cloud image" \
    --snapshot debian12-snapshot \
    --image debian12 \
    --image-description "debian 12 original base image" \
    --image-os debian \
    --image-version "12"
To create a disk without an image or snapshot, use the command below. This is useful when attaching it to an instance in order to modify the disk (e.g., install additional software) before creating the reusable snapshot and image. After making the desired changes, you can create a snapshot of the disk to produce the image.
oxide disk import \
    --project myproject \
    --path /tmp/debian-12-genericcloud-amd64.raw \
    --disk debian12-boot \
    --disk-block-size 512 \
--description "debian 12 cloud image"Image attributes
Image names must meet the following requirements:
Is unique within the project
Starts with a letter
Contains only lower-case letters, numbers, and dashes
Cannot be a UUID (but can contain one)
Besides name and description, other built-in image attributes include:
os: the operating system family that the image runs on, e.g., Ubuntu, Debianversion: the operating system or application version stringdigest: hash of the image contents, e.g., sha256size: image total size in bytes
Preparing images for import
Linux images from providers
Popular Linux distros that provide images compatible with the Oxide rack include:
Images built for the x86_64 / amd64 architecture in RAW format can be imported directly as disks.
For images in other formats, the open source tool qemu-img can convert them to RAW format:
qemu-img convert -f qcow2 -O raw jammy-server-cloudimg-amd64.img jammy-server-cloudimg-amd64.raw
qemu-img convert -f vmdk -O raw myimage.vmdk myimage.raw
Formats and labels will vary by distro, but it is important to consider a few general criteria:
Cloud type: generic or NoCloud (indicating support for the NoCloud cloud-init datasource)
Architecture: x86_64 / amd64
Boot mode: UEFI
Format: raw, if available; else use img or qcow2 and convert with
qemu-imgafterwards
Some distros offer both full and minimal versions. It is recommended to try the minimal versions first, but keep in mind that they may not include all the necessary device drivers.
Building your own image
Oxide VMs boot with a UEFI firmware image. The Oxide control plane provides instance metadata to VMs using a cloud-init "NoCloud" configuration drive. This metadata includes the instance’s hostname, SSH public keys authorized for "cloud user" accounts managed by the guest’s metadata service, and the instance’s cloud-init user data.
If you plan to build custom images from other sources, ensure you include the following prerequisites:
Enabled for UEFI boot mode
virtiodriver for network and storage devices, if it does not come with the operating system image (e.g., Windows)Any necessary tools or settings to allow remote server management (e.g., SSH server)
Mechanisms for setting login credentials (e.g., SSH keys, local account, password) during initialization
Any operating system licenses, if applicable
Sharing images across projects
Silo admins can make an image available in all projects by promoting it. An image must first be created within a project. Once the image is tested and ready for broader access, users with the silo admin role can make use the web UI or CLI to promote them to the silo level. After being promoted, images are no longer associated with the project in which they were created. Any users with the silo viewer role (in practice, any user in the silo) will be able to list these images, and any user that can create VMs (users with the collaborator role on a project or the silo) can use them to create disks and VMs in any project.