This example configures Keycloak as an identity provider (IdP) for Oxide. It runs Keycloak v26.0.0 as a container on an Oxide virtual machine. If you already have a Keycloak instance elsewhere you can skip to the Create Keycloak objects section.
Create Keycloak Instance
Create TLS certificate
Create a directory named
keycloakfor your cert files.mkdir ~/keycloak
cd ~/keycloakCreate an OpenSSL config file named
san.cnfwith the following content. This config file uses an IP SAN since it assumes that Keycloak will be accessed by its external IP address instead of a DNS name. Replace172.20.26.91with your instance’s external IP address.san.cnf[req]
default_bits = 2048
distinguished_name = req_distinguished_name
req_extensions = req_ext
x509_extensions = v3_req
prompt = no
[req_distinguished_name]
countryName = US
stateOrProvinceName = N/A
localityName = N/A
organizationName = Self-signed certificate
commonName = 172.20.26.91: Self-signed certificate
[req_ext]
subjectAltName = @alt_names
[v3_req]
subjectAltName = @alt_names
[alt_names]
IP.1 = 172.20.26.91Use
opensslto generate the cert and key files based on the config above.openssl req -x509 -nodes -days 730 -newkey rsa:2048 -keyout key.pem -out cert.pem -config san.cnfVerify the generated certificate contains the desired attributes.
openssl x509 -in cert.pem -text -noout
Create Keycloak container from Docker Hub image
docker run --name keycloak -d -p 8080:8080 -p 8443:8443 \
    -v $HOME/keycloak:/etc/ssl/certs/more \
    -e KC_BOOTSTRAP_ADMIN_USERNAME=admin -e KC_BOOTSTRAP_ADMIN_PASSWORD=oxide \
    quay.io/keycloak/keycloak:26.0.0 \
    start --https-certificate-file=/etc/ssl/certs/more/cert.pem --https-certificate-key-file=/etc/ssl/certs/more/key.pem --hostname-strict false
At the time of this writing, the most recent keycloak image is version 26.0.0 but feel free to use anything that’s newer.
The
keycloakdirectory is mounted to the/etc/ssl/certs/moredirectory in the container such that the PEM files created above are accessible inside the container.By default, TLS is configured to use port 8443 in the Keycloak container. It can be exposed to the same port on the docker host. You can choose to remap it to a different one (e.g., 443).
Whichever port you end up using, it has to be configured in the VPC firewall in a way to allow access from your workstation. If you are new to VPC firewall rule setup, you can refer to the Make a web server example in the Quick Start Guide - Appendix.
Once the container is up and running, you can log in at https://${externalIP}:8443 with the username and password specified in the docker run command (i.e., admin/oxide, if there was no change to those input arguments).
Upon successful login, you are all set to create a realm, a client, and some users in Keycloak.
What if the Keycloak container is not accessible?
First, confirm if you can access the 8443 endpoint locally inside your Oxide VM with curl -k https://localhost:8443. If this doesn’t return any connection error, your access issue is most likely due to a missing or misconfigured VPC firewall rule.
If the curl command returns an error, the container or some services in it may have failed to start. Here are a few useful commands for troubleshooting if you haven’t used docker much or at all:
List both running and stopped containers:
docker ps -aView keycloak container logs:
docker logs keycloakOpen a shell in keycloak container to peek into it:
docker exec -it keycloak /bin/sh
Create Keycloak objects
Create a realm
If you are using an existing Keycloak instance and a realm that is already set up, you can skip the realm creation below. All other steps will still be required for the integration setup.
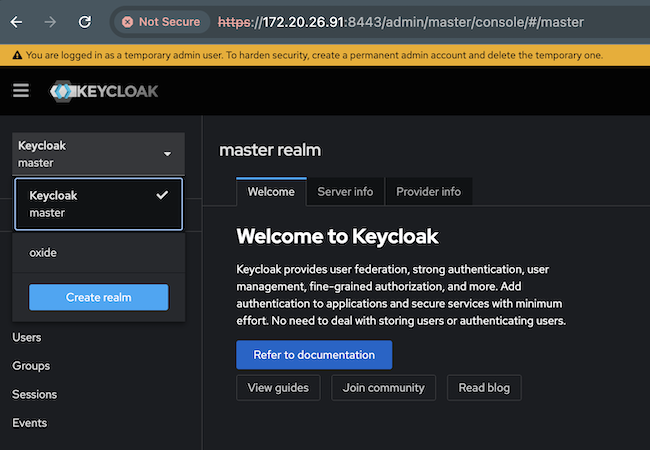
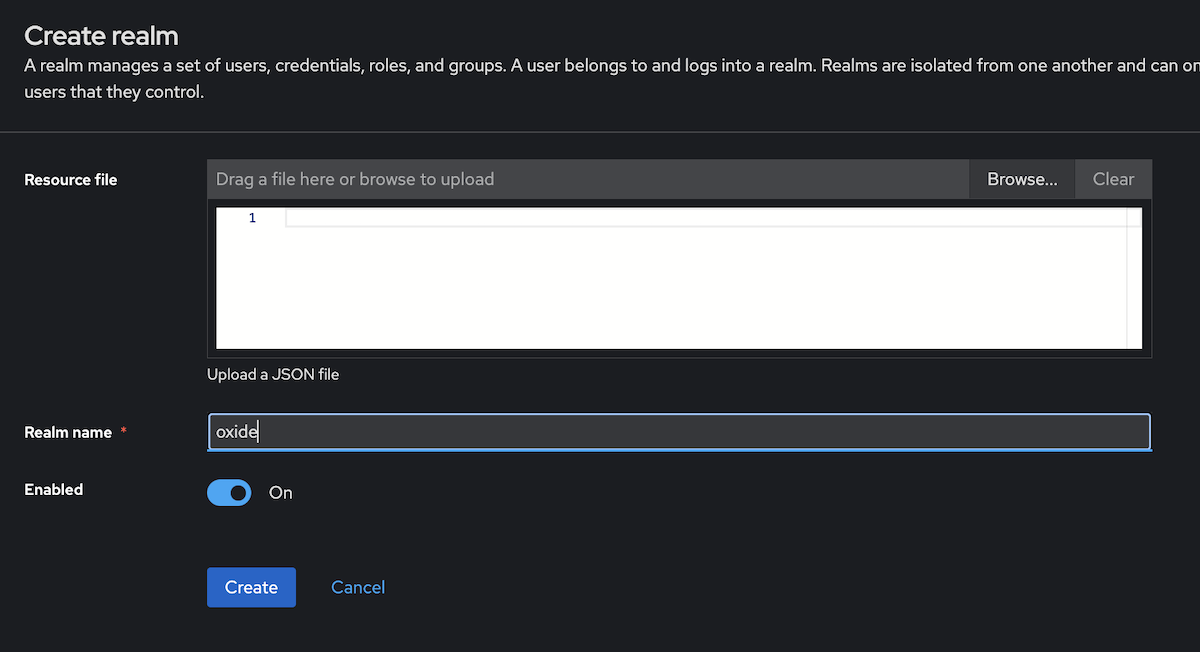
Click the realm button at the top left (it probably says "master") and choose Create Realm. Give it a name and leave everything else empty or to the default.
On the Realm settings, set Unmanaged Attributes to enabled.
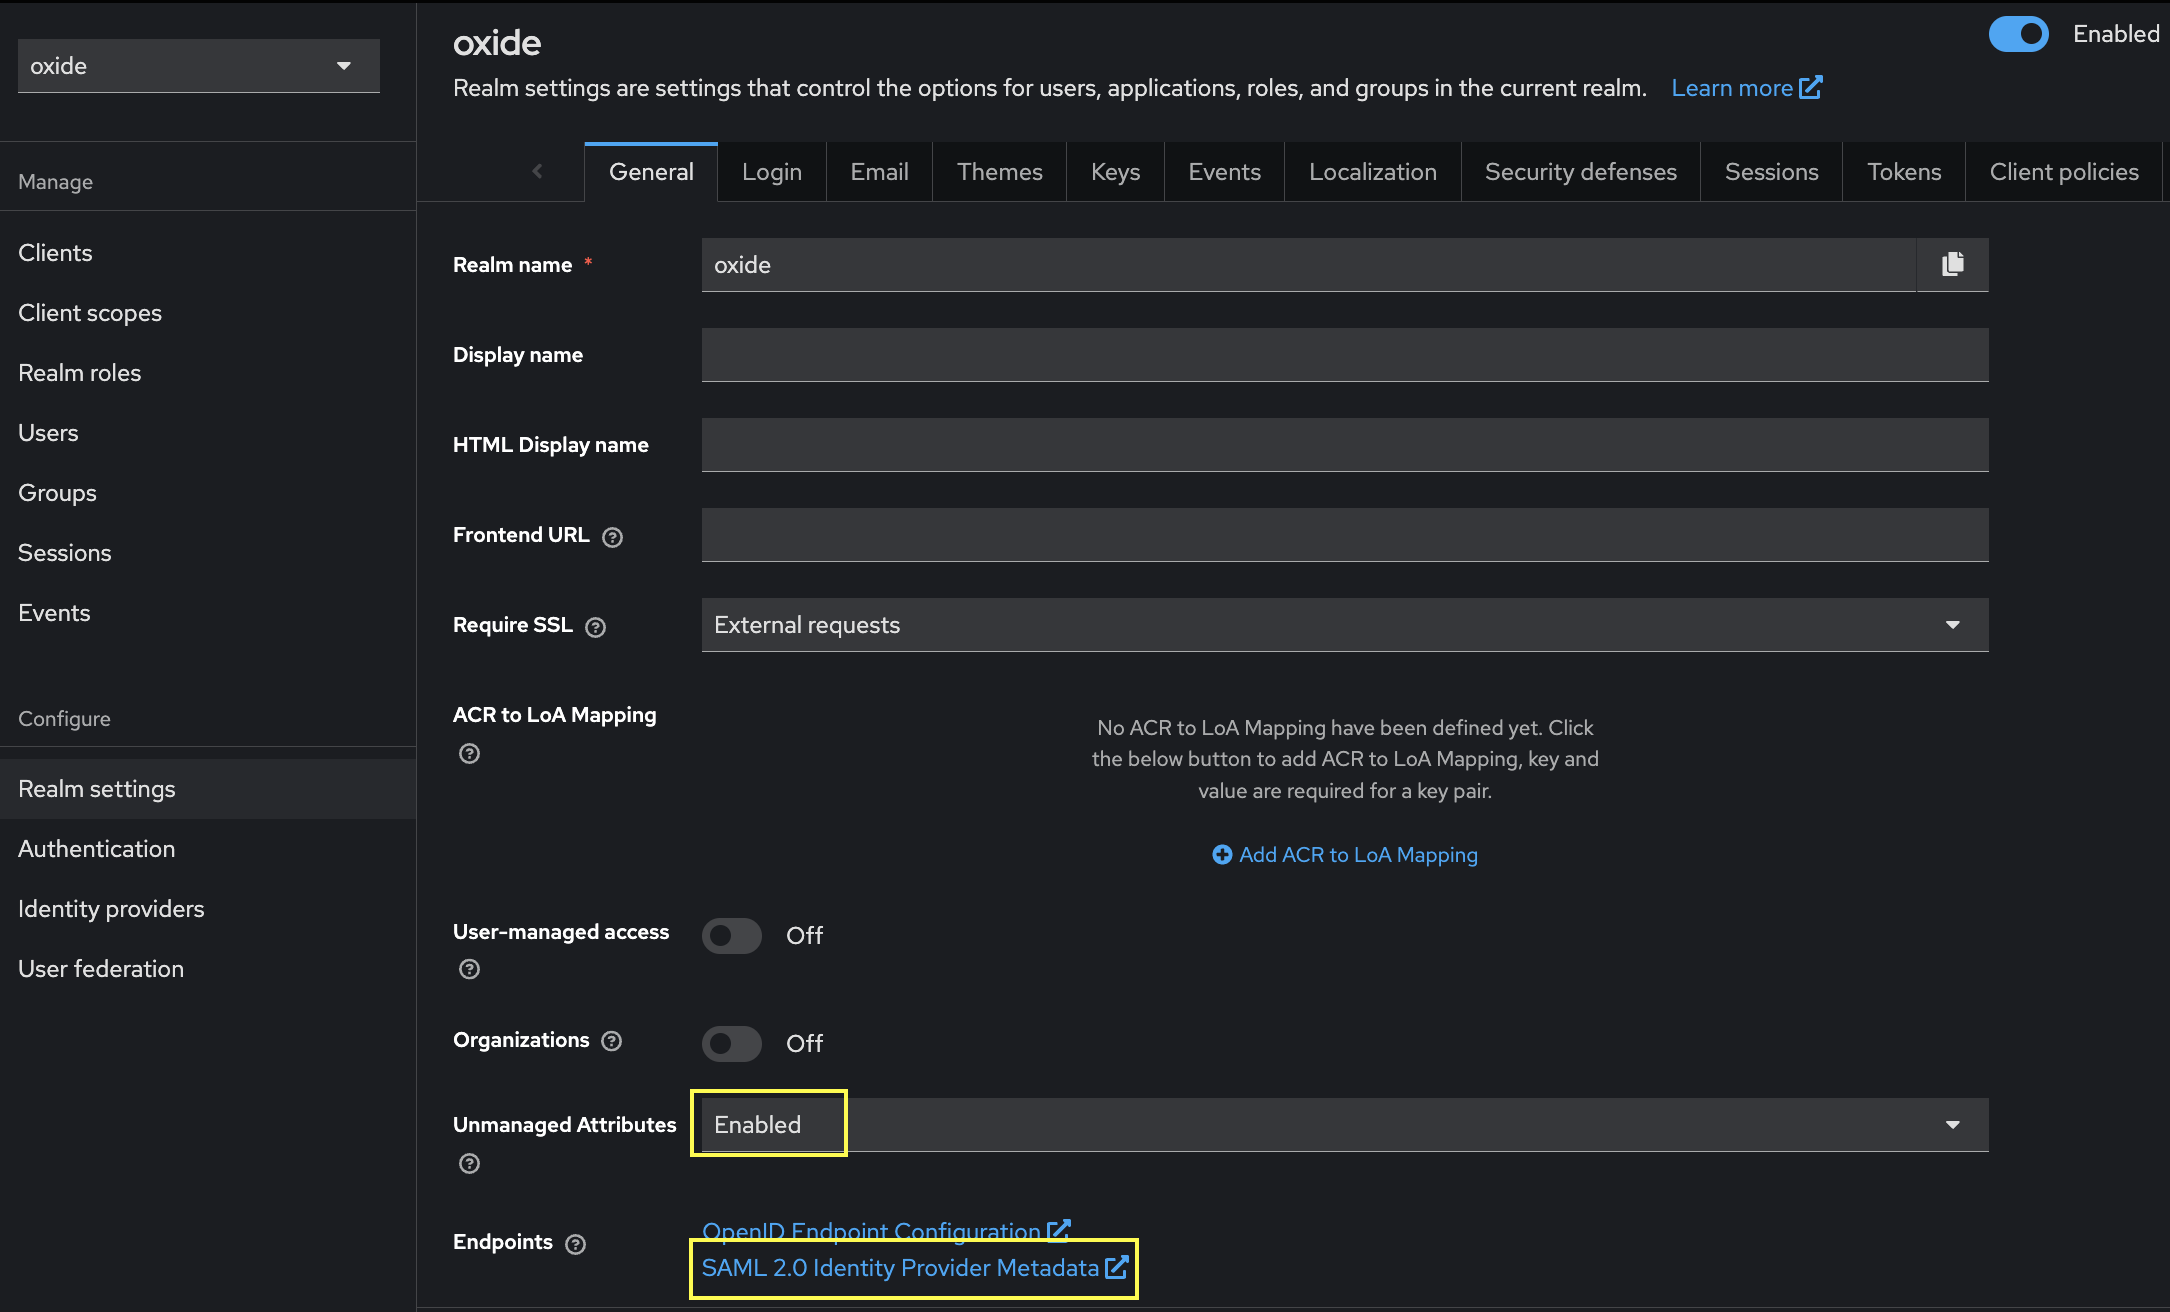
An important piece of information to obtain on this page is the SAML metadata - viewable by clicking the link under Endpoints.
Download SAML metadata from the endpoint
Use curl or other equivalent tool to download the metadata file from the realm endpoint mentioned above, for example,
curl -o metadata.xml https://172.20.26.91:8443/realms/oxide/protocol/saml/descriptorOpen the XML file and look for entityID which should match with the root URL of the realm you just created. You’ll need it for IdP setup later on. In this case, the value is https://172.20.26.91:8443/realms/oxide.
Create a client
Select SAML for client type. You can use the same value for Client ID and Name. Each client can back one or more silos. But if you plan to have one-to-one mapping between clients and silos, it’ll be a good idea to use the silo name as the client name for better traceability.
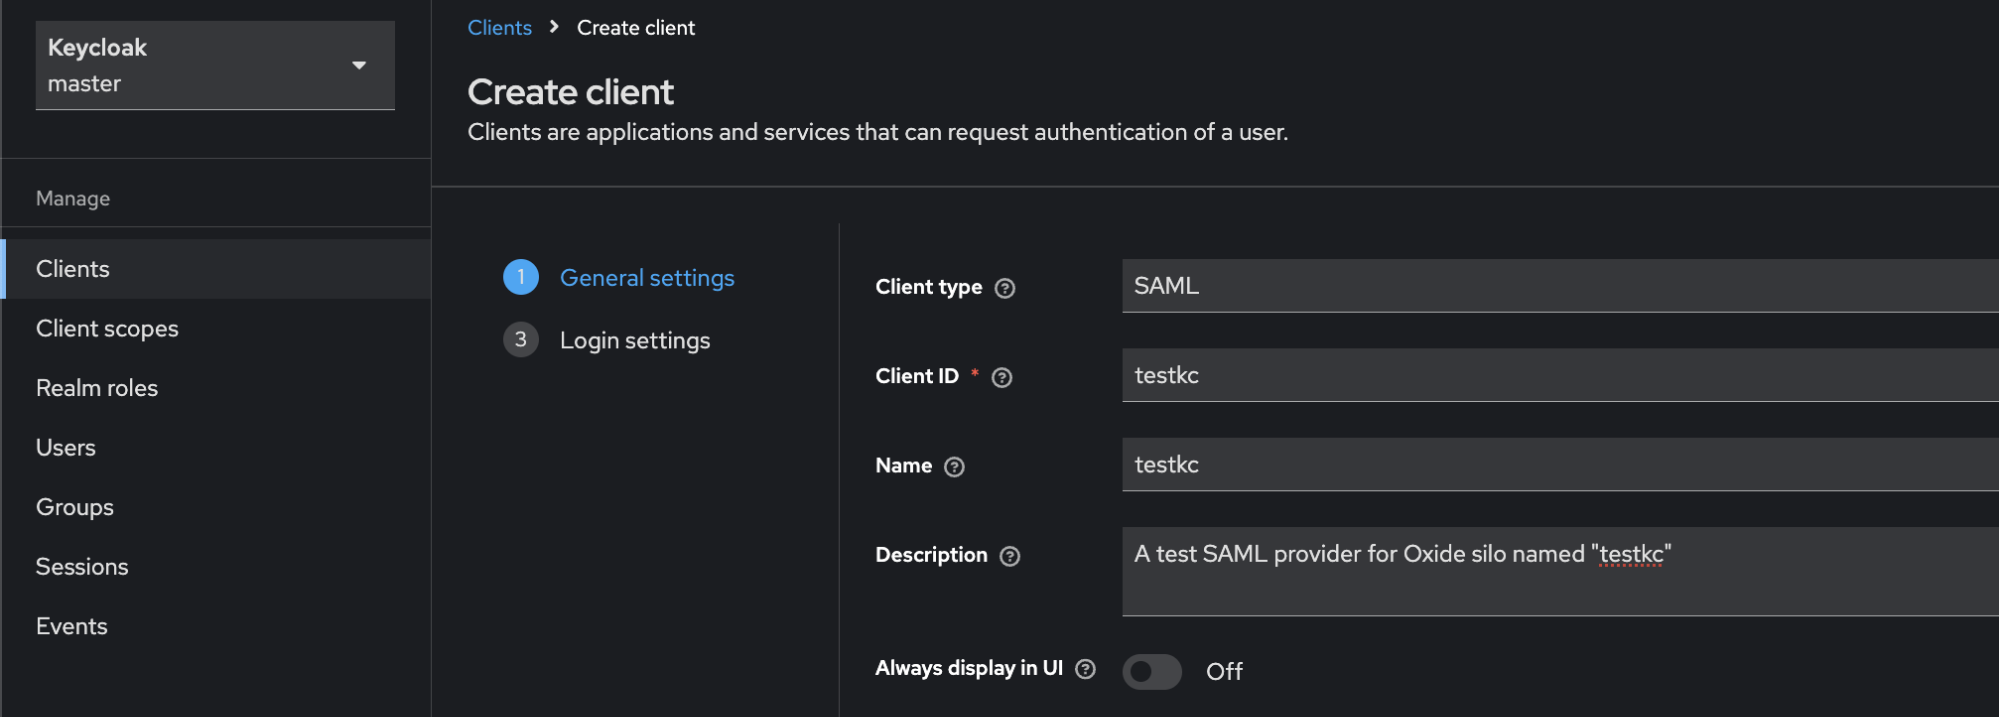
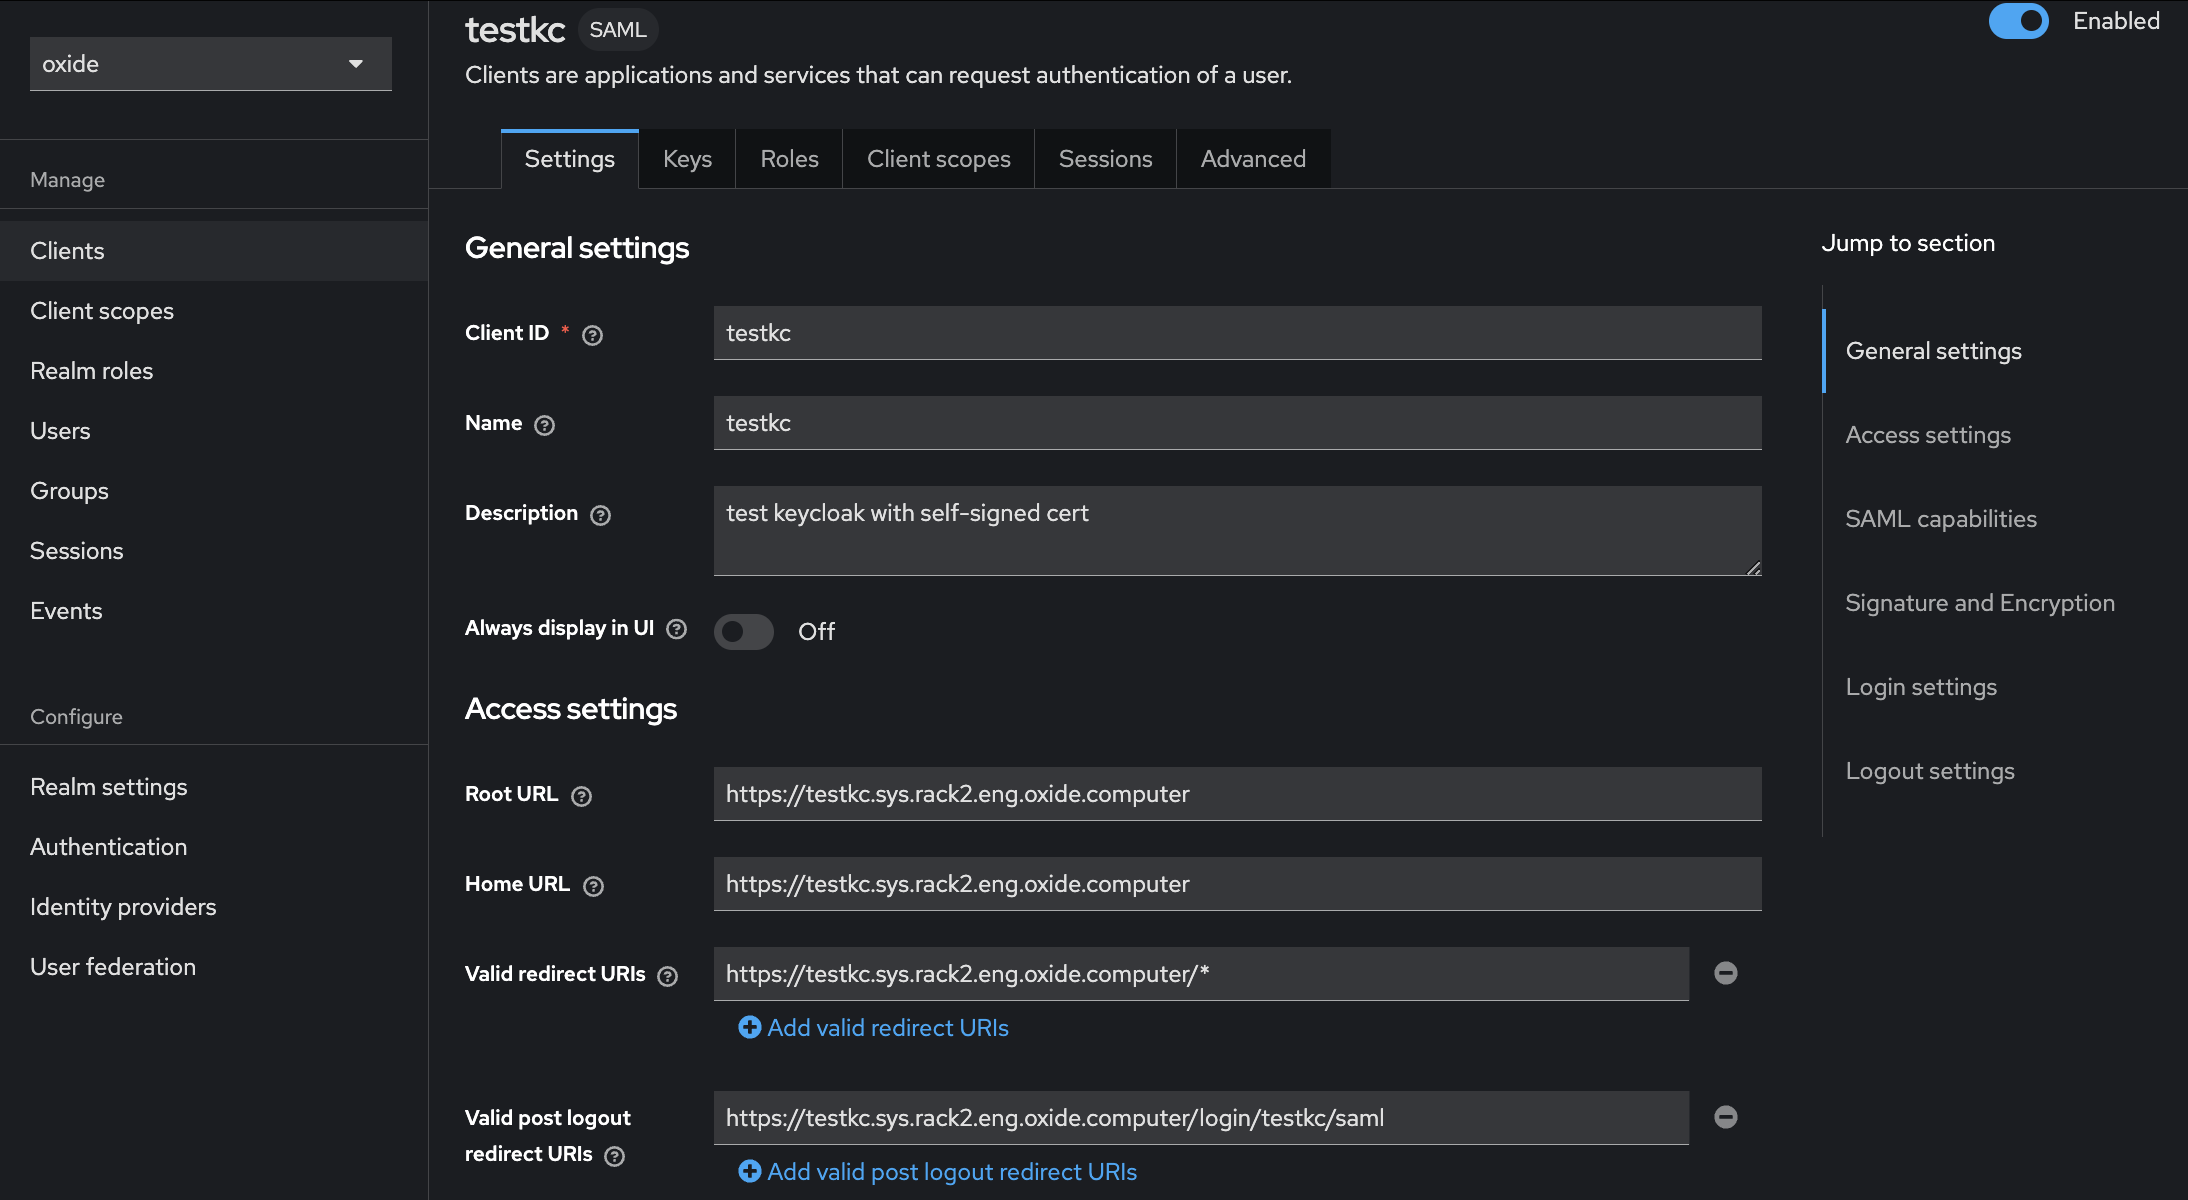
You can enter the same URL for root, home, and logout, which is the silo-specific Oxide endpoint:
https://$siloName.sys.$oxideDomainName
For redirect URIs, we use a wildcard variant such that any URI with the same root URL is considered valid by Keycloak. If you miss or misspell it, you’ll get an invalid redirect URI error at login time.
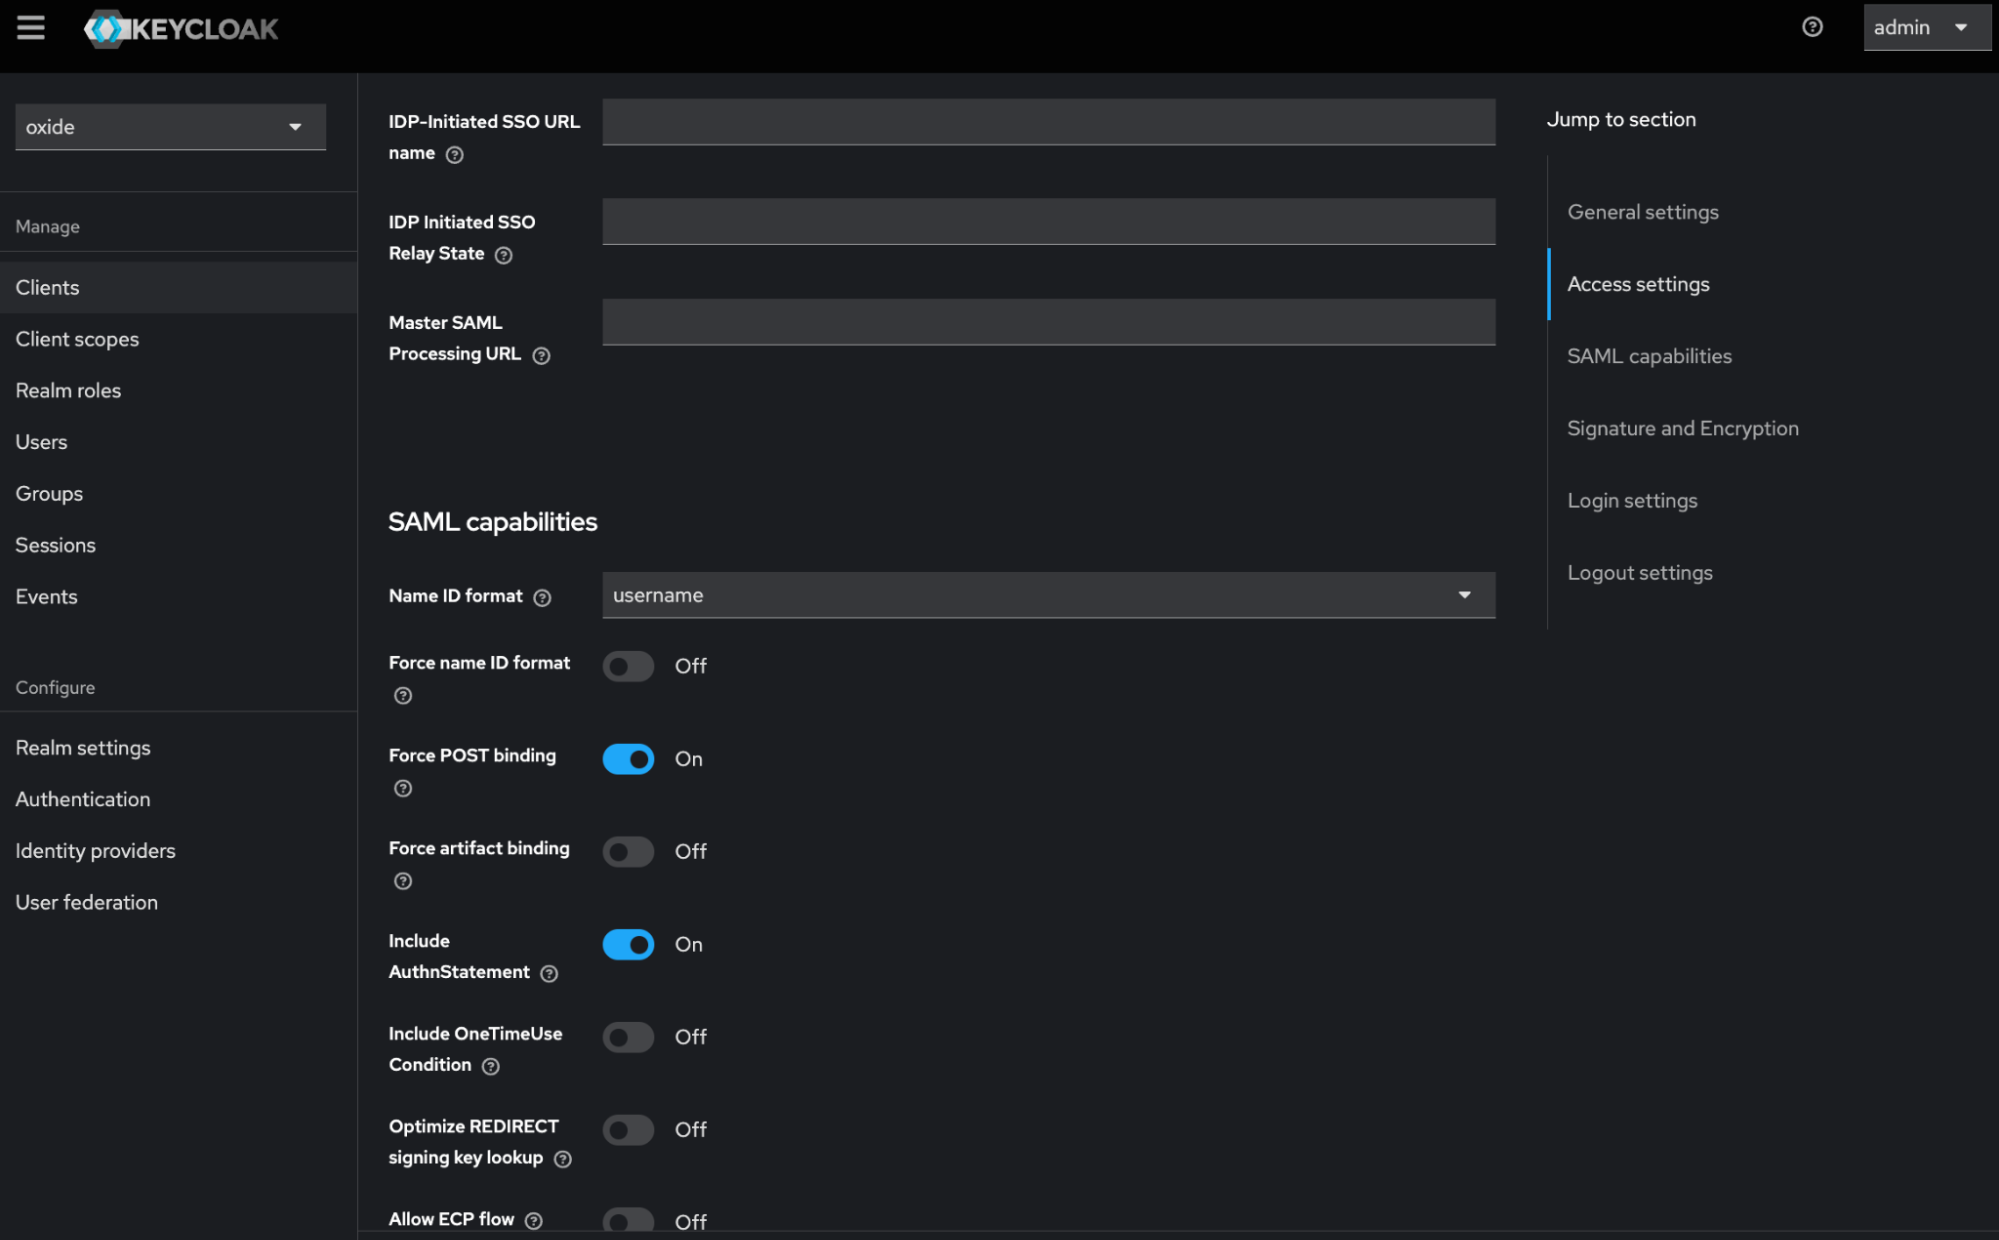
You can leave SAML capabilities settings to their default.
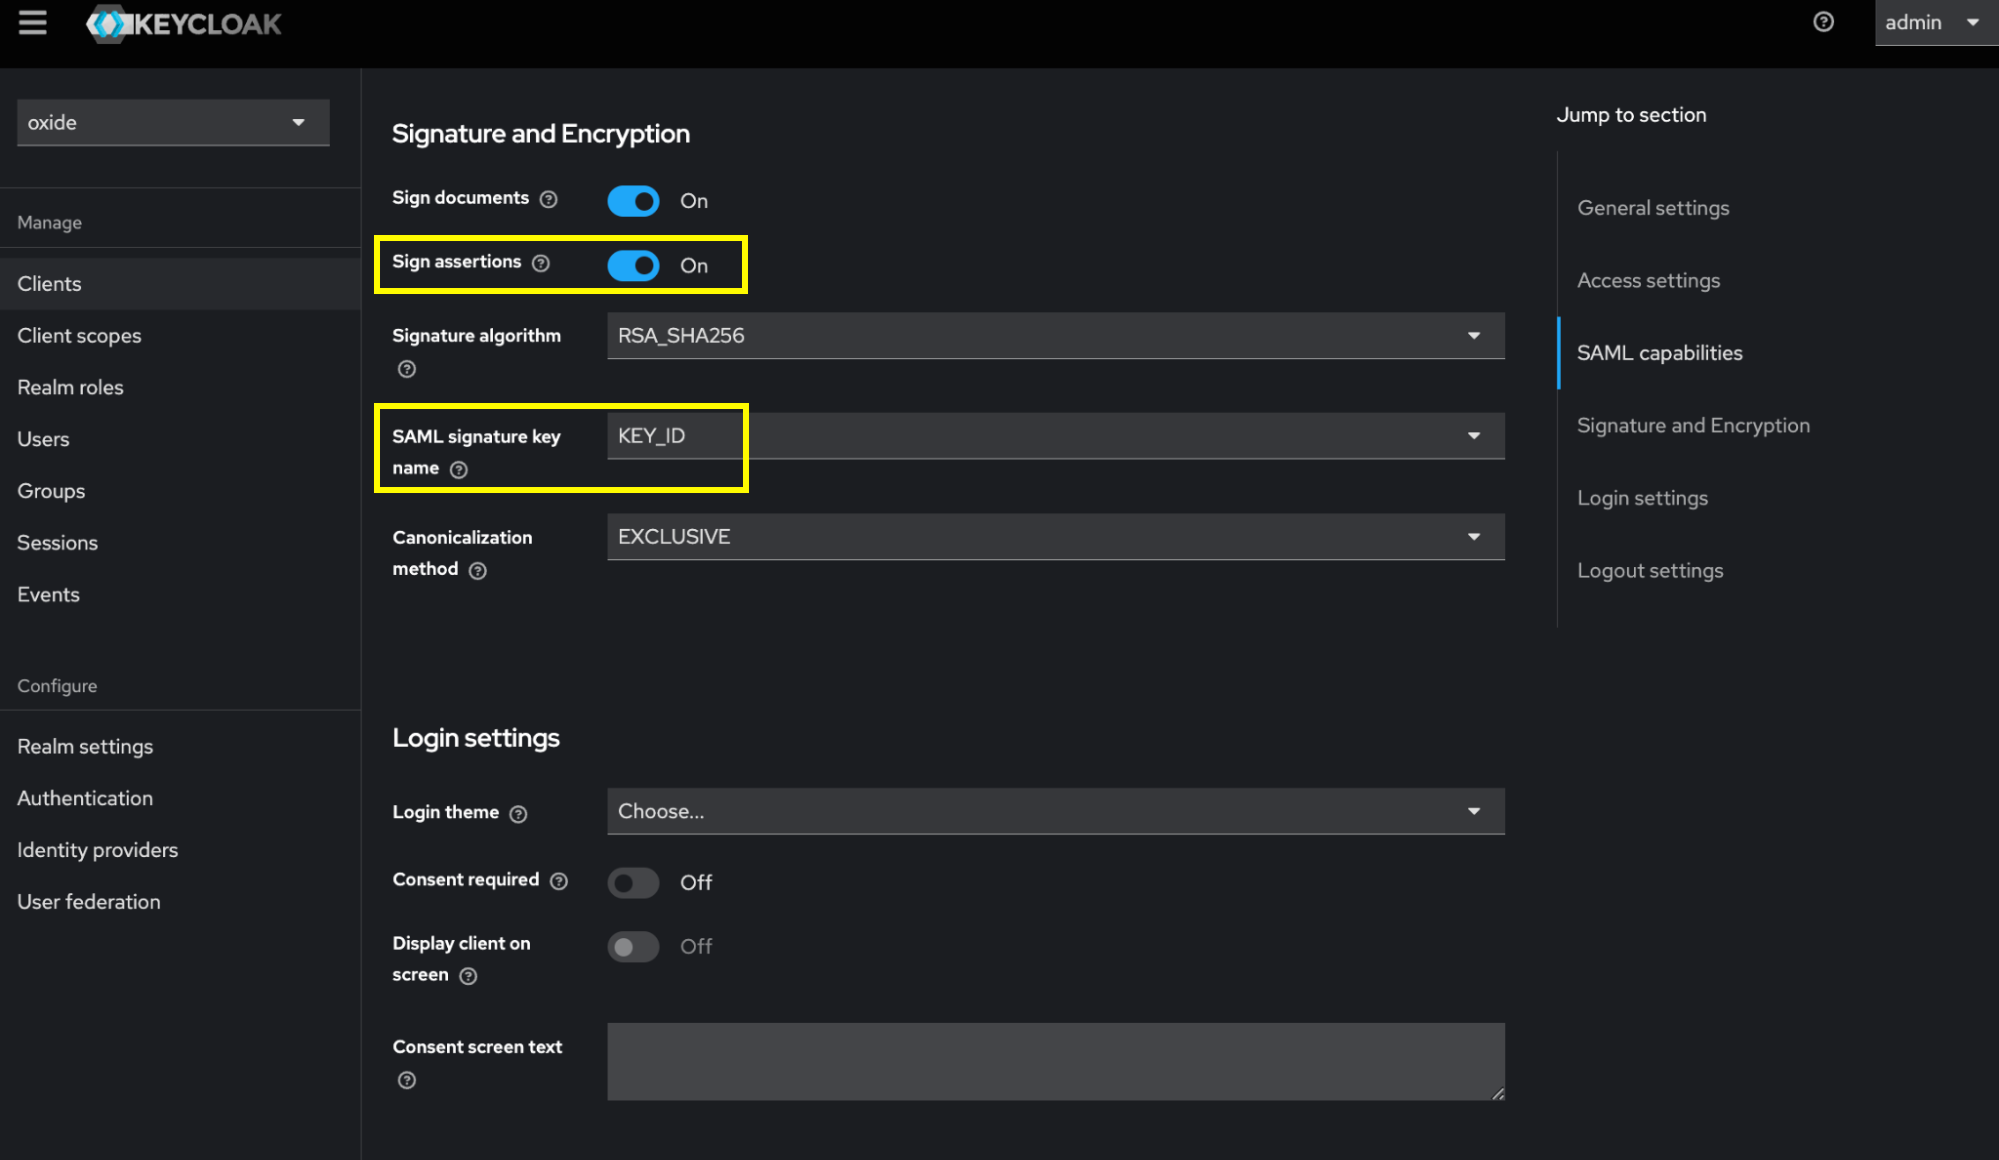
Under Signature and Encryption, enable Sign assertions for Oxide to validate SAML responses and choose KEY_ID as the SAML signature key name.
Keycloak automatically generates a keypair for your client (viewable on the Keys tab) but you can also import your own. If you use the system-generated keys for signing, you’ll need to export the certificate and key files. (We’ll have the instructions in a later step and explain how to prepare them for Oxide provider setup.)
Configure mappers and user attributes
So far, the setup above only serves to support authentication but we also need to know what the user is authorized to do. Mappers provide the vehicles for authorization information to be passed to Oxide in the form of group labels which translate into Oxide group memberships. This allows the authorization setup to be managed in the IdP. The Oxide-side setup simply replicates the IdP user attributes as groups.
In newer versions of Keycloak, the Mappers tab is not available by default. So the first step here is to add the mapper type User Attribute - a key/value pair set on a per user basis. You’ll find the Mappers tab by clicking the <client>-dedicated link on the Client scopes tab.
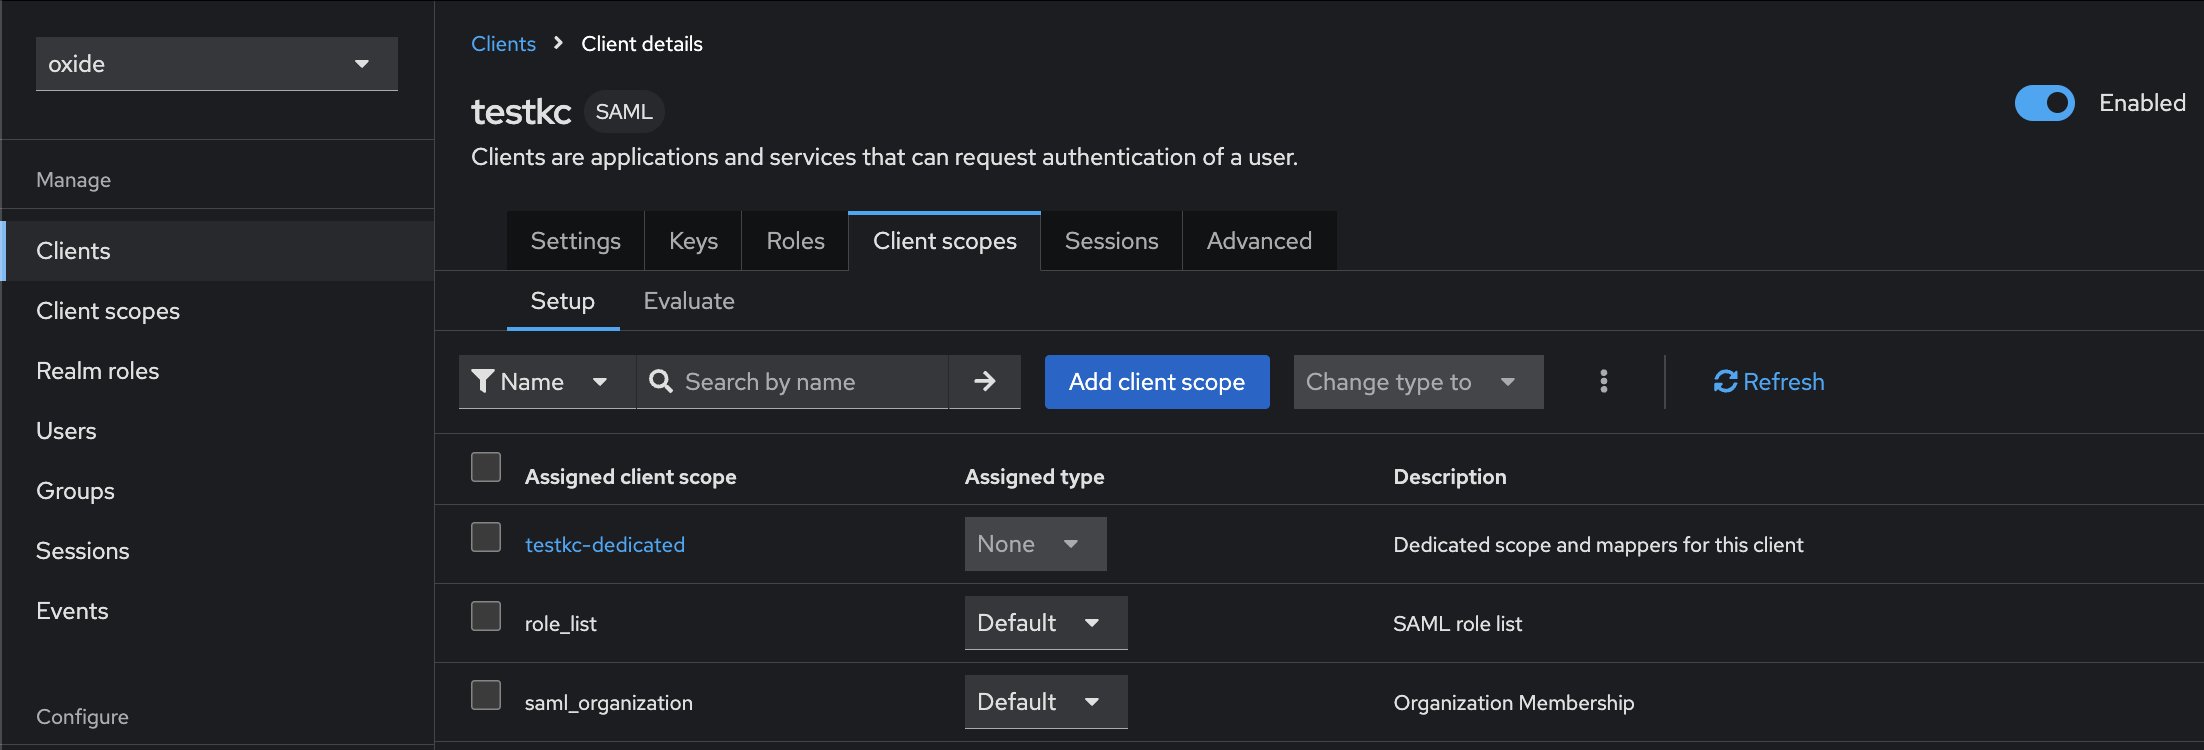

Next, select Configure a new mapper, then User Attribute.
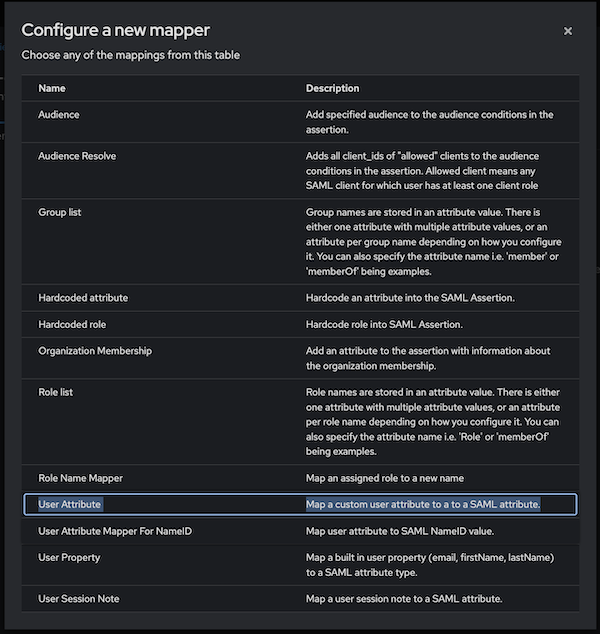
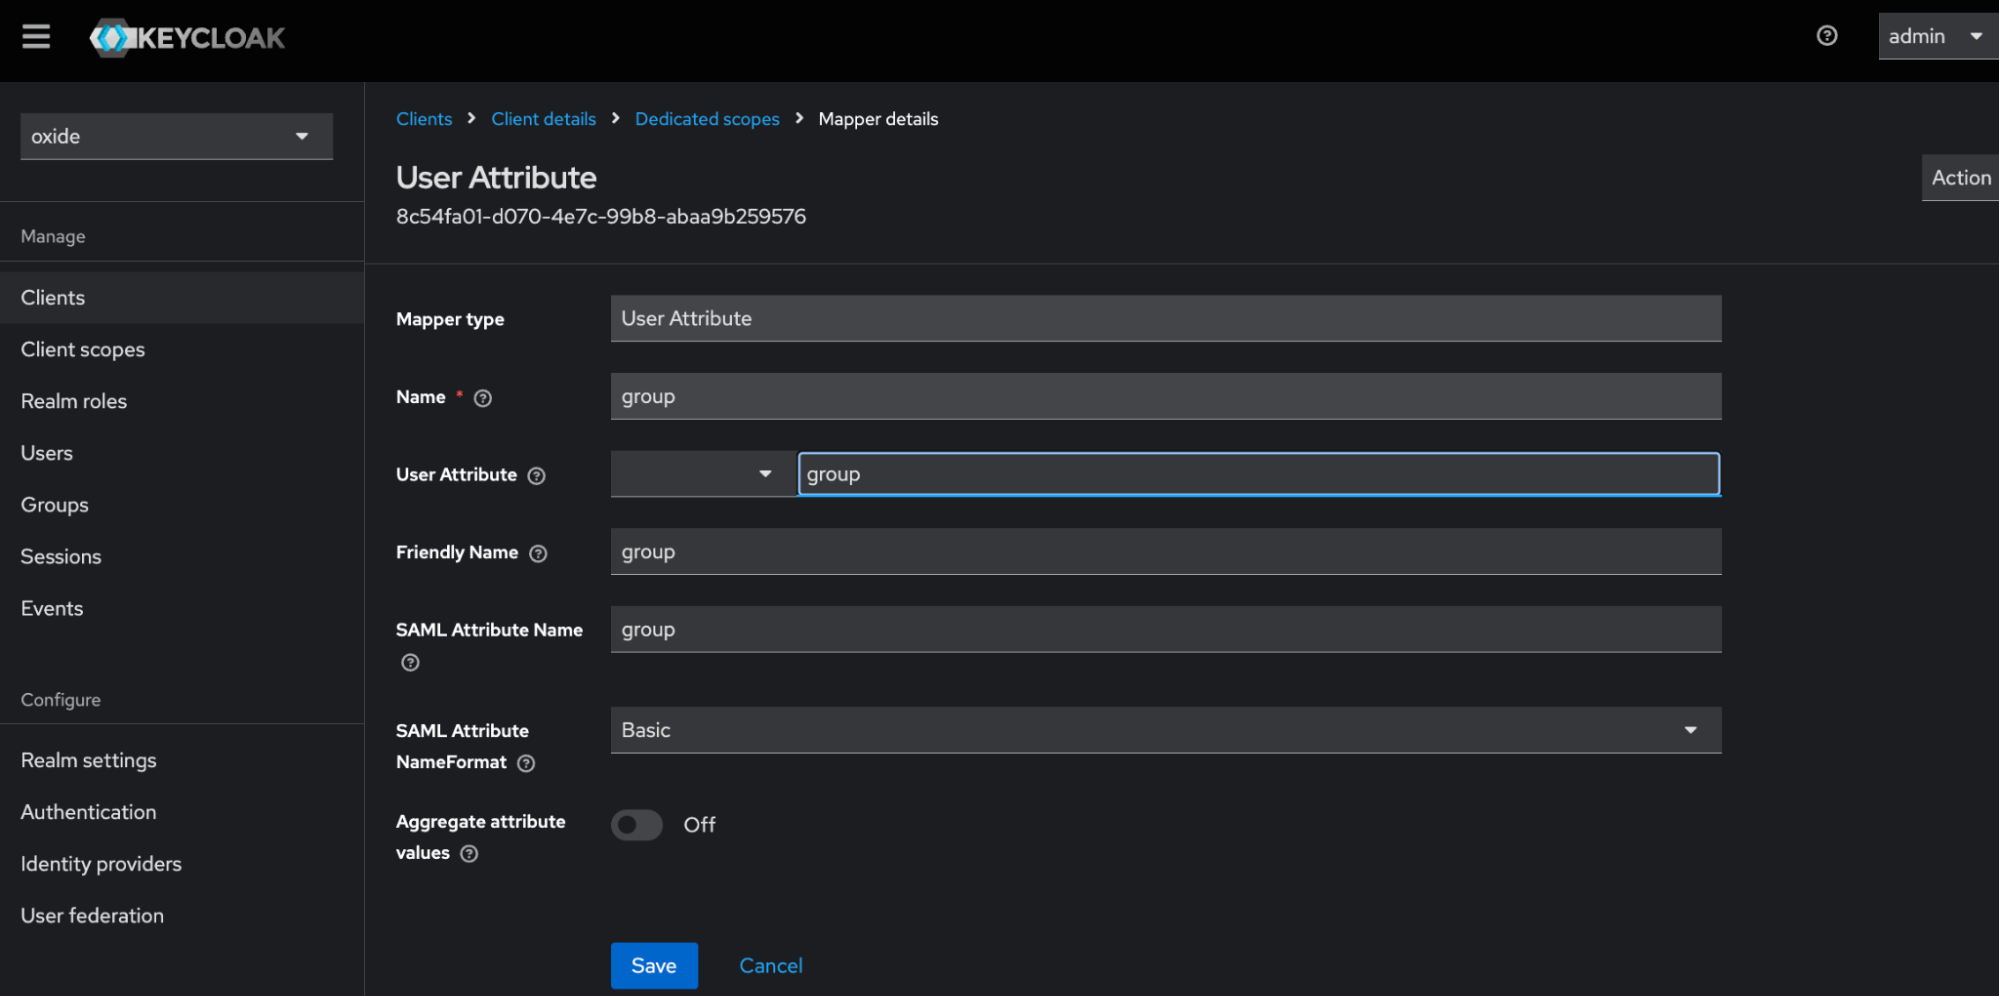
Here, we name the attribute key "group" but it can be named differently according to your organization’s policy or naming convention.
Create users
The final step in the Keycloak setup is to create some users, set their initial passwords, and configure their Oxide access.
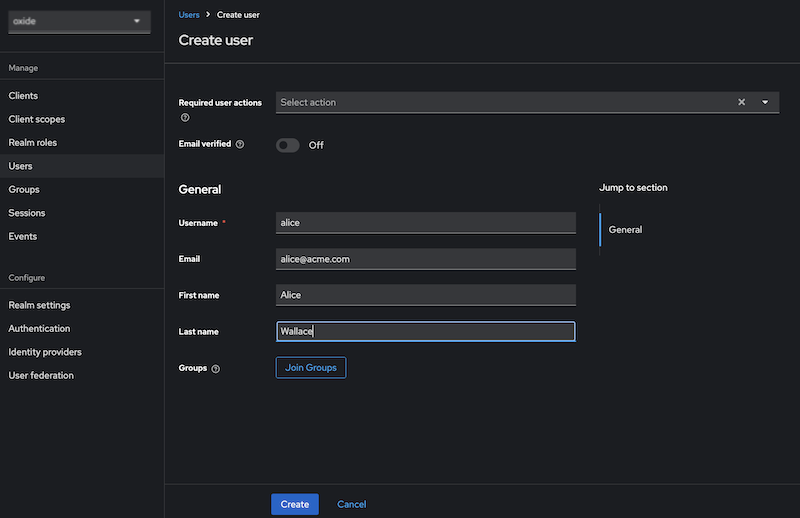
Every user should have a group attribute value set to indicate the user’s Oxide group memberships. The way you name the groups will depend on which of the built-in roles users will be granted in Oxide when they log in. In the example below, we’ll set up two types of access in the "testkc" silo - admin and user. The former group will be configured to have the silo admin role and manage all access policies within the silo. The latter group will have its access configured by an admin. In this case, alice will be placed in multiple Oxide groups which is represented as a comma-delimited list.

When alice has successfully logged in the Oxide Console, the admin and user groups will be created automatically with alice being a member in each of these groups. Since alice has the silo admin role, she can create new projects and assign the user group to certain projects they are allowed to use. The next time someone with user in their Keycloak attribute value logs in, the person can start accessing those projects right away.
In a multi-tenant environment, it is likely that you’ll have more fine-grained access control to different projects such as project1-user, project1-admin, project2-user, project2-admin, and so on. But no matter how many project groups are set, there has to be a silo admin group and at least one user assigned to that group such that the person can grant permissions to all other users. The value used to designate the admin group can be anything. Here, we use admin but it can be testkc-admin or anything meaningful to the user. When you create an Oxide silo in a later step, the system will ask for this admin group name.
Export client signing keys
On the client details Keys tab, click Export. Choose PKCS12 for the archive format and set the passwords to use when getting data out of the archive. You can name the key and certificate alias to the client and realm names respectively for easier reference but you are also free to name them differently.
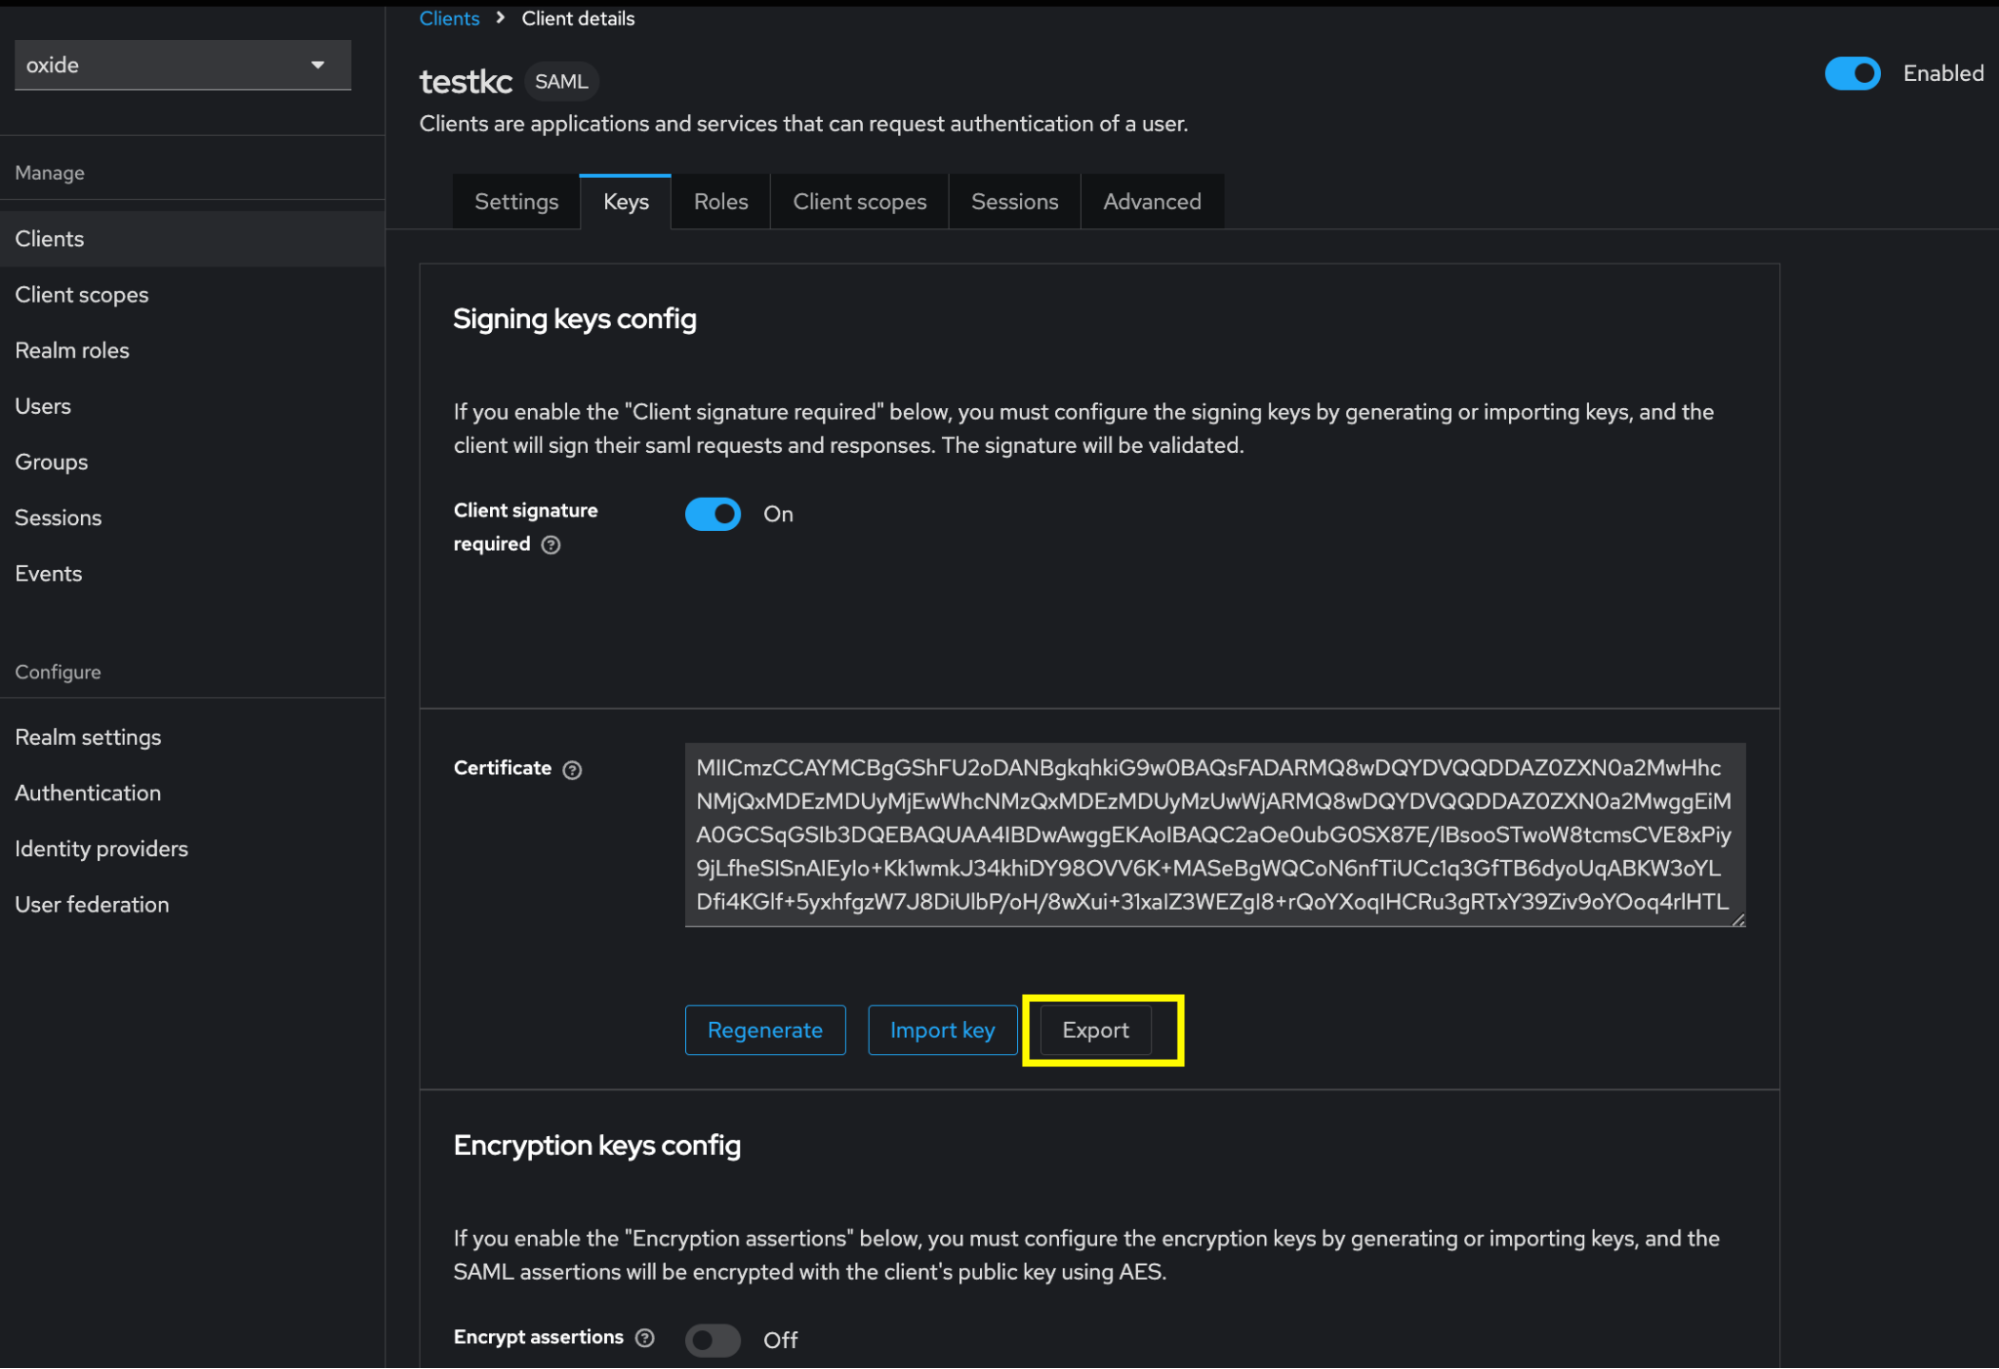
The file exported will be named keystore.p12. The IdP setup in Oxide requires the files to be in DER format so we’ll need to generate them from the exported file with a few extra steps.
Execute the following to extract the cert and key PEM files (you’ll be prompted for the archive password specified during export):
openssl pkcs12 -in keystore.p12 -out idp-cert.pem -clcerts -nokeys -legacy
openssl pkcs12 -in keystore.p12 -out idp-key.pem -nocerts -nodes -legacy
Convert them to DER format with the private key in RSA PKCS#1 format
# For API/CLI IdP setup
openssl x509 -in idp-cert.pem -outform der | base64  > idp-cert.base64
openssl rsa -in idp-key.pem -outform der -traditional | base64 > idp-key.base64
# For Console IdP setup openssl x509 -in idp-cert.pem -outform der -out idp-cert.der openssl rsa -in idp-key.pem -outform der -traditional -out idp-key.der
Create Oxide silo and identity provider
Now we are ready to create the new silo using Keycloak for authentication and authorization. Navigate to the System menu using the dropdown at the top right-hand corner of the web console (next to user name).
Create silo
First, select Silos and create a new silo.
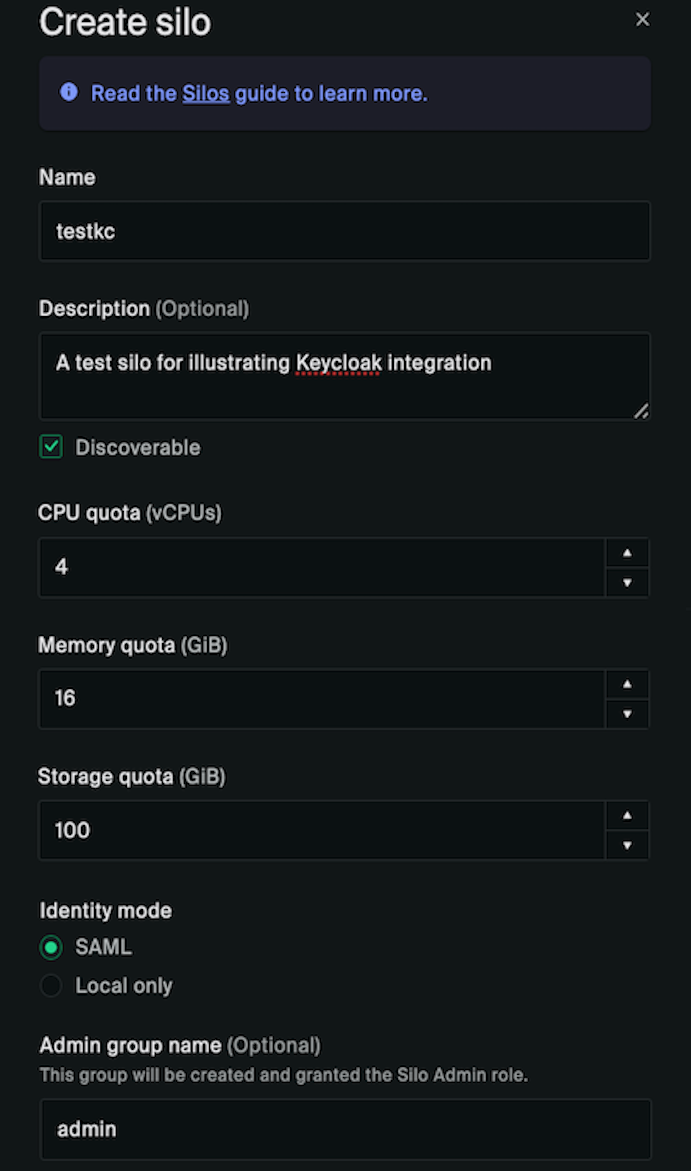
The silo name must match with what you used in the Keycloak client Root URL. The Admin group name is the one you will be setting or already set earlier in the group attribute of users who are granted the silo admin role. The silo admin user(s), once logged in and imported into Oxide, will have the necessary permissions to manage the roles of other users onboarded later on.
The Role mapping options provide silo admins and/or viewers the access to fleet-level system information. You’ll likely grant the additional access only to silos used by operators and power users. This will eliminate the need for anyone requiring fleet-level access to log in as the built-in recovery user.
Before clicking Create Silo, ensure you have added a TLS certificate with a matching common name.
Create identity provider
The provider setup requires a number of data input and certificate/key files which should all be available from Keycloak. The screen shots below illustrate the input that corresponds to the "testkc" Keycloak client settings:
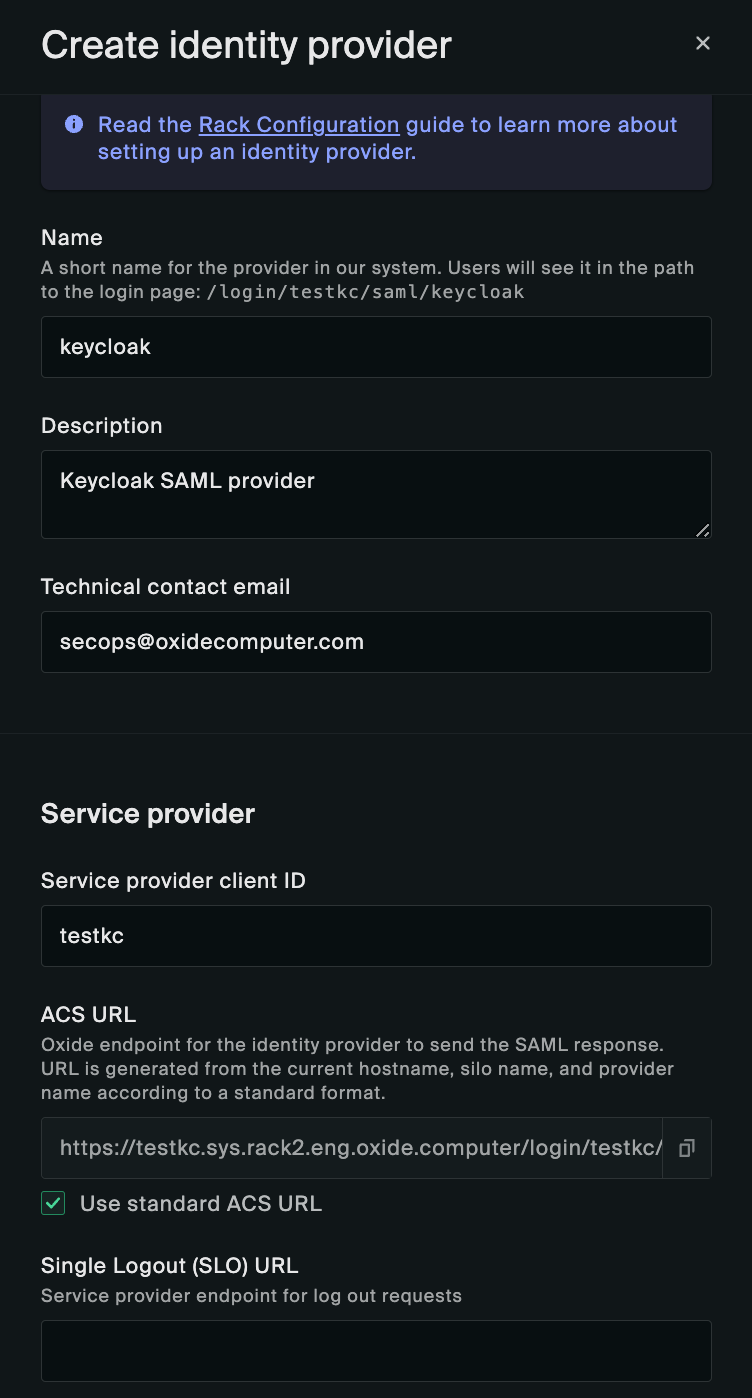
Here we use "keycloak" as the provider name to let users know which system they are authenticating with. It can be named differently according to your organization’s policy or naming convention.
The Service provider client ID should correspond to Client ID specified in the Keycloak client configuration.
The ACS URL is generated for you based on the silo and provider names following the naming convention:
https://$siloName.sys.$oxideDomainName/login/$siloName/saml/$providerName
Assuming that Oxide is running on the subdomain rack2.eng.oxide.computer, the URL rendered in the UI will be
https://testkc.sys.rack2.eng.oxide.computer/login/testkc/saml/keycloak
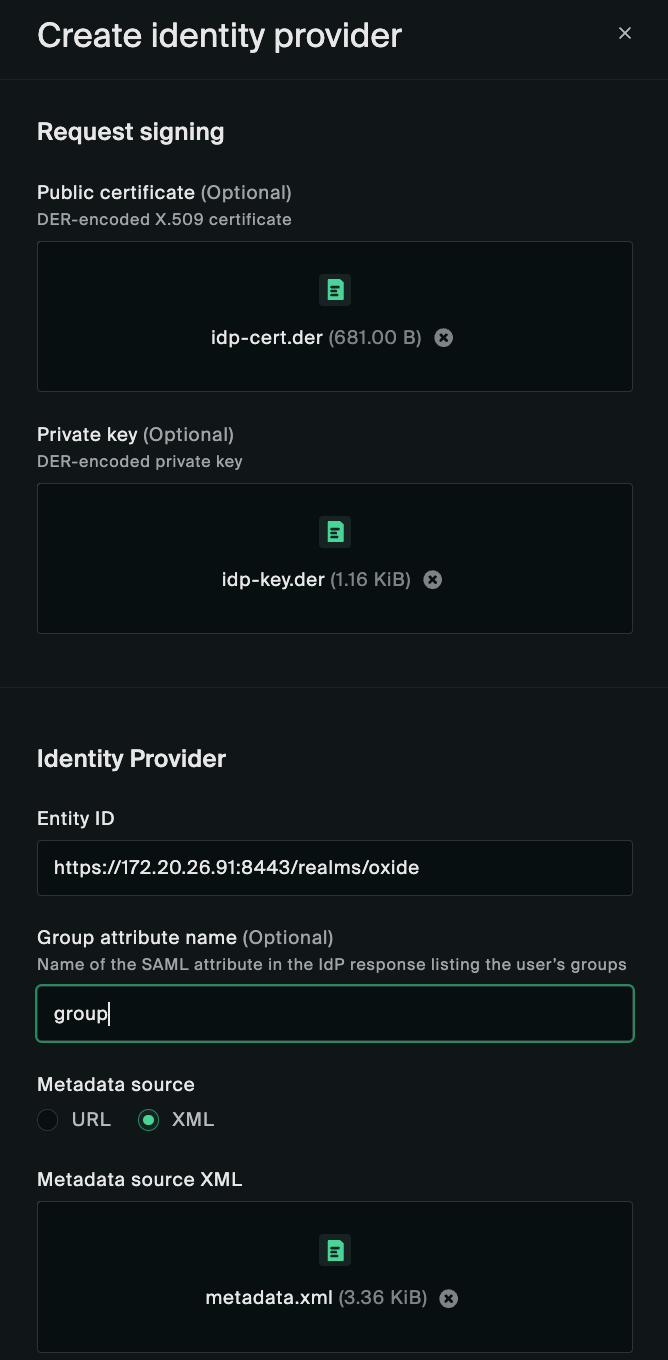
Here, you’ll also import the certificate/key DER files created above for request signing and assertion verification.
The Entity ID should be the one obtained from the Keycloak metadata XML earlier.
The Group attribute name should be set to the key field of Keycloak user attributes.
You may set the Metadata source to XML and import the metadata.xml file downloaded from Keycloak earlier, or choose the URL option and enter the URL if the rack upstream network has access to the Keycloak instance.
Log in as a Keycloak user
If everything is configured correctly, you should be able to log in as the users set up in Keycloak.
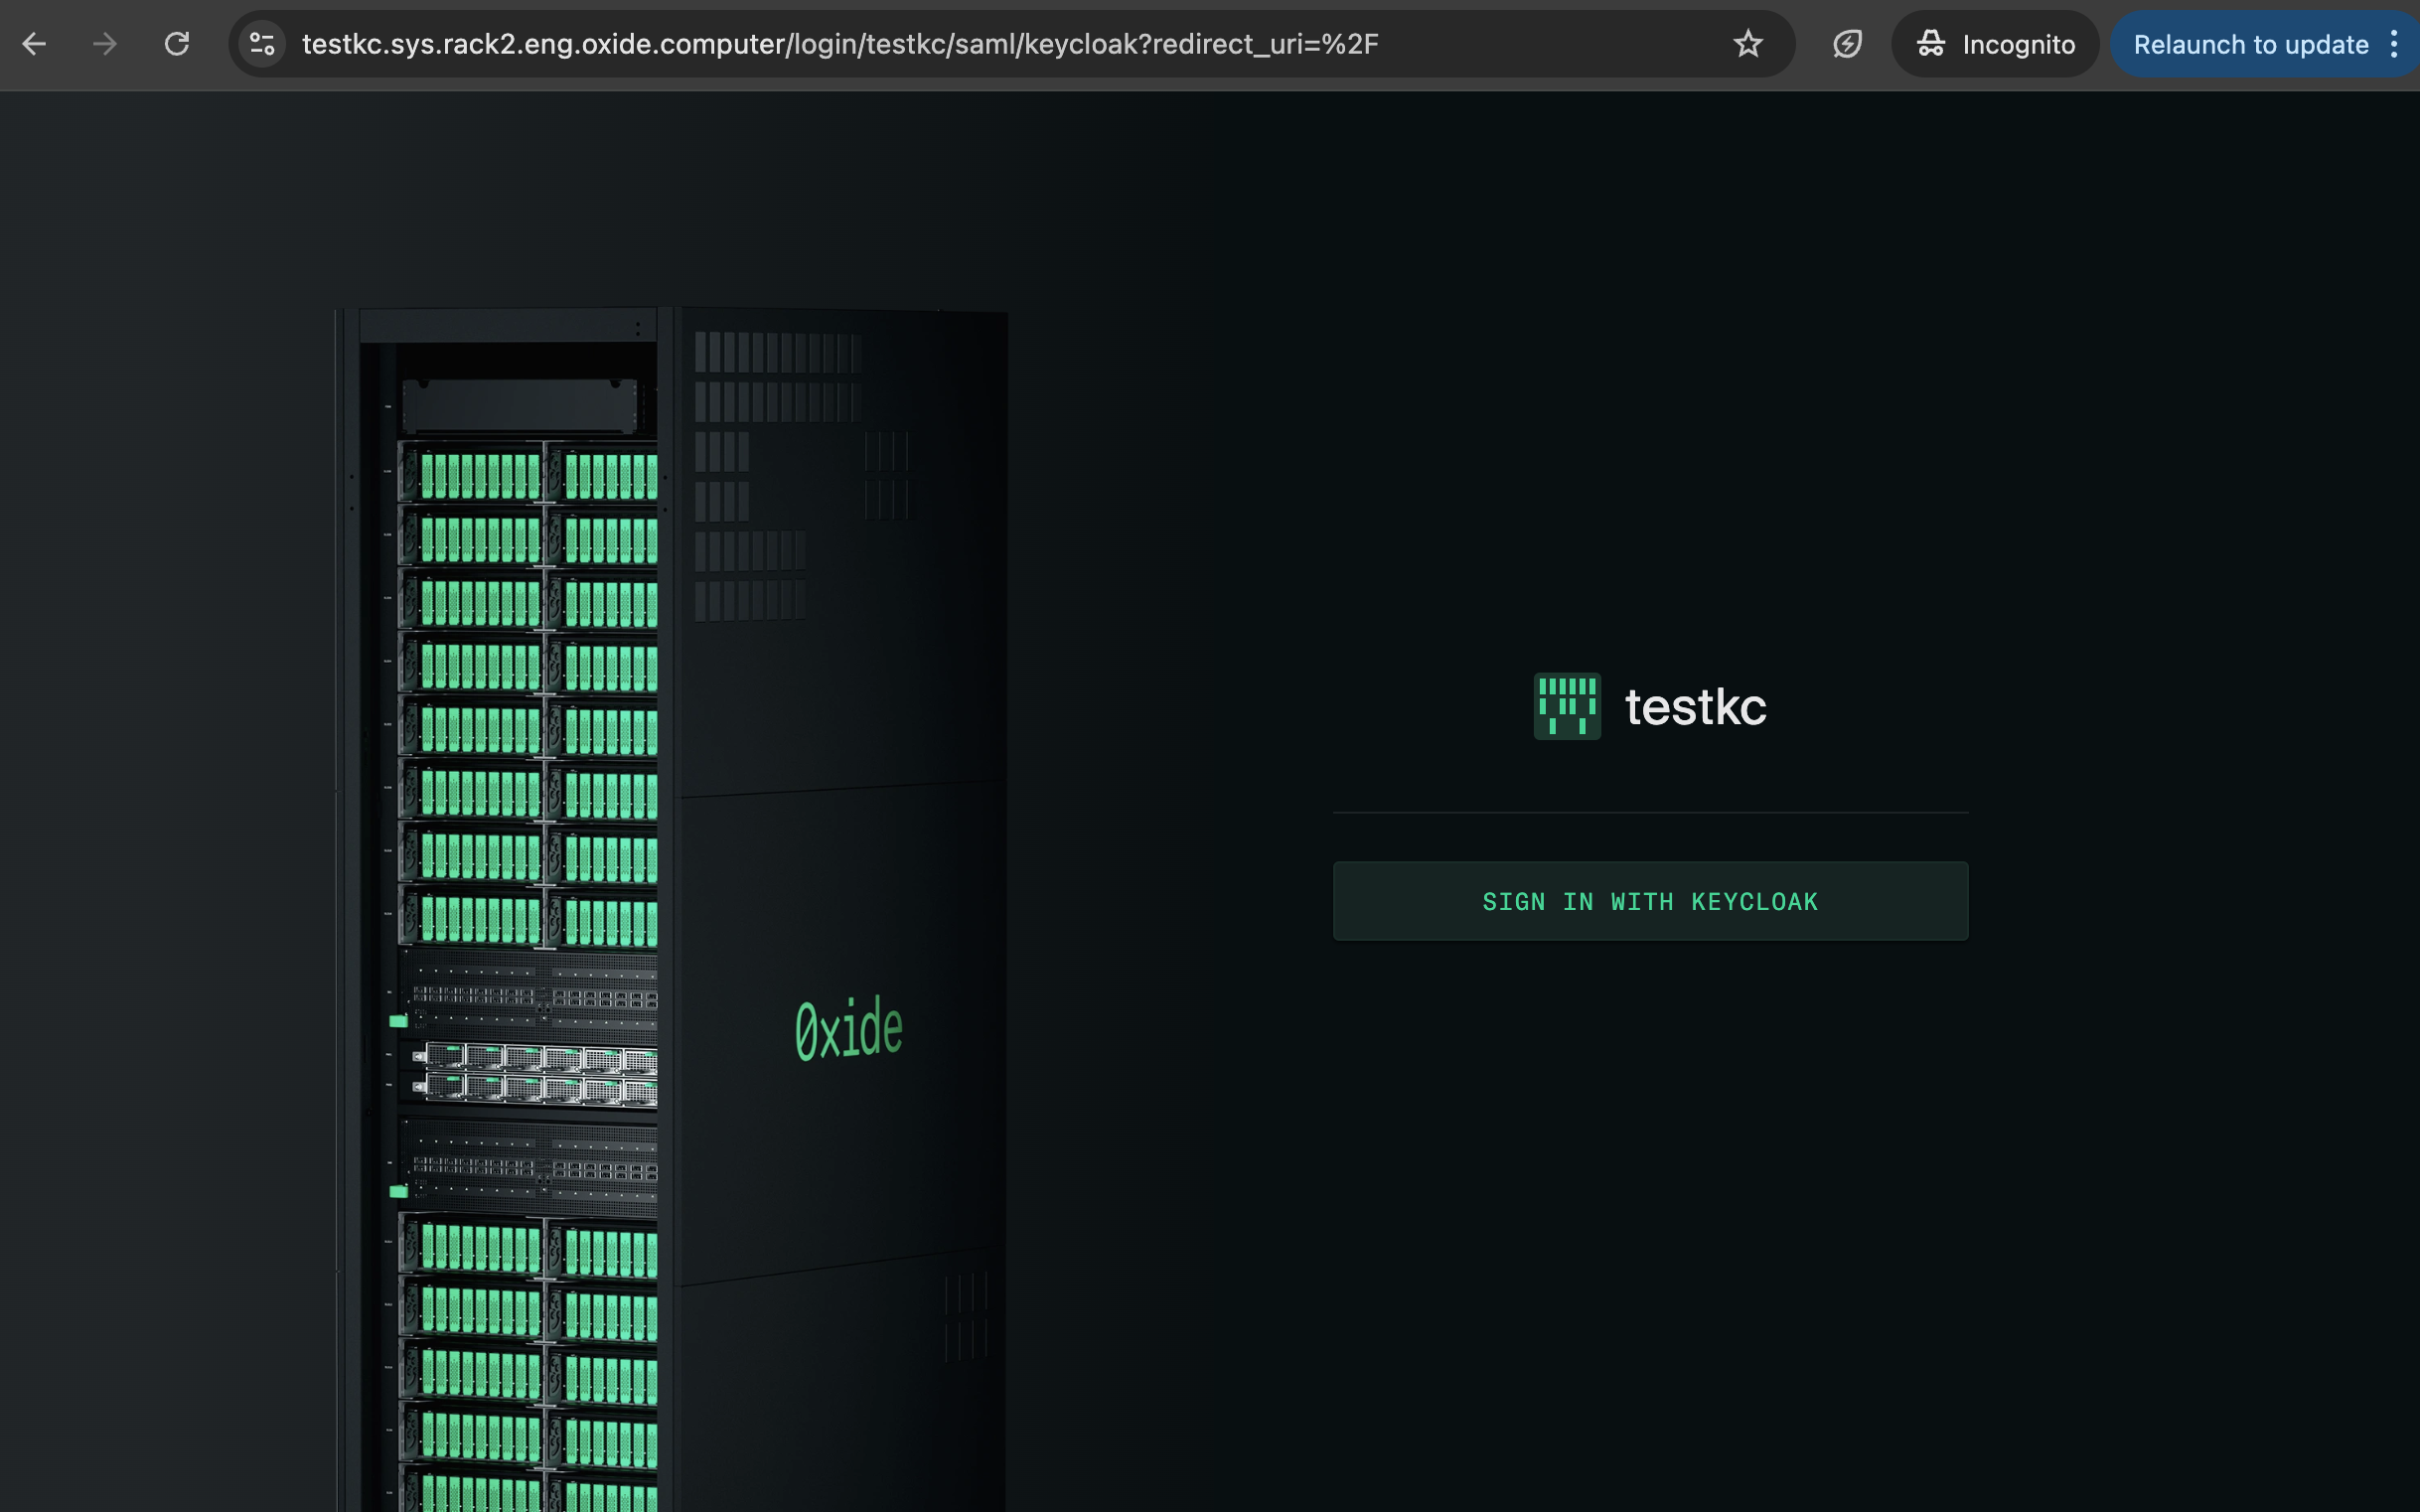
Clicking SIGN IN should redirect you to the Keycloak login page:
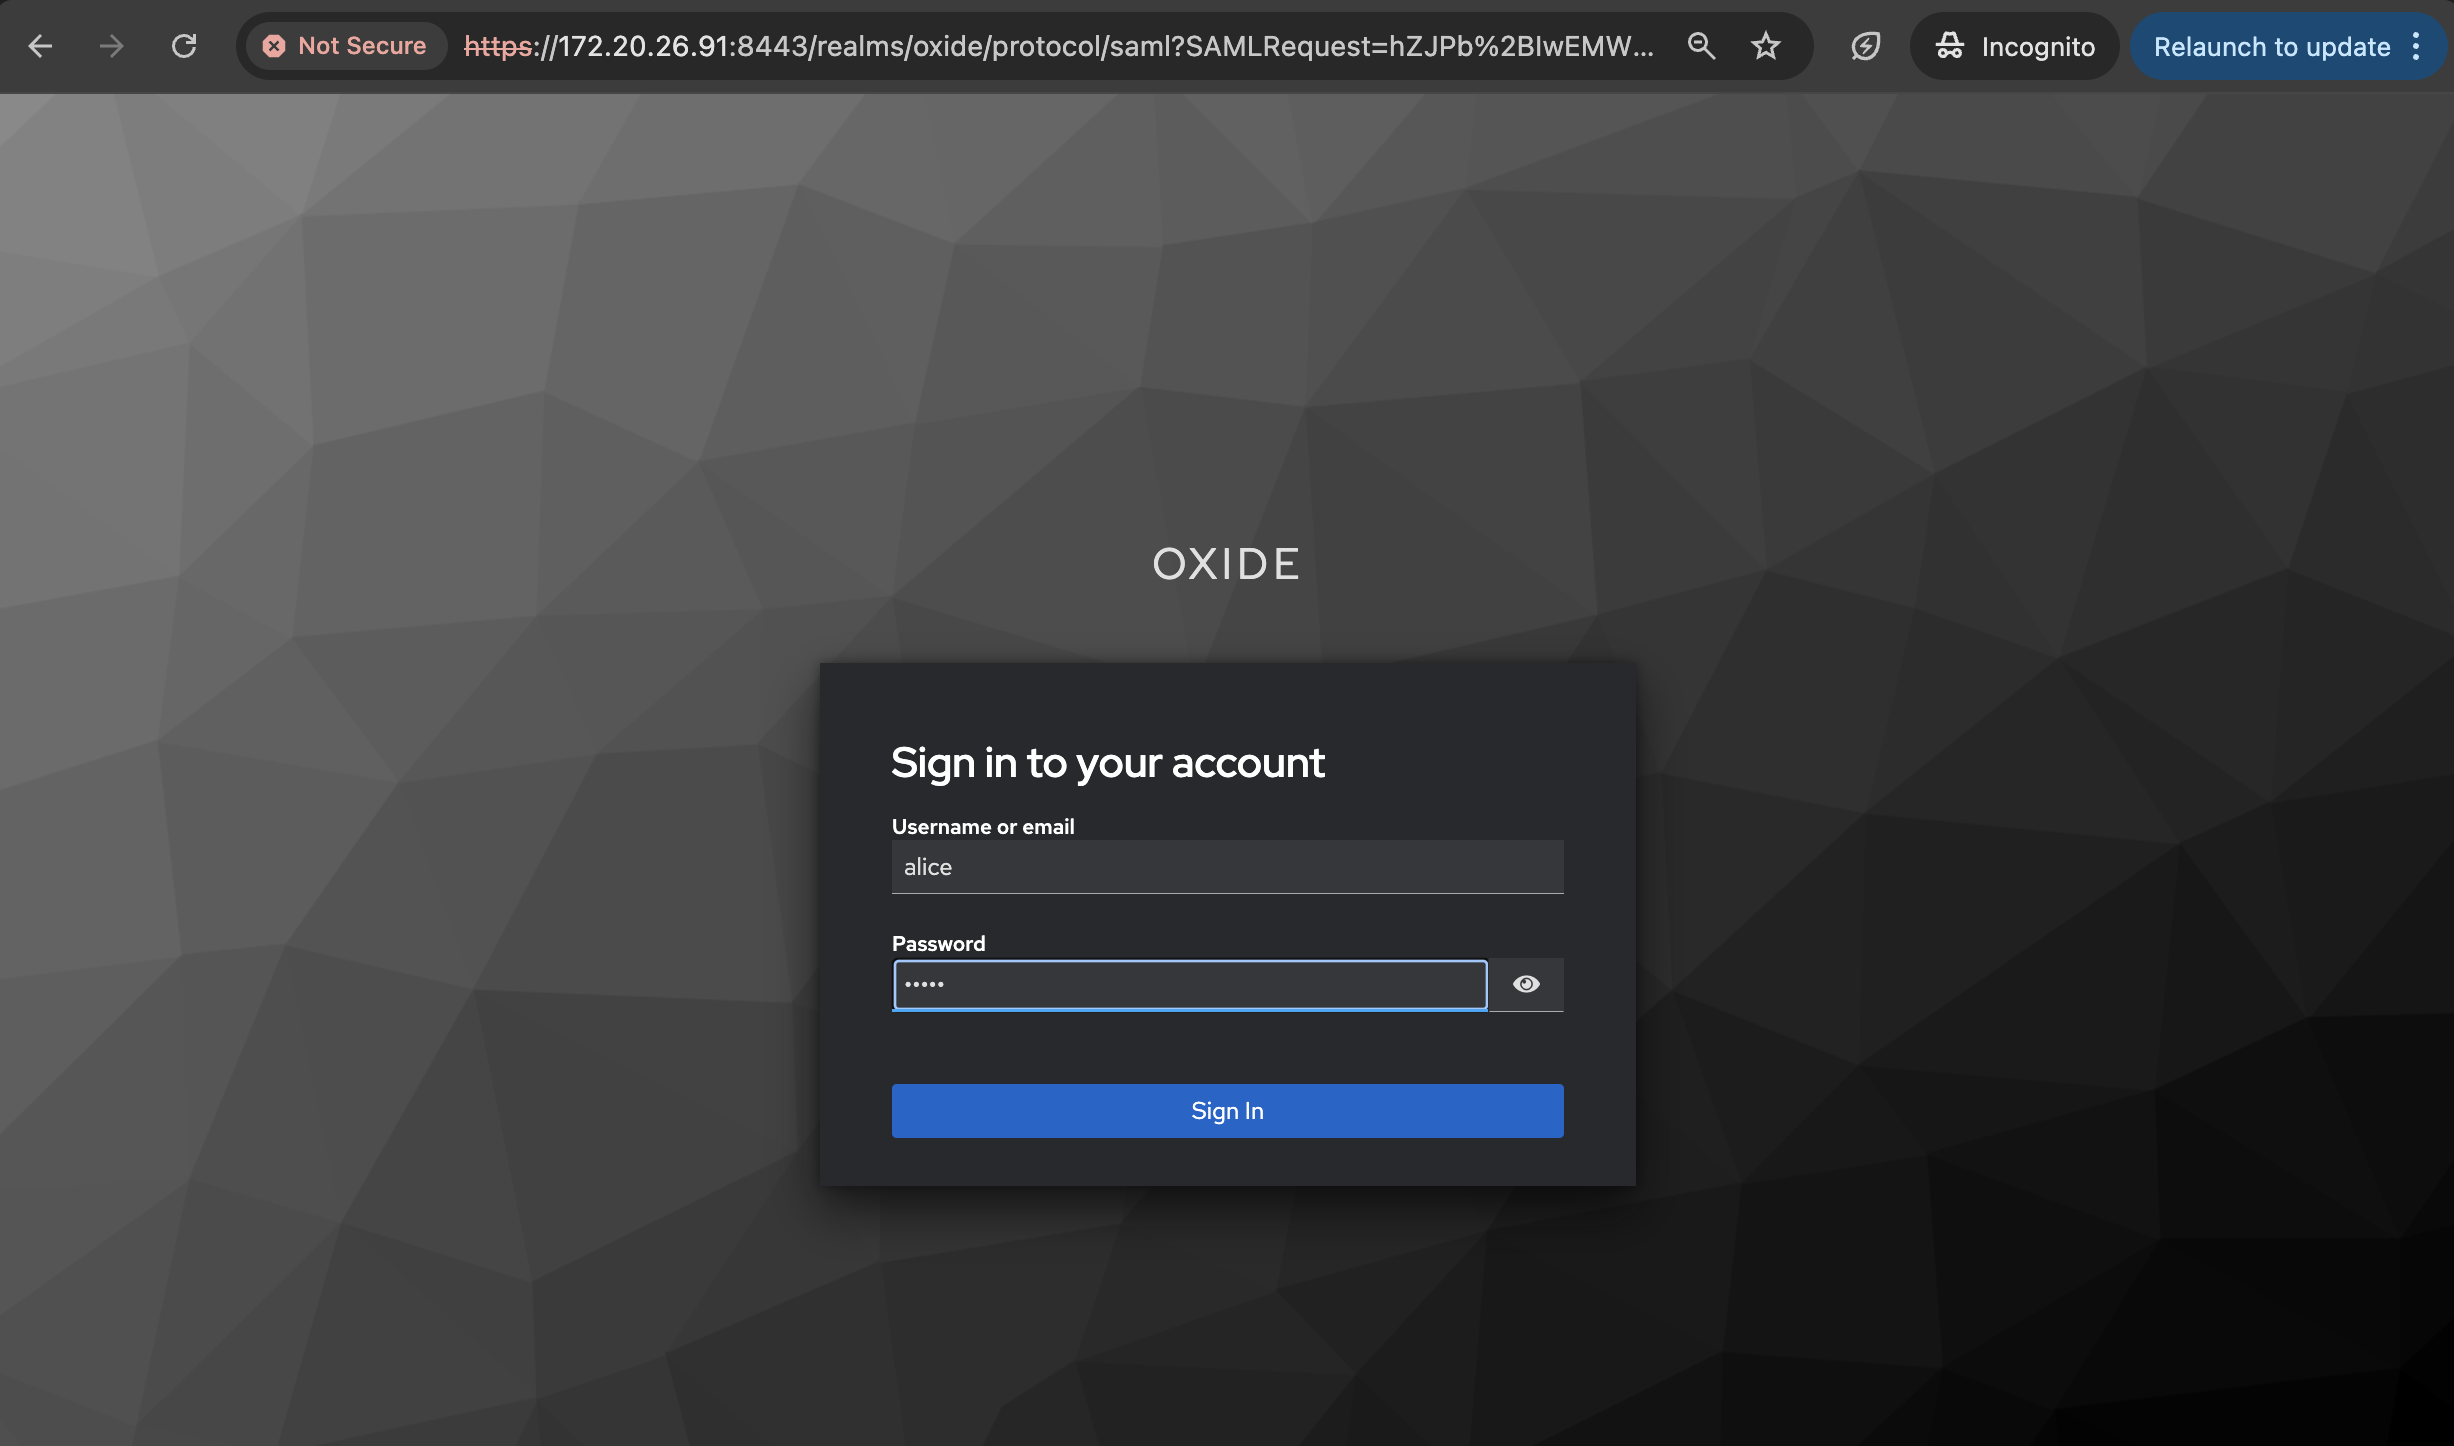
admin and user) matches with the Admin group name defined for the silo. You can also see which groups the user has been imported with by navigating to the profile page https://$ROOT_URL/settings/profile.User roles and groups
The group user attribute value is used to create silo groups and assign memberships. Users should see the same groups as the ones defined in Keycloak’s user attribute value in their Oxide profile.
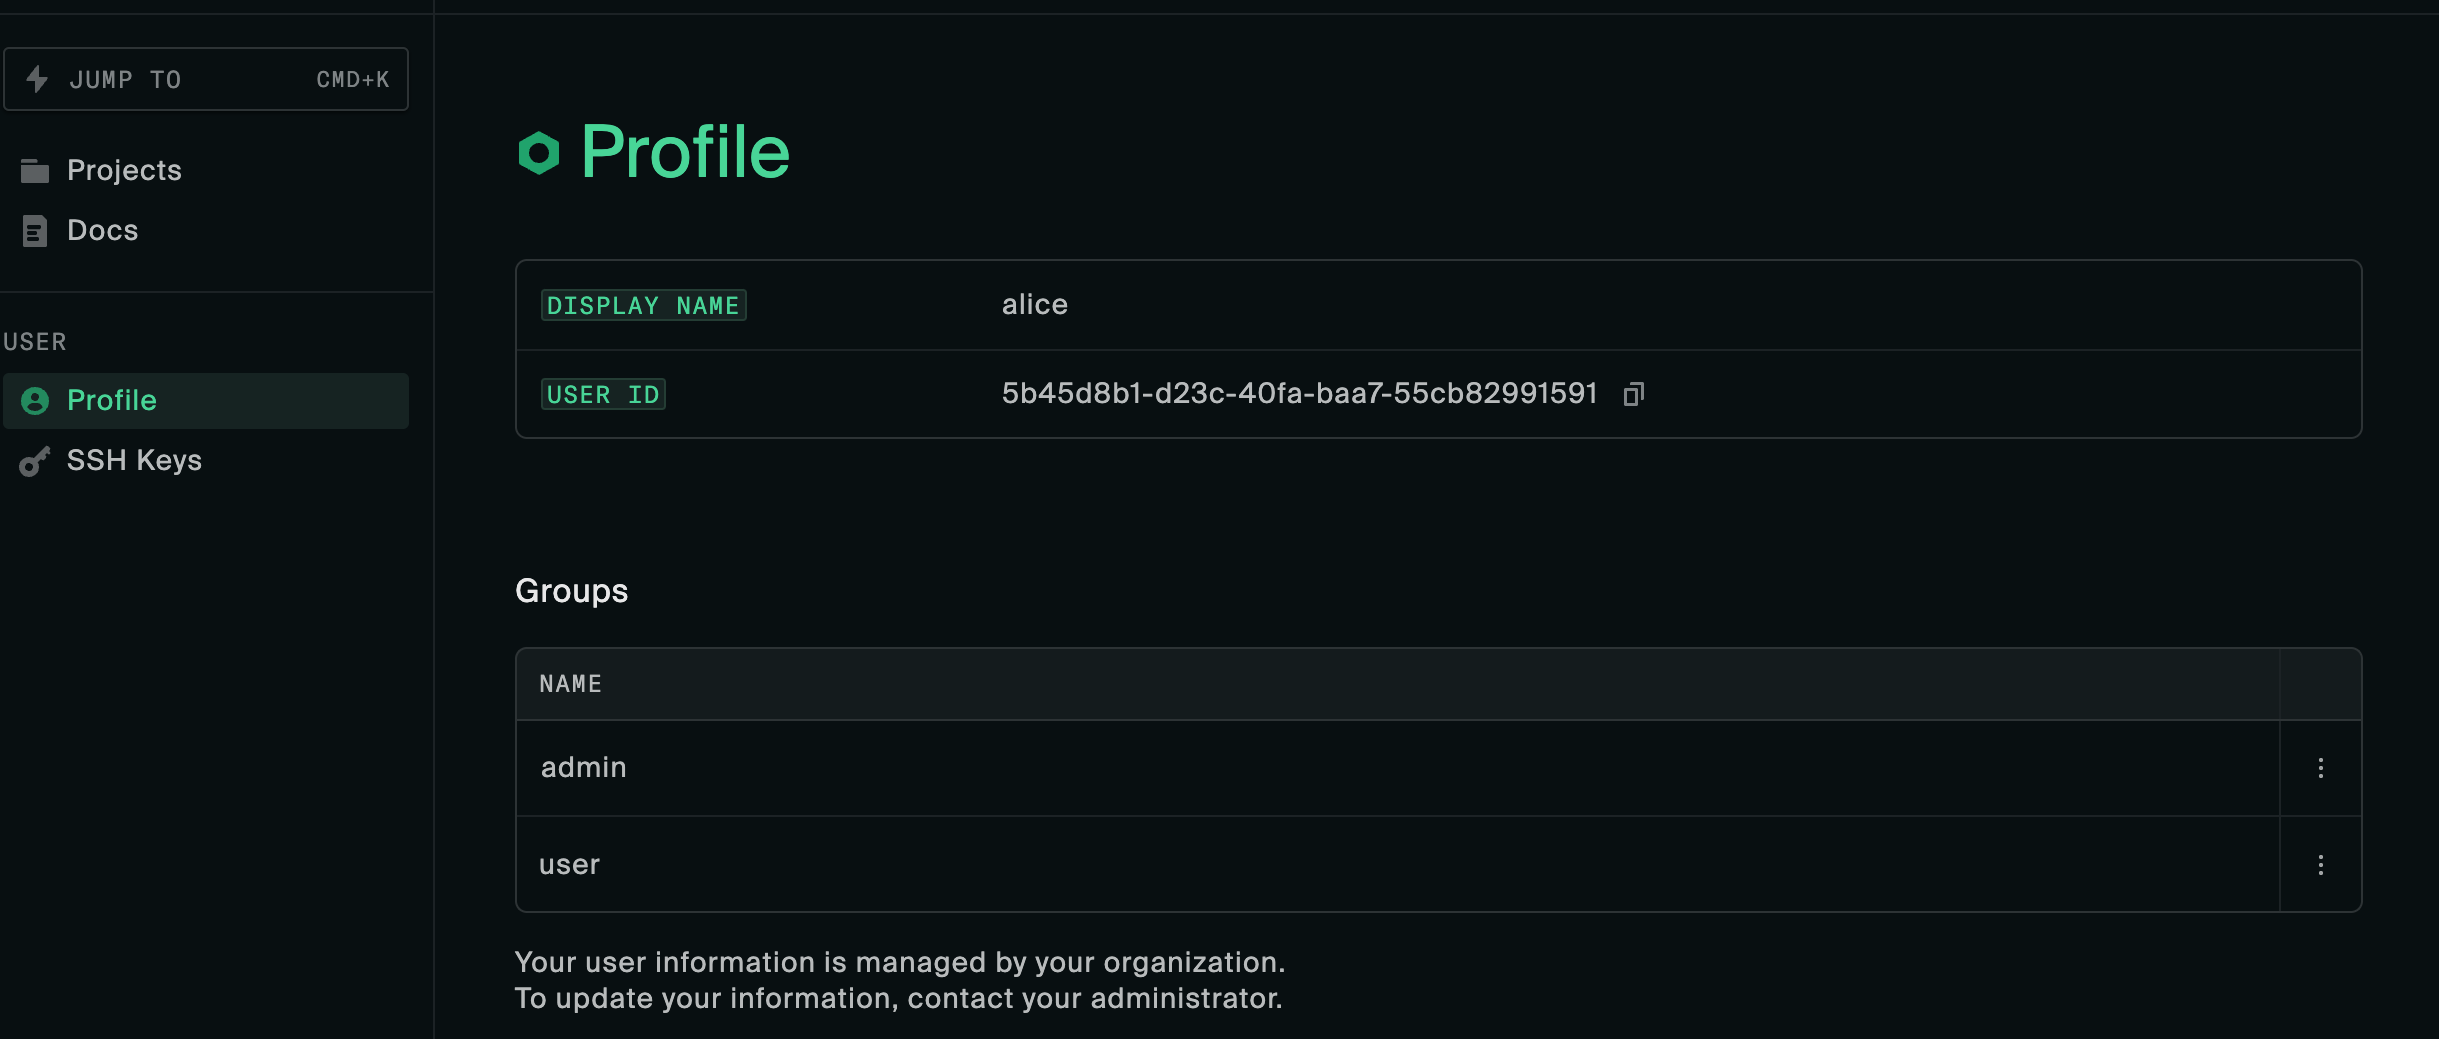
The group specified as the silo’s Admin group name should be reflected on the Access tab.
